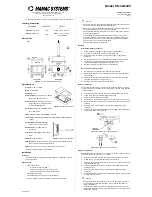
Specification:
Pressure Ranges: ULP*1 ± 1 "wc, 0-1 "wc, ± 0.5 "wc, 0-0.5 "wc,
± 250 Pa, 0-250 Pa, ± 125 Pa, 0-125 Pa
ULP*2 ± 0.25 "wc, 0-0.25 "wc, ± 0.125 "wc, 0-0.125 "wc,
± 60 Pa, 0-60 Pa, ± 30 Pa, 0-30 Pa
Accuracy . . . . . . . . . . . . . . . .± 1% FS of selected range
Stability . . . . . . . . . . . . . . . . .± 1% FS (1 year)
Thermal Effect . . . . . . . . . . .± 2% FS max , 10 - 40 ˚C (50 - 104 ˚F)
Response Time . . . . . . . . . .5 or 30 Seconds (switch selectable)
Proof Pressure . . . . . . . . . . .100 "wc (24.9 kPa) for ULP*1,
40 "wc (9.96 kPa) for ULP*2
Burst Pressure . . . . . . . . . . .200 "wc (49.8 kPa) for ULP*1,
80 "wc (19.9 kPa) for ULP*2
Operating Conditions . . . .0 - 60 ˚C (32 - 140 ˚F),
0 - 90 %RH non-condensing
Storage Temperature . . . .-40 - 95 ˚C (-40 - 203 ˚F)
Media Compatibility . . . . .Dry air or inert gas
Zero Adjust . . . . . . . . . . . . . .Pushbutton or digital input auto-zero
Power Supply . . . . . . . . . . . .24 Vac/dc ± 10%
Power Consumption . . . . .55 mA max with relay option
Output Signal . . . . . . . . . . . .4-20 mA (3-wire), 0-5 or 0-10 Vdc (3-wire),
field selectable
Output Drive . . . . . . . . . . . .750 Ω max (4-20 mA), 2 KΩ min (voltage)
Optional Display . . . . . . . . .3 ½ digit LCD, 0.45" digit height,
unit symbols and backlight
Optional Alarm Relay . . . .NO contact, 2 Amps @ 120 Vac or 30 Vdc
Alarm Trip Point . . . . . . . . . .Adjustable over the pressure range
(forward or reverse acting)
Alarm Delay . . . . . . . . . . . . .10 or 60 Seconds (switch selectable)
Wiring Connections . . . . . .Screw terminal block (14 to 22 AWG)
Pressure Connections . . . .Barbed ports for 1/8" to 3/16" ID tubing
Conduit Connection . . . . .Access hole for ½” NPT conduit or cable gland
Enclosure . . . . . . . . . . . . . . . .Grey ABS with gasket, UL94-5VB. IP65 (NEMA 4X)
145mmW x 101mmH x 63mmD (5.7" x 4.0" x 2.5")
Weight . . . . . . . . . . . . . . . . . .260 g (9.2 oz)
PRINTED IN C
ANAD
A
V. ULP 09/15
Dimensions:
Alarm Operation
During normal operation the device also compares the output pressure value to the alarm setpoint and takes appropriate
action. If the pressure value exceeds the setpoint then an alarm condition is set and the device will operate in alarm mode.
Alarm mode activation is controlled by certain device settings.
The setpoint can be set using the Alarm Setpoint control on the pcb. Moving the control clockwise changes the setpoint from
the minimum to the maximum pressure of the selected range, either 0-MAX or –MAX to +MAX, depending on the DIP switch
position. The LCD will show the setpoint briefly while it is being adjusted and will revert back to the normal display when
adjustment stops.
When the input pressure exceeds the setpoint for the delay time, then the relay contacts will close. When the input pressure
decreases below the setpoint for the delay time then the relay contacts will open again. The alarm on/off delay time can be
set to either LO Delay (10 seconds) or HI Delay (60 seconds) via a DIP switch. The operation described above is for the default
Normal Alarm. A DIP switch can be set to Reverse Alarm which will cause the alarm operation to reverse. In this case the alarm
condition will be set when the pressure falls below the setpoint, instead of above the setpoint.
Auto Zero Operation
A sensor auto zero can be initiated by pressing and holding the internal auto zero switch for at least 3 seconds. If both
pressure ports are close to zero pressure (open to ambient), then the device will calibrate with a new zero point. The auto zero
can also be initiated by holding the ZERO IN terminal low for 3 seconds.
Generally, it is not recommended that a span calibration be performed in the field unless a high quality calibrator with low
differential pressure ranges is available and the temperature of the sensor can be maintained. Contact the factory for informa-
tion on this type of calibration.
Normal Operation con’t
In the case of
±
1 "wc, 4 mA or 0 V = -1 "wc and 20 mA or 5 V or 10 V = +1 "wc. Since the transmitter is linear, 0 "wc would be 12
mA or 2.5 V or 5 V.
During normal operation the device reads the pressure sensor and calculates the pressure value depending on the device
model ranges and the selected pressure range. The pressure value is displayed on the LCD (if installed) and set as the value for
the analog output.
The output signal may be affected by the pressure averaging time setting. The pressure averaging setting controls how many
readings are averaged to form the output value. The pressure averaging value can be set to LO Avg for a 5 second average of
the output signal or to HI Avg for a 30 second average to form the output value. This value effectively filters the output to
prevent noise and false alarms.
114.3 mm
4.5 “
100 mm
3.95 “
Mounting Holes
(X4) Ø 0.200”
88.9 mm
3.5 “
145 mm
5.7 “
High Port
Low Port
1/8” Barbed for 3/16 ID tubing
63 mm
2.5 “
Greystone Energy Systems, Inc. 150 English Drive, Moncton, NB E1E 4G7 Canada Tel: +1-506-853-3057 Tollfree (North America): +1-800-561-5611 Fax: +1-506-853-6014
Email: [email protected] Web: www.greystoneenergy.com
Cop
yr
igh
t © Gr
ey
stone Ener
gy S
yst
ems I
nc
. A
ll R
igh
ts R
eser
ved


