2.9 Inspection of parking brake
Gremo 1250F/1450F Workshop manual
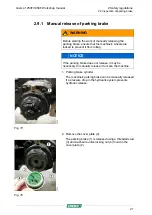
3. Screw the threaded stud (3) all the way in through the
hole in the brake cylinder and tighten until it stops.
Fig. 17
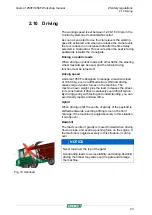
4. Fit the washer and counter-locking nut (4) and tighten
the nut to release the spring force in the brake cylinder.
Fig. 18
5. Repeat for all four brake cylinders to release the
parking brake.
Reset the parking brakes by loosening and removing the
counter-locking nuts, washers and threaded studs again,
and put them back in the cover plate.
22
Summary of Contents for 1250F
Page 2: ......
Page 4: ......
Page 68: ...64...
Page 76: ...72...
Page 82: ...78...
Page 102: ...98...
Page 108: ...104...
Page 110: ...106...
Page 112: ...108...
Page 114: ...110...
Page 116: ...112...
Page 118: ...114...
Page 120: ...116...
Page 122: ...118...
Page 124: ...120...
Page 126: ...122...
Page 128: ...124...
Page 130: ...126...
Page 132: ...128...
Page 134: ...130...
Page 136: ...132...
Page 138: ...134...
Page 140: ...136...
Page 142: ...138...
Page 144: ...140...
Page 146: ...142...
Page 148: ...144...
Page 150: ...146...
Page 152: ...148...
Page 154: ...150...
Page 156: ...152...
Page 158: ...154...
Page 160: ...156...
Page 162: ...158...
Page 164: ...160...
Page 166: ...162...
Page 168: ...164...
Page 170: ...166...
Page 172: ...168...
Page 173: ...Gremo 1250F 1450F Workshop manual 10 Wiring diagram 10 1 Power supply Fig 106 Active bogie 169...
Page 174: ...170...
Page 175: ...Gremo 1250F 1450F Workshop manual 10 Wiring diagram 10 1 Power supply Fig 107 Active bogie 171...
Page 176: ...172...
Page 178: ...174...
Page 180: ...176...
Page 182: ...178...
Page 184: ...180...
Page 186: ...182...
Page 188: ...184...
Page 190: ...186...
Page 192: ...188...
Page 194: ...190...
Page 196: ...192...
Page 198: ...194...
Page 200: ...196...
Page 202: ...198...
Page 204: ...200...
Page 206: ...2019 last page...


