background image

1

DESCRIPTION

1.1

PURPOSE

The machine is intended for hammer drilling in concrete,
bricks and masonry, as well as for light chiselling work. It is
also suitable for drilling without impact in wood, metal,
ceramics and plastic, as well as for screwdriving.

1.2

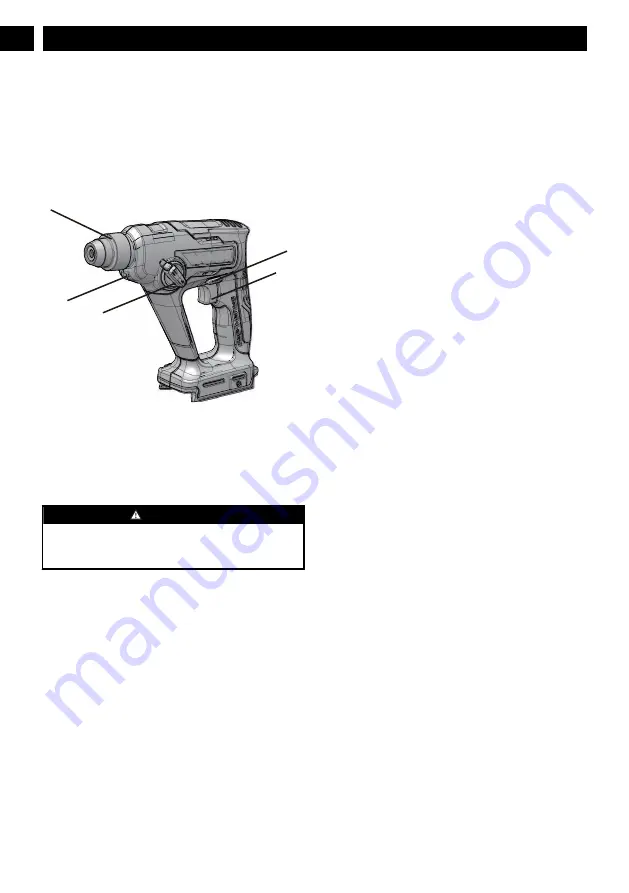
OVERVIEW

2

5

3

4

1

1

SDS Chuck

2

Mode Selector

3

Forward / Reverse

4

Trigger

5

LED Light

2

GENERAL POWER TOOL

SAFETY WARNINGS


WARNING

Read all safety warnings and all instructions. Failure to
follow the warnings and instructions may result in electric
shock, fire and/or serious injury.

Save all warnings and instructions for future reference.

The term "power tool" in the warnings refers to your mains-
operated (corded) power tool or battery-operated (cordless)
power tool.

2.1

WORK AREA SAFETY

Keep work area clean and well lit.


Cluttered or dark

areas invite accidents.

Do not operate power tools in explosive atmospheres,
such as in the presence of flammable liquids, gases or
dust.


Power tools create sparks which may ignite the dust

or fumes.

Keep children and bystanders away while operating a
power tool.


Distractions can cause you to lose control.

The machine is not intended for use by persons
(including children) with reduced physical, sensory or
mental capabilities, or lack of experience and

knowledge, unless they have been given supervision or
instruction concerning use of the machine by a person
responsible for their safety. Children should be
supervised to ensure that they do not play with the
machine.

2.2

ELECTRICAL SAFETY

Power tool plugs must match the outlet. Never modify
the plug in any way. Do not use any adapter plugs
with earthed (grounded) power tools.
 Unmodified plugs
and matching outlets will reduce risk of electric shock.

Avoid body contact with earthed or grounded
surfaces, such as pipes, radiators, ranges and
refrigerators.
 There is an increased risk of electric shock
if your body is earthed or grounded.

Do not expose power tools to rain or wet conditions.
Water entering a power tool will increase the risk of
electric shock.

Do not abuse the cord. Never use the cord for
carrying, pulling or unplugging the power tool. Keep
cord away from heat, oil, sharp edges and moving
parts.
 Damaged or entangled cords increase the risk of
electric shock.

When operating a power tool outdoors, use an
extension cord suitable for outdoor use.
 Use of a cord
suitable for outdoor use reduces the risk of electric shock.

If operating a power tool in a damp location is
unavoidable, use a RESIDUAL CURRENT DEVICE
(RCD) protected supply.
 Use of an RCD reduces the risk
of electric shock.

2.3

PERSONAL SAFETY

Stay alert, watch what you are doing and use common
sense when operating a power tool. Do not use a
power tool while you are tired or under the influence
of drugs, alcohol or medication.


A lapse of attention

while operating power tools may result in serious
personal injury.

Use personal protection. Always wear eye protection.
Protective products such as dust mask, non-skid safety
shoes, hard hat or hearing protection used appropriately
will reduce personal injuries.

Prevent unintentional starting. Ensure the switch is in
the off position before connecting to power source
and/or battery pack and when picking up or carrying
the tool.
 Carrying power tools with your finger on the
switch or energizing power tools that have the switch on
invites accidents.

Remove any adjusting key or wrench before turning
the power tool on.
 A wrench or a key left attached to a
rotating part of the power tool may result in personal
injury.

Do not over-reach. Keep proper footing and balance
at all times.
 This enables better control of the power tool
in unexpected situations.

Dress properly. Do not wear loose clothing or
jewellery. Keep your hair, clothing and gloves away

4

English

EN

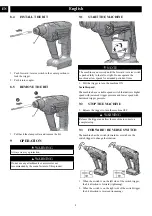
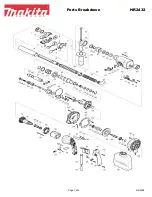
Summary of Contents for HMG405

Page 1: ...HMG405 EN OPERATOR MANUAL FR MANUEL D OP RATEUR SDS ROTARY HAMMER MARTEAU PERFORATEUR SDS ES MANUAL DEL OPERADOR MARTILLO GIRATORIO SDS www greenworkstools com www shopgreenworksgear com Rev B...

Page 2: ......
Page 3: ...nstruction 5 5 Proposition 65 6 6 Symbols on the product 6 7 Risk levels 7 8 Installation 7 8 1 Unpack the machine 7 8 2 Install the battery pack 7 8 3 Remove the battery pack 7 8 4 Install the bit 8...

Page 4: ...radiators ranges and refrigerators There is an increased risk of electric shock if your body is earthed or grounded Do not expose power tools to rain or wet conditions Water entering a power tool wil...

Page 5: ...keys nails screws or other small metal objects that can make a connection from one terminal to another Shorting the battery terminals together may cause burns or fire Under abusive conditions liquid m...

Page 6: ...asure prevents the battery against dangerous overload Charge the battery pack only with the recommended charger The batttery has some power Fully charge the battery when you use it for the first time...

Page 7: ...ts do not operate the machine If parts are damaged or missing contact the service center 1 Open the package 2 Read the documentation provided in the box 3 Remove all the unassembled parts from the box...

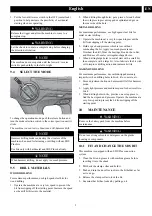
Page 8: ...extended periods of time 1 Pull the trigger to turn the machine ON Variable speed The machine has a variable speed switch that delivers higher speed with increased trigger pressure and lower speed wi...

Page 9: ...bits for metal or steel drilling 1 Operate the machine at a very low speed to prevent the bit from slipping off the starting point 2 Hold a speed and pressure which let cut without overheating the bit...

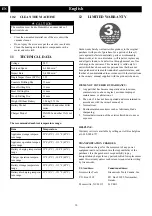
Page 10: ...rs against defects in materials parts or workmanship Greenworks at its own discretion will repair or replace any and all parts found to be defective through normal use free of charge to the customer T...

Page 11: ...s de s curit et d utilisation suppl mentaires 14 5 Proposition 65 15 6 Symboles figurant sur la machine 15 7 Niveaux de risques 15 8 Installation 15 8 1 D baller la machine 15 8 2 Installer le bloc ba...

Page 12: ...ler les enfants pour s assurer qu ils ne jouent pas avec la machine 2 2 S CURIT LECTRIQUE Les prises de l outil lectrique doivent tre compatibles avec la prise de courant Ne modifiez jamais la prise d...

Page 13: ...is s hors de port e des enfants et ne laissez pas des personnes qui ne se sont pas familiaris es avec l outil lectrique ou ces instructions l utiliser Les outils lectriques sont dangereux entre les ma...

Page 14: ...oussi re emp che en grande partie la p n tration de poussi re de per age dans le porte outil pendant son utilisation Lors de l insertion de l outil veillez ce que le capuchon de protection contre la p...

Page 15: ...cet outil Veuillez les tudier et apprendre leur signification Une bonne interpr tation de ces symboles vous permettra de mieux utiliser l outil et de mani re plus s curitaire Symbole Explication V Vol...

Page 16: ...ou de retirer le bloc batterie Lisez comprenez et suivez les instructions du manuel du bloc batterie et du chargeur 1 Alignez les languettes du bloc batterie avec les rainures du compartiment de batt...

Page 17: ...rupteur de la g chette marche arr t la direction de la m che est vers l arri re desserrage 3 Placez l interrupteur avant arri re dans la position OFF verrou central pour r duire les risques de d marra...

Page 18: ...e pour viter que la m che ne glisse du point de d part 10 ENTRETIEN AVERTISSEMENT Retirez le bloc batterie de la machine avant l entretien AVERTISSEMENT N utilisez pas de solvants ou de d tergents pui...

Page 19: ...e en raison d une mauvaise utilisation d une utilisation commerciale d un abus d une n gligence d un accident d un entretien inappropri ou d une modification ou 2 L appareil s il n a pas t utilis et o...

Page 20: ...cional e instrucciones de trabajo 23 5 Propuesta 65 24 6 S mbolos en el producto 24 7 Niveles de riesgo 24 8 Instalaci n 24 8 1 Desembalaje de la m quina 24 8 2 Instalaci n de la bater a 25 8 3 Retira...

Page 21: ...cciones sobre el uso del aparato por parte de una persona responsable de su seguridad Los ni os deben estar bajo vigilancia para asegurarse de que no juegan con el aparato 2 2 SEGURIDAD EL CTRICA Los...

Page 22: ...el ctrica se arranque accidentalmente Almacene las herramientas el ctricas inactivas fuera del alcance de los ni os y no permita que personas que no est n familiarizadas con la herramienta el ctrica...

Page 23: ...una tapa de protecci n antipolvo da ada La tapa de protecci n antipolvo evita en gran medida la penetraci n del polvo de perforaci n en el portabrocas durante el funcionamiento Al insertar la herrami...

Page 24: ...rramienta mejor y de manera m s segura S mbolo Explicaci n V Tensi n Corriente continua Lea todas las advertencias de seguri dad y todas las instrucciones Lleve protecci n ocular Lleve protecci n audi...

Page 25: ...elevaci n de la bater a con las ranuras del compartimento de la bater a 2 Introduzca la bater a en el compartimento de la bater a hasta que encaje en su posici n 3 Cuando escuche un clic la bater a es...

Page 26: ...el gatillo interruptor la direcci n de la punta se invierte afloje 3 Sit e el interruptor de avance retroceso en la posici n de apagado bloqueo central para ayudar a disminuir la posibilidad de una pu...

Page 27: ...y baja para evitar que la broca se deslice del punto de inicio 10 MANTENIMIENTO AVISO Retire la bater a de la m quina antes de realizar tareas de mantenimiento AVISO No utilice disolventes o detergent...

Page 28: ...lquier pieza que no funcione debido a mal uso uso comercial abuso negligencia accidente mantenimiento inadecuado o alteraci n o 2 La unidad si no ha sido utilizada o mantenida de acuerdo con el manual...

Reviews: