


Model No.
Description
PRODUCT
C
ONCEPT AND MAIN APPLICATIONS
S
pecification
S
tandard equipment
Note: The standard equipment for the tool shown may differ from country to country.
P 1 /13
Dimensions: mm (")
Width (W)
Height (H)
Length (L) 413 (16-1/4)
107 (4-1/4)
247 (9-3/4)
Shank type: mm (")
Yes (by dial)
Europe: 4.0 (13.1), Brazil: 2.0 (6.6), other countries: 5.0 (16.4)
Yes
230 - 460
1,300 - 2,600
17 (11/16) Hex
1,100
6.2 (13.7)
Impacts per minute: min
-1
= ipm
No load speed: min
-1
= rpm
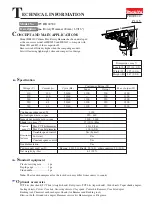
HR4030C
Rotary Hammer 40mm (1-9/16")
Model HR4030C 40mm Hex Rotary Hammer has been developed
as the successor model of HR3850 and HR3811 to compete with
Model H1 and H2 of the competitor H.
Ensures work efficiency higher than the competing models,
but still featuring lightweight, slim and compact tool design.
Continuous rating input: W
Double insulation
Net weight: kg (lbs)
Plastic carrying case .........1 pc
Depth gauge ................... 1 pc
Side handle ...................... 1 pc
Power supply cord: m (ft)
Variable speed control
Yes
Yes
Constant speed control
40 (1-9/16)
Max TCT bit diameter
118 (4-5/8)
Max Core bit diameter
Capacity
:
mm (")
O
ptional accessories
TCT bits (hex shank),TCT bits (straight shank), Bull points, TCT bits (taper shank), Cold chisels, Taper shank adapter,
Scaling chisels, Cotter, Core bits, Grooving chisels, Clay spade, Center bit, Rammer, Core bit adapter,
Bushing tool, Chemical anchor adapter, Shank (for Rammer and Bushing tool),
Blow-out bulb, Ground rod adapter, Hammer service kit, Hammer grease, Bit grease
W
L
H
T
ECHNICAL INFORMATION
Continuous Rating (W)
Voltage (V)
Cycle (Hz)
Input
Output
Max. Output (W)
110
120
220
230
240
12.0
11.0
6.2
6.2
6.2
50/ 60
50/ 60
50/ 60
50/ 60
50/ 60
1,100
---
1,100
1,100
1,100
500
500
550
550
550
1,200
1,200
1,500
1,500
1,500
Current (A)
Electronic
features
Soft start


