


9
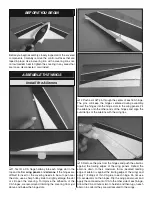
carbon fi ber pushrod. Loosely thread a 2x4mm self-tapping
screw into each clevis. The screw head should be in the
recessed end of the hole in the clevis. Hook the clevis to the
outer holes in the servo arms.
❏
❏
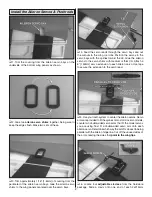
7. Cut the bottom from a control horn tab leaving
approximately 5/32" [4mm] remaining on the control horn.
Using the pushrod as a guide, position a control horn on
the aileron in line with the outer hole of the servo arm and
the holes in the control horn over the hinge line. Press the
control horn tab into the aileron making an indentation. Cut
a 1/16" [1.6mm] slot at the indentation 4-5mm deep using a
sharp hobby knife. Be careful not to cut through the top of
the wing.
❏
❏
8. Glue the control horn in place with medium or thick
CA glue.
❏
❏
9. Attach a clevis to the outer hole of the control horn and
slide the pushrod through the clevis connecting the aileron
to the servo. Position the aileron in the neutral position and
tighten the screws in the adjustable clevises (be sure that
the pushrod is positioned so the excess pushrod can be cut
off from one end and re-used). Cut off the excess pushrod
beyond the control horn clevis. Save the excess pushrod. It
will be used to join the top and bottom ailerons together. If
you haven’t done so, secure the servo arm to the servo using
the screw included with the servo.
❏
10. Repeat steps 7-9 for the other bottom wing panel.
Do not use the excess 2x215mm pushrod for the other
aileron pushrod!
Use another 2x215mm pushrod to make
the second aileron pushrod.
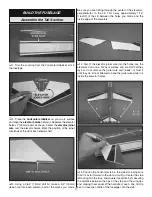
Attach the Wings
❏
1. A fuselage stand is included to simplify gluing the wings
to the fuselage. Glue the stand and wing supports together
as shown. The arrows on the long side pieces should point
toward the front (tall end).
❏
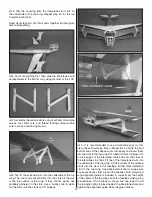
2. Trim away the covering that overlaps onto the wing
root ribs.