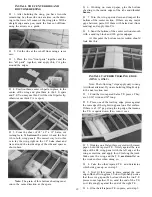
D 1 Have someone hold the center of the wing
firmly down to the flat building surface Now grasp
the tip of the wing and twist it so that the trailing
edge raises off the surface While holding in this
twist, use a heat gun to "re-shrink" the covering.
Heat both the top and the bottom When you let go
of the tip, you will see that the wing will retain some
of the twist.
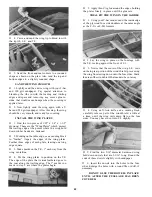
D 2. You must continue twisting and re-shrinking
until the trailing edge is 7/8" off the surface AT
BOTH TIPS As an aid in getting this height correct,
you may make a small wood block 7/8" high by gluing
together pieces of scrap wood Keep this block handy
while twisting and heating, to check your progress.
D 3. Depending on what type of covering you have
used, you may find that, in time, some of the washout
may disappear Check it after an hour and repeat the
above process if necessary Also, re- check it periodi-
cally before you go flying, because THIS IS A VERY
IMPORTANT REASON FOR THE STABILITY OF
YOUR PT40
D FINAL ASSEMBLY
D 1 Lay the rudder and elevator (and ailerons if
you built Wing B) on the plans and mark the hinge
locations on the leading edge of each part Now use
your X-Acto knife (blade must be sharp) to cut slits
in the covering at the hinge locations Trial fit the
hinges to make sure you have "found" the slots which
you previously cut
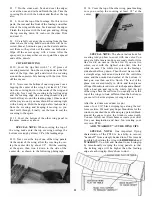
L] 2. Glue the hinges into the rudder and elevator
(and ailerons) NOTE Do not just smear glue on the
hinge and push it into the slot, as most of the glue
will be wiped off as it is being pushed in You must
also work some glue into the slot A good way of doing
this is to scoop up some epoxy with a plastic soda
straw, then pinch the end of the straw, insert it into
the hinge slot, and squeeze the straw to force glue
into the slot Then insert the hinge hallway into the
slot After pushing in the hinge, wipe away all excess
glue with a tissue.
D 3. After the epoxy has hardened, put glue (15 or
30 minute epoxy is recommended) into the hinge slots
in the stab, and push the elevator hinges into the
slots Wipe away all excess epoxy with a tissue. Re-
peat this process for the rudder
D 4 Wing B only Glue the aileron hinges in place
in the same manner, but also apply epoxy into the
torque rod holes before pushing the ailerons into
place.
D 5. Install 1/4" wide wing seating tape (sticky
side down) onto the wing saddle and the top of the
F-2A (or F-2B) saddles
D 6 Note- Each time you put the wing into the
wing saddle to fly the model, it needs to be in the
same position Follow the steps below so the wing
will be in the correct relationship to the fuselage.
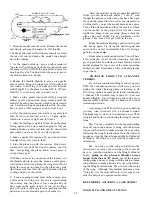
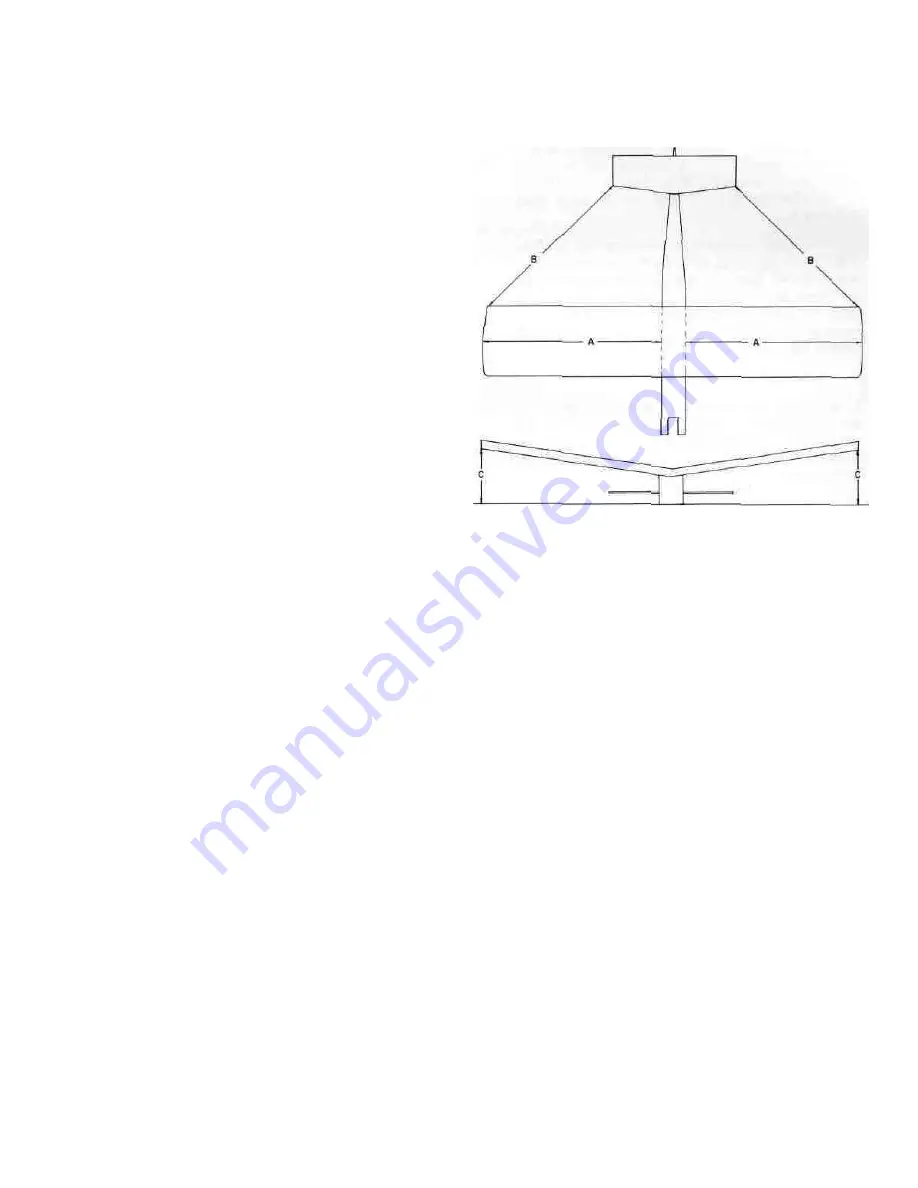
A Place the fuselage on the work surface right
side up Place the wing into the wing saddle Make
the following measurements If the distances you
measure are not the same, move the wing in the wing
saddle until the measurements are the same.
B Measure the wing from side to side in the
saddle The distance from the fuselage side to the
wing tip on each side should be the same. A = A
C Measure from each wing tip to each stab tip.
These distances should be the same. B = B
D Wing tip to work surface distance is the same
on both sides C = C
E When the wing is all lined up to the fuselage
after the above measurements are made, mark a
small line on the wing and a small line on the fusel-
age drawn with a pen on the covering, so you can
put the wing in the same position each time before
you rubber band it.
D 7. Re-install the nose gear assembly, main land-
ing gear, engine and muffler.
D 8 Re- install the nylon horns on the elevator
and rudder For the rudder, you will have to re-drill
the two holes for the 2-56 screws because the lower
hinge now blocks the holes.
D 9 WING B ONLY- Using a sharp X-Acto knife
or single edge razor blade, carefully cut away the
covering from the bottom of the wing where the aile-
ron servo mount will be attached You should be able
to faintly see the dark outline that you previously
drew under the covering Now glue the aileron servo
mount to the bottom of the wing.
D 10. Using an X-Acto knife, cut away the covering
from the rudder, elevator and nose gear pushrod slots;
then re-install the pushrods for the rudder, elevator,
throttle, nose gear and (ailerons).
32


