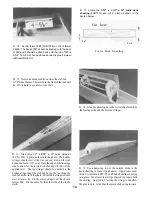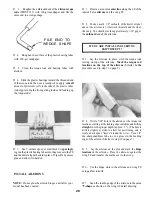
D 4. With the engine on the mount, plan the throttle
pushrod routing. A flexible cable type pushrod is recom-
mended for this application since it has to bend under the
fuel lank. The pushrod should be located as close as
possible to the fuse sides (to allow room for the fuel tank),
and the guide tube should not have any tight bends. Drill
a 1/8" hole in Fl for the throttle pushrod guide tube, but
stay at least 1/8" in from the outside edge of the fuse sides.
against the firewall. Try not to "kink" the tubes when
bending (See photo at step 4).
D 2. Drill two holes (7/32" or size to fit your fuel
tubing) for your fuel tubing vent and fill lines. The
location of these holes will depend somewhat upon the
type of engine you arc using, but will normally be in the
upper two corners.
D 3. Now remove the engine mount and fuelproof the
inside of the fuel tank compartment and the front of F-1 by
brushing on a coat of polyester resin or 30-minute epoxy
thinned with alcohol.
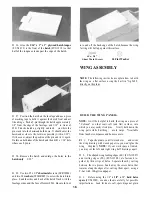
D 5. If you arc building it with tricycle landing gear,
install the nosegear (WBNT075), and the nylon steering
arm as shown in the sketch and on the plan. Determine
where the pushrod should exit the fuselage and drill a 1/8"
hole for the flexible cable pushrod. Also drill a hole in
former Fl for the pushrod. NOTE: Try to plan the
pushrod installation so the rudder pushrod and the nose-
wheel pushrod are on the same side of the fuselage, as
shown on the plan.
Nylon Steering Arm 5/32- Wheel Collar
FIT FUEL TANK and FUELPROOF
TANK COMPARTMENT
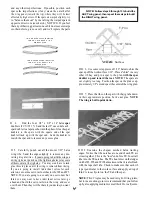
D 1. Assemble your 6 oz. fuel tank. We recommend
bending the brass tubes as shown in the photo to prevent
them from cutting through the silicone fuel lines if pressed
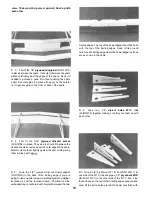
D 4. You may permanently install the fuel tank at this
time, or you may wait until the plane is nearly completed.
When you install the tank, be sure to cushion it from
vibration and prevent it from moving by surrounding the
tank on all sides (and front) with latex foam rubber.
Leave several inches of extra fuel tubing in front of F-l
(you can cut off the excess later). The photo shows how to
route the fuel tubing to prevent kinking.
28
Summary of Contents for FUN-ONE
Page 5: ...5...

