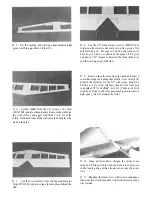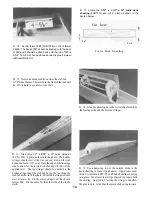
the plywood ribs. NOTE: when making this rib assembly
for the other wing, be sure to glue the plywood ribs to the
opposite sides of the W 1 C ribs so you will have a "right"
and a "left" as the photo above shows.
D 8. Round o f f both ends of each 1/4" x 5-3/4" dowel
(DOWEL037) and trial fit them into the Wl rib assem-
blies. Glue the dowels in place with plenty of med/thick
CA or epoxy.
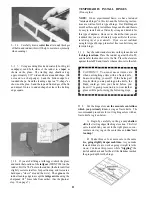
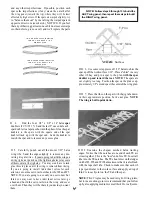
D 9. Position the wing back over the plan and trial fit
both Wl rib assemblies. Enlarge the notches in the TE if
needed to get the dowels to be positioned exactly over the
notches in the dowel aligner. Tack glue the rib assemblies
at the trailing edge so they are centered up and down on the
trailing edge. Don't worry if the dowels are not seated in
the aligner notches but do make sure they are both directly
above the aligner notches. Securely glue the front of the
rib assemblies to the dihedral brace. Add some med/thick
CA to the trailing edge joint but don't allow excess glue to
accumulate on the trailing edge or the 1/16" sheeting will
not fit well.
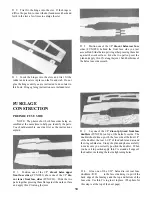
D 10. Add a piece of 1/4" triangle (BAL143) to each
outside spar/Wl rib joint and a small piece at the trailing
edge of each rib assembly (See photo at step 11).
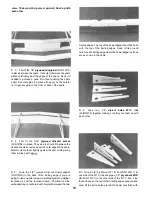
D 11. Glue the two 1/8" ply W1A ribs (FUN1W01)
together and glue them in place in the center of the wing as
shown in the photo. Glue a piece of 1/4" triangle on both
sides of the ribs near the spars.
D 12. Glue the 1/8" balsa W2B ribs (FUN1W02) in
place in the remaining notches. Be sure the 1/2" diameter
hole is down.
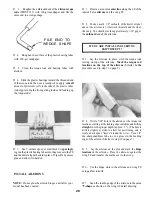
D 13. Remove the wing from the work surface and test
fit it to the fuselage. Sand a "Flat" on the front of the
leading edge to allow it to seal properly. The bottom of the
leading edge will still keep the wing from seating all the
way in the saddle but we can make sure the wing is aligned.
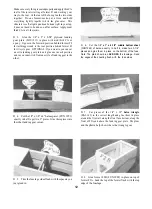
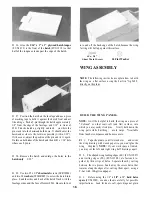
D 14. Tie a 3' piece of string to a T-pin and stick the T-
pin into the middle of the slab base at the very back. Pull
the string out to one wing tip and mark it or grip it with your
fingers where it touches the tip. Swing the string over to
the other tip to see if the two distances are equal. If they
are, make a mark on the leading edge and former F2B so
you will know when the wing is on correctly. If the
distance is not equal, adjust the wing until it is, then make
the mark.
Both distances must
be equal!
20
Summary of Contents for FUN-ONE
Page 5: ...5...


