


Spartan
II
607
Troubleshooting
Great Plains | 166-486M | 2019/01/29
95
Troubleshooting
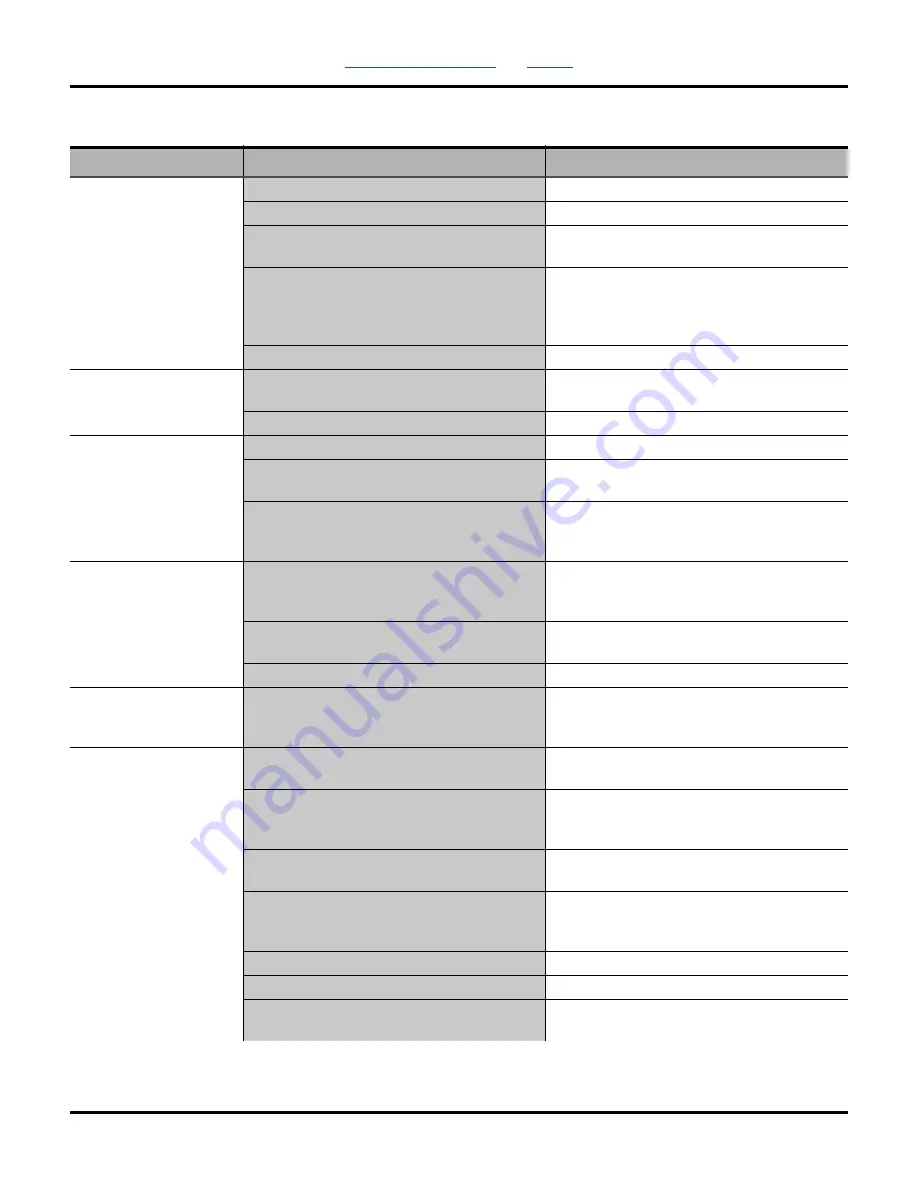
Problem
Causes
Solutions
No material flow - all
rows
Empty hopper
Load material.
Meter in use clogged
Clean-out meter (page 73).
Fan not operating
Check hydraulic and electrical connections
for fan.
Fan speed too low
Check pulses-per-rev setting for fan in
terminal. Increase fan speed to
recommended range. See operator manual
for terminal.
Fan running backward
Reverse fan circuit hoses at hitch.
No material flow -
multiple rows
Primary seed hose blocked
Check seed hoses for kinks, congealed
materials at low spots, nests and pests.
Tower inlet or turret blocked
Clear blockage.
No material flow - one
or two rows
Seed tube blocked at row
Inspect and clear seed tube.
Tower port blocked for affected row
Disassemble distribution ring and clear
blockage.
False alarm - blockage sensor disconnected
or failed
Run terminal self-test. Swap sensor with a
working row to verify failure. Replace
sensor.
Material is flowing, but
is not detected by
terminal
This is normal during the first few meters of
planting, as it takes some time for material
to reach rows.
Lower openers 3m before planting is to
begin. Terminal does not check for blockage
during first 5 seconds.
Lift switch not adjusted correctly, failed, or
not wired correctly.
Check, adjust or replace switch (page 75).
Terminal disconnected at hitch
Connect terminal.
Planting too little -
some rows
Partial blockage in meter chamber, seed
hoses, towers, seed tubes
Treat as blockage. See “
Planting too little - all
rows
Incorrect seed rate, meter flutes, or rate
range setting.
Check seed rate information beginning on
page 37.
Air system leaks retarding material flow
above meters
Check hopper lids, meter seals, manifold
caps and seed hose connections. Adjust
latch and/or replace seals as needed.
Seed size and weight or fertilizer density
and granularity vary.
Calibrate. Adjust rate to compensate.
Seed or fertilizer density and granularity
may vary from season to season, batch to
batch and between different suppliers.
Calibrate again if materials might have
changed since last calibration.
Low material level in hopper
Fill hopper.
Fan speed too low
Increase fan speed (page 52).
Fan will not run fast enough
Tractor must be able to supply 68 litres/min
at 14 bar.