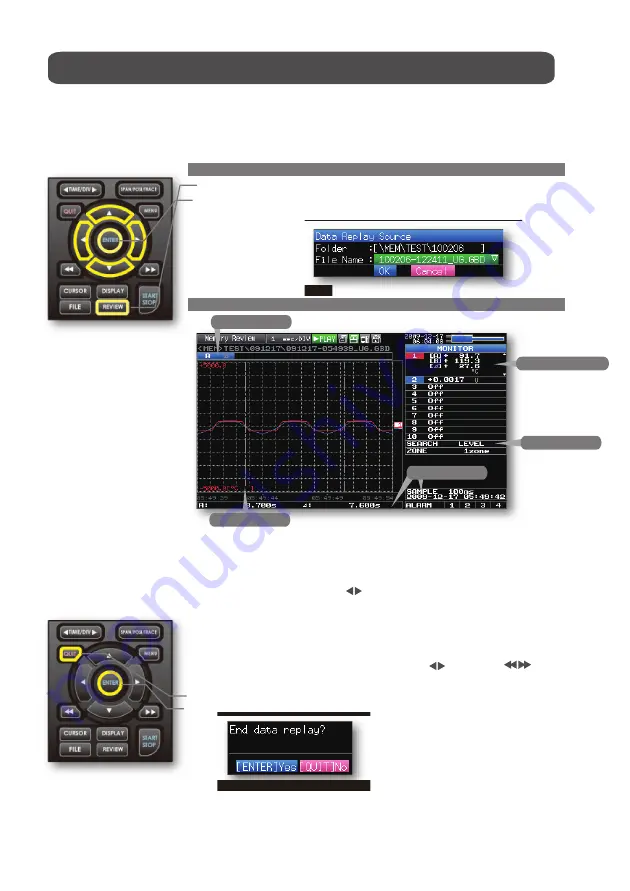
1.Selecting a file to replay
(1) Press the REVIEW key.
(2) Since the file you want to replay has the file name that was appended automatically
when the data was captured, move the cursor to the OK button and then press
the ENTER key.
(3) The Replay screen opens.
2.Replay screen
(1) Scroll bar
: Displays the position within the whole data and the display width.
(2) Level display area : Displays the levels of A and B cursors and the difference
between the A and B values.
(3) Quick settings
: Use the keys to search the previous or next level.
(Note: Make search settings in the menu.)
(4) Time display
: Displays the sampling interval and the time of the cursor.
(5) Cursor
: Displays the cursor. (Note: Press the CURSOR key to switch
between A and B cursors.)
Move the cursor using the keys or the keys.
Desired level values and time can be checked by moving the cursor.
Press the QUIT key to end the data replay operation.
A confirmation message is displayed. Press the ENTER key.
Data replay ends, and the GL220 goes into the Free Running status.
4. Data Replay : How to Replay Captured Data
When data capture ends, data is automatically replayed. The automatically replayed data
is the data captured to the internal memory which has been set as the data capture destination.
Press the QUIT key to end the data replay operation.
Explanation of basic operation in the GL220 is completed.
The GL220 has many other convenient functions. Please refer the next five pages for details.
14
5. Cursor
2. Level display area
3. Quick settings
4. Time display
1.Scroll bar


