Goodmans GSR1885DAB User Manual Download Page 19

19

Setting the Alarms

06

After you have set the alarm with your 

required time and wake-up mode, set 

the radio to Standby. If the alarm is 

active, the alarm symbol will show on 

the display .

Setting the Alarm to Wake You

To set the alarm to wake you:

Check that the Alarm symbol is 

1. 

displayed. If not, set the Alarm(s) 

On as described in the ‘Setting the 

Alarms’ section on the previous 

The Alarm will stop sounding and “Zz”
indicator will display, After 10 minutes,
the Alarm will sound again.  

page.
Set the radio to Standby (or set the 

2. 

SLEEP function). 

The radio will switch off and the 

3. 

time and the Alarm Symbol will be 

displayed

When the alarm sounds

To switch off the alarm:

.

1


e

h

s

s

e

r

P


POWER


ON/OFF

 Button 

or the 

ALARM

 Button.

 .

3


s

s

e

r

P

SELECT 

to into “Snooze” mode.
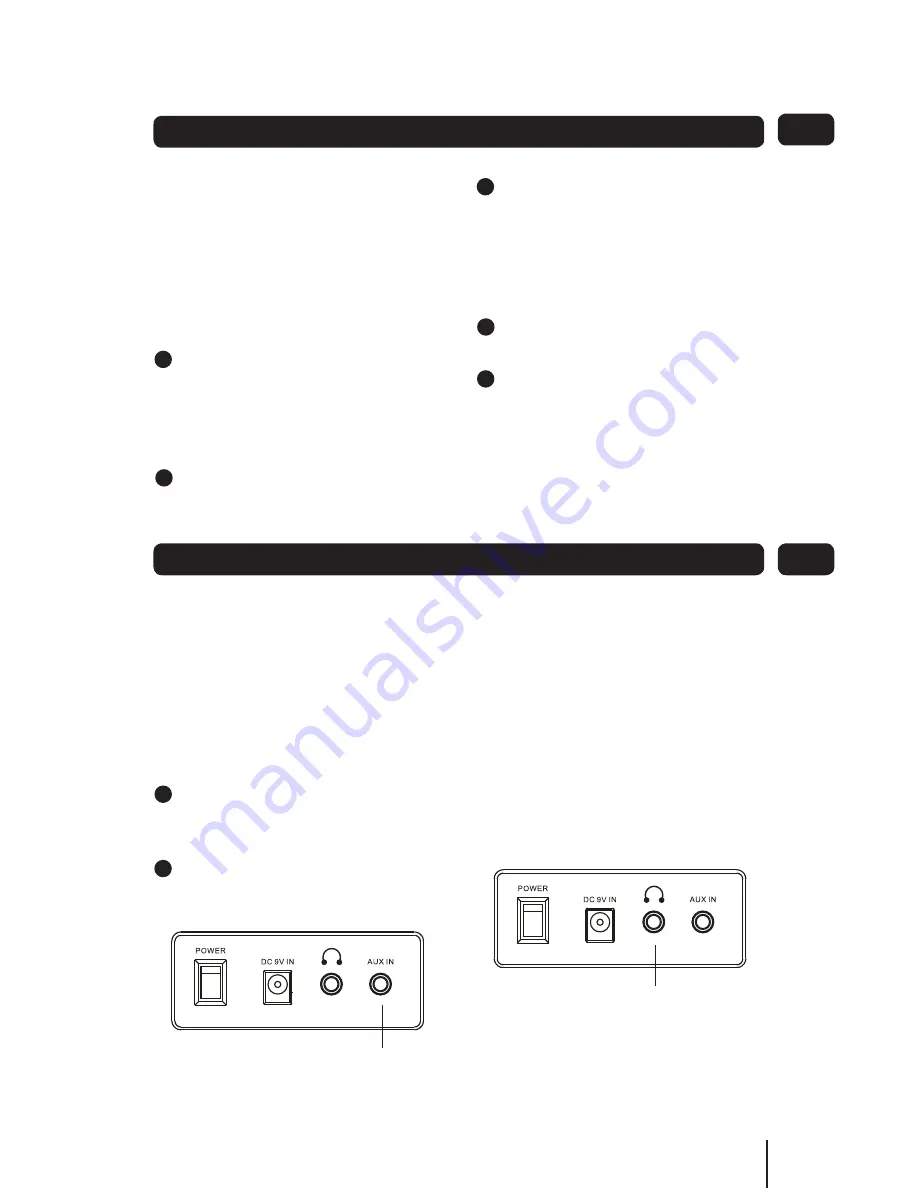
Auxiliary input

There is an jack socket on the rear 

panel (labelled AUX IN) to listen to 

an external audio player for example 

through the radio. The output cable 

from the external audio player must 

be terminated in a 3.5 mm stereo jack 

plug.

Connect the external audio player 

1. 

cable to the (not supplied) to the 

AUX IN socket on the rear panel.

.

2


e

h

s

s

e

r

P


MODE

 button to switch 

the input to AUX. (DAB/FM/AUX).

AUX and Headphones

07

Headphone output

There is a 3.5 mm jack socket on the 

back panel of the radio labelled with a 

headphone symbol. 
This output is suitable for a set of 

headphones to be connected for private 

listening. 
When the headphone jack is inserted, 

the speakers in the main unit are 

disconnected.

AUX IN socket

Headphone output socket

1

2

3

4

5

6

7

8

9

1

32

1

2

3

4

5

6

7

8

9

1

2

3

4

5

6

7

8

9

1

2

3

4

5

6

7

8

9

1

2

3

4

5

6

7

8

9

Summary of Contents for GSR1885DAB

Page 1: ...GSR1885DAB Digital Radio User Guide IMPORTANT Please read all instructions carefully before use and keep for future reference...

Page 2: ...take time to read these instructions They are designed to familiarise you with the unit s many features and to ensure you get the very best from your purchase Introduction Safety is important Use of...

Page 3: ...eshooting 20 Specifications 21 Warnings 22 Guarantee 24 05 06 07 08 09 10 Contents Power Adaptor Digital Radio main unit Quick Start Guide USER Guide The above images are for illustrative purposes onl...

Page 4: ...CAN Button INFO Button MODE Button VOL Button VOL Button ALARM Button DISPLAY PRESET Button MENU Button SELECT Button Button Button ON OFF Button SPEAKER Left SPEAKER Right aerial aux In headphone Out...

Page 5: ...n MUTE Button MODE SELECT Button PRESET Button Button POWER ON OFF Button STEREO MONO Button ALARM Button DIMMER Button SLEEP Button VOLUME Button CLOCK Button BASS Button Button Button INFO Button SE...

Page 6: ...receive a series of ones and zeros so any other interference is ignored resulting in very high quality audio Interference free reception Analogue systems suffer from an effect called multipath distor...

Page 7: ...es into the battery compartment observing the polarity shown in the compartment SLIDE LID TO OPEN SLIDE LID TO CLOSE LID BATTERIES X6 BATTERY COMPARTMENT Battery Disposal Dispose of used batteries wit...

Page 8: ...the mains power on The unit is now ready for use Power Adaptor Mains outlet socket Connect power socket here Power Control To turn the radio on Slide the POWER ON OFF switch on the rear panel to the...

Page 9: ...s the catch across While holding the catch open the battery door 2 Fit the battery observing polarity as shown When replacing the 3 battery use only the same CR2025 type specified Setting the Clock Th...

Page 10: ...tion list will be displayed in sequence 2 Press the buttons until you find the station you want to listen to 3 Press the 4 SELECT button to select the displayed station After a short delay the radio w...

Page 11: ...playing if it is available Alternatively you can continue to browse for an other station as described on the previous page Scanning Progress bar Number of stations found DAB and FM presets Your radio...

Page 12: ...describes the style of the programme being broadcast Multiplex Name DAB Digital radio stations are broadcast in multiplexes Each multiplex is a bundle of radio station transmitted in a single frequenc...

Page 13: ...s s e r P Menu button to move backwards through the menu Using DAB 14 1 2 3 4 5 6 7 8 9 1 2 3 4 5 6 7 8 9 1 2 3 4 5 6 7 8 9 3 1 2 1 2 1 2 3 4 5 6 7 8 9 Auto Scan Press SELECT Press SELECT Manual Tune...

Page 14: ...one or both of the dual alarms More details of alarm setting in the Using Alarms section Time Select the Time option to set the clock manually This may be useful if you are in an area where it is not...

Page 15: ...tively 1 e h t s s e r P or Button to tune the band in 50 kHz steps Repeat until the required tuning is 2 achieved Stereo Mono Reception You can set your radio to switch automatically between stereo a...

Page 16: ...the FM radio to two different levels Strong stations only or All stations Setting to Strong stations only will exclude weaker stations resulting in a quicker scan If you set to All stations the scan...

Page 17: ...time option to set the clock manually Using FM 05 Factory Reset Setting Select the Yes sub option to reset all the settings of your radio to factory original settings The station list will also be cle...

Page 18: ...Press the 1 or Button to scroll through the options available for a setting or times when clock setting When you have finished changing a 2 setting press the SELECT button to confirm the setting and m...

Page 19: ...or the ALARM Button 3 s s e r P SELECT to into Snooze mode Auxiliary input There is an jack socket on the rear panel labelled AUX IN to listen to an external audio player for example through the radio...

Page 20: ...operate when you press any buttons Electrostatic discharge 1 Turn off the unit 1 disconnect the main power and reconnect after a 60 seconds Radio poor reception Weak radio signal 1 Interference caused...

Page 21: ...type CR2025 Power Consumption 7W Tuner Frequency Coverage DAB 174 240MHz BAND III FM 87 5 108MHz Sensitivity 95 dBm typical Headphone output 3 5 mm jack socket AUX IN audio 3 5 mm jack socket Specific...

Page 22: ...e the sound level General Safety This Digital Radio has been designed and manufactured to meet European safety standards but like any electrical equipment care must be taken if you are to obtain the b...

Page 23: ...o the mains supply This Digital Radio is supplied with a mains adaptor which has been designed for indoor use only 10 Warnings The mains adaptor is a sealed unit There are no user serviceable parts in...

Page 24: ...he boundaries of the country of purchase The product must be correctly installed and operated in accordance with the instructions contained in this User Guide This Digital Radio must be used solely fo...

Page 25: ...25...

Page 26: ...0871 230 1777 GSR1885DAB 130712 Rev0...

Reviews: