ENGLISH - 10
–––––––––––––––––––––––––––––––––––––––––––––––––––––––––––––––––––––––––––––––––––
– PART THREE –
The television’s Operating System
3.1 - ON SCREEN DISPLAY
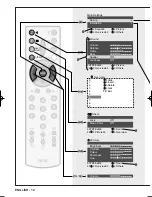
Your television has an OSD (On-Screen Display) consisting of a set of menus and sub-menus displayed
over the picture. These offer either controls that you can choose and set according to your viewing and
listening preferences, or functions like tuning, programme lock and sleep timer.
In this ‘Part Three’, before we start explaining the functions and options that you can set in the menus, it
would be a good idea to get to know these menus, looking at them together (see the SUMMARISED TABLE
OF THE OSD MENUS further on) so as to understand their overall structure and the topics dealt with.
Generally speaking, use the OSD menus as follows.
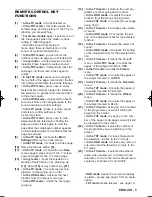
• Please refer to key numbers illustrated on the front fold-out REMOTE KEYS page.
-01- Call up the menu you want on the screen by pressing the key assigned to it which is on the
remote
.
.
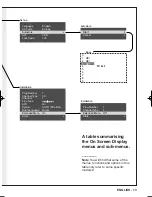
Symbols are used to represent the sound [17] and picture [18] menu buttons.
You can also
press the MENU key and choose from the main menu in the same way as step 2...
-02- Select the menu item you want by scrolling the list in the menu with key [13 or 14] on the remote.
-03- Change the setting of the selected item with key [15] or [16] on the remote.
-04- When you have finished, exit from whatever menu you are in and hence from the OSD function by
pressing key [22] on the remote.
3.2 - CHOOSING A LANGUAGE FOR THE OSD
Before reading any further you might wish to change the on-screen menu language if is not your prefer-
red one. Please choose a different language as follows...
-01- Press the MENU key [9] to see the Main Settings menu.
-02- If the highlight bar is not on Set-up, press the 'down' key [14] until it is. Press the 'right' key [15] to
make the set-up menu appear on the screen.
-03- If the highlight bar is not on Language, press the 'down' key [14] until it is. Press the 'right' [15] or
'left' key [16] to change language.
-04- Press the TV button [22] to finish.
–––––––––––––––––––––––––––––––––––––––––––––––––––––––––––––––––––––––––––––––––––
– PART FOUR –
Tuning and programming
There are two ways for tuning the channels you can receive and storing them in the programmes:
MANUALLY and AUTOMATICALLY. We recommend manual tuning if you like to choose which number
you want the TV stations to be on, but automatic tuning is faster.
Manual tuning is also good for tuning in older satellite receivers and VCRs which have output via an
aerial cable.
4.1 - AUTOMATICALLY FINDING AND STORING THE STATIONS
This automatically finds and tunes all the channels you can
receive - that the stations in your area use for broadcasting -
and sequentially assigns the channels to programme numbers
starting from number one. Before continuing it is a good idea
to make sure that the factory-defined broadcasting standard
corresponds to the one normally used in your country (to
check and alter the standard, if necessary, read 4.2 -
'Manually finding and storing the stations', step – 03-). Lastly
proceed as follows:
[9]
[13]
[16]
[15]
[14]
Please refer to key numbers illustrated on
the front fold-out REMOTE KEYS page.
MENU
Testo del man. SWING (UK) 14-10-2002 17:35 Pagina 10

