


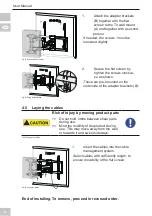


23
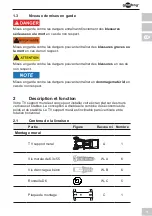
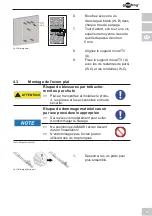
1.
Loosen the screws as shown
for
further
assembly.
2.
Lean the flat screen vertically
on a soft, large surface or a
Fig. 13:
Mounting the flat screen 1
wall and protect it of scratches
and
overturning.
3.
Mount the adapter brackets (B)
with
the
arrows
facing
up.
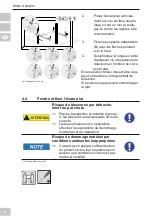
4.
Select the screw length and
thickness as well as TV space-
rs according to your flat screen.
Domed flat screens should be fitted
with
matching
TV
spacers.
Screws that are too long can damage
the flat screen.
Fig. 14:
Mounting the flat screen 2
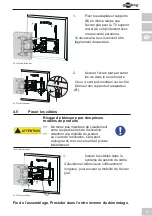
4.4
Adjusting and fixing the flat screen
Risk of injury by tripping and falling
>>
>>
Place, transport and install product, parts
and acceories in a safe way.
When working with burdens, secure your
-
self and the working place, let a second
person help you.
Risk of material damage by inappropri-
ate ambient conditions
>> Keep enough space around product and
to the whole system to ensure proper
ventilation and mobility.
Tab. 19:
Adjusting and fixing the flat screen