

Buzzaround XL_SG_REVA_100711
22
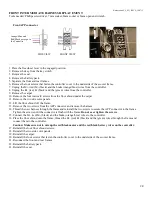
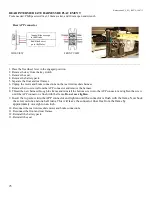
MAIN HARNESS REPLACEMENT
Tools needed: Phillips screwdriver and slotted screwdriver
1. Engage the park brake.
2. Remove the key from the key switch.
3. Remove the seat.
4. Remove the battery pack.
5. Lock the tiller.
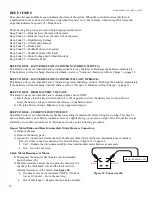
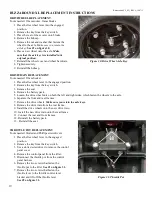
6. Remove the control panel shroud.
See #1 on figure 36.
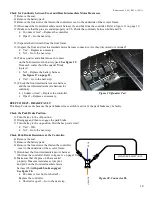
7. Remove the four screws that fasten the control panel
1
to the tiller.
See figure 37.
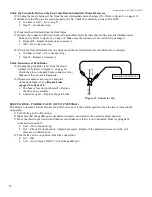
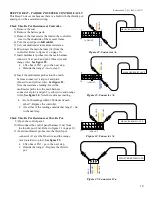
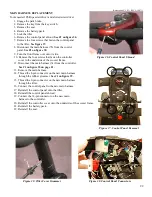
8. Disconnect the main harness (7b) from the control
panel.
See #1 on figure 38.
9. Turn the front frame over onto it side.
10. Remove the four screws that fasten the controller
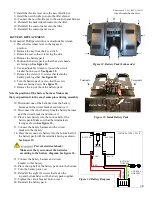
Figure 36. Control Panel Shroud
cover to the underside of the scooter frame.
11. Disconnect the main harness (7a) from the controller.
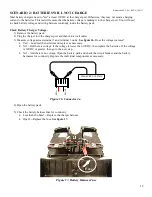
See #1 on figure 35 on page 21.
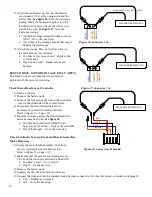
13. Remove the main harness.
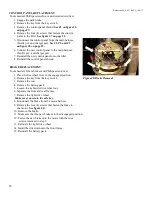
14. Thread the 8-pin connector on the new main harness
through the rubber grommet.
See #1 on figure 39.
15. Thread the 8-pin connector on the new main harness
through the tiller.
16. Connect the control panel to the new main harness.
17. Reinstall the control panel onto the tiller.
18. Reinstall the control panel shroud.
19. Connect the 14-pin connector on the new main
harness to the controller.
20. Reinstall the controller cover onto the underside of the scooter frame.
21. Reinstall the battery pack.
22. Reinstall the seat.
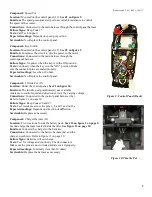
Figure 37. Control Panel Removal
Figure 39. Tiller Cover Grommet
Figure 38. Control Panel Connectors
1
1
2
3