11
S
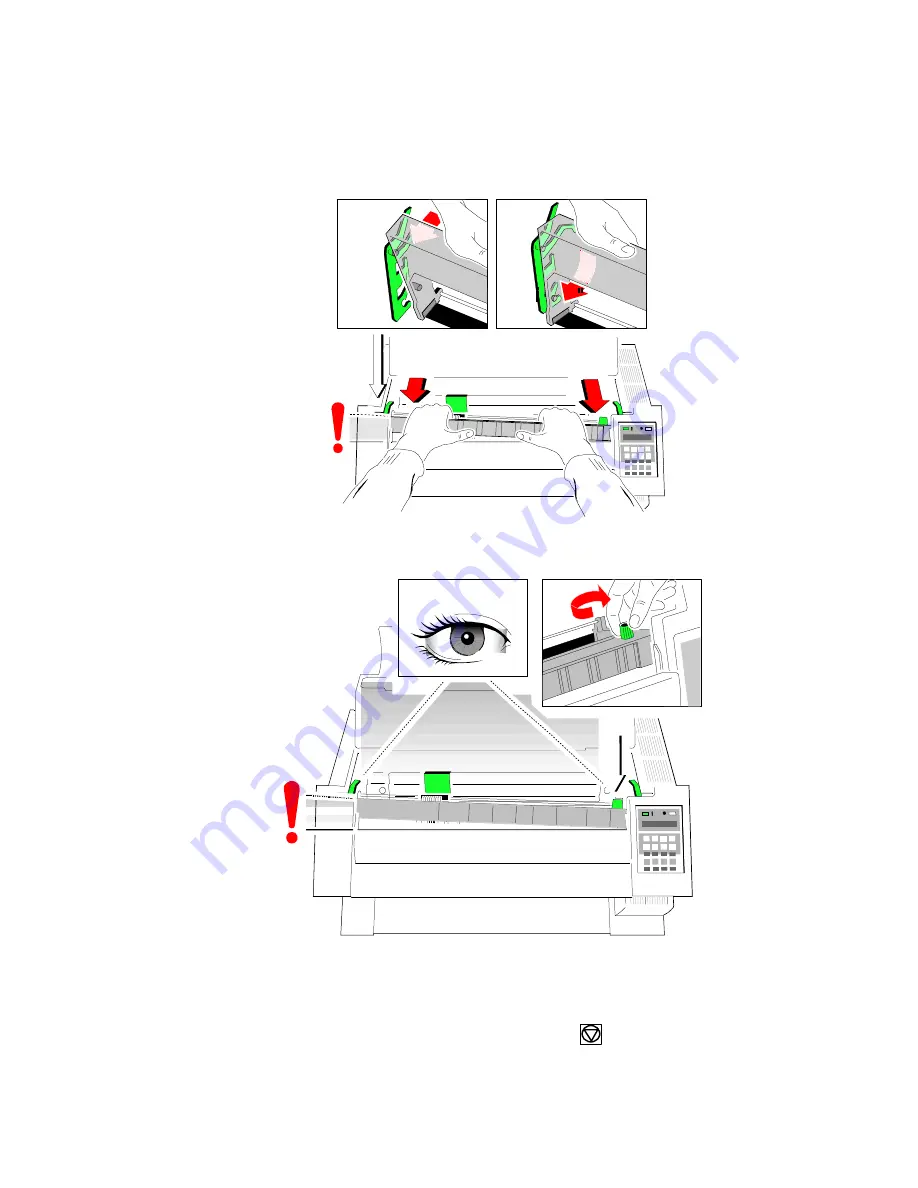
Move the cassette towards you until you hear a
click
on both sides. Swing
the ribbon underneath the print head for the final click. The audible clicks
inicate that the mounting pins have engaged properly.
click !
click !
Note:
When installed correctly the ribbon cassette has a
sloping position
.
S
Move the print head back and forth to settle the ribbon in the correct position.
S
If necessary remove excess ribbon slack by turning the green knob
clockwise.
S
Close the top cover and press
[START/STOP]
.
Summary of Contents for CI-4040
Page 1: ...Quick Reference Guide Kurzanleitung C I 4 0 4 0 C I 4 0 5 0 ...
Page 3: ...1 Step 1 Contents of Delivery Printer CI 4040 Lieferumfang ...
Page 5: ...3 Step 2 Removing the Transport Lock Transportsicherung entfernen ...
Page 8: ...ON OFF 6 6 or 6 Step 5 Mains Connection and Power On Netzanschluss und Einschalten ...
Page 9: ...7 Step 6 Installing the Ribbon Cassette Farbband einlegen ...
Page 10: ...8 ...
Page 11: ...Quick Reference Guide C I 4 0 4 0 C I 4 0 5 0 ...
Page 12: ......
Page 14: ......
Page 18: ...IV ...
Page 20: ...2 The Printer CI 4040 ...
Page 21: ...3 The Printer CI 4050 ...
Page 49: ...31 PAPER JAM ASF or MANUAL single sheets jammed PARKING PAPER AND RESETTING TOP OF FORM ...
Page 50: ...32 NO PRINTOUT NO PRINTING ...
Page 52: ...34 CI 4040 CI 4050 CONFIGURATION MENU ...
Page 53: ...Kurzanleitung C I 4 0 4 0 C I 4 0 5 0 ...
Page 54: ......
Page 56: ......
Page 60: ...2 Der Drucker CI 4040 ...
Page 61: ...3 Der Drucker CI 4050 ...
Page 90: ...32 PAPERSTAU ASF oder MANUELL PARKING PAPER AND RESETTING TOP OF FORM ...
Page 91: ...33 kein Ausdruck ...
Page 93: ...35 CI 4040 CI 4050 Menüstruktur ...
Page 94: ......


