background image

24 


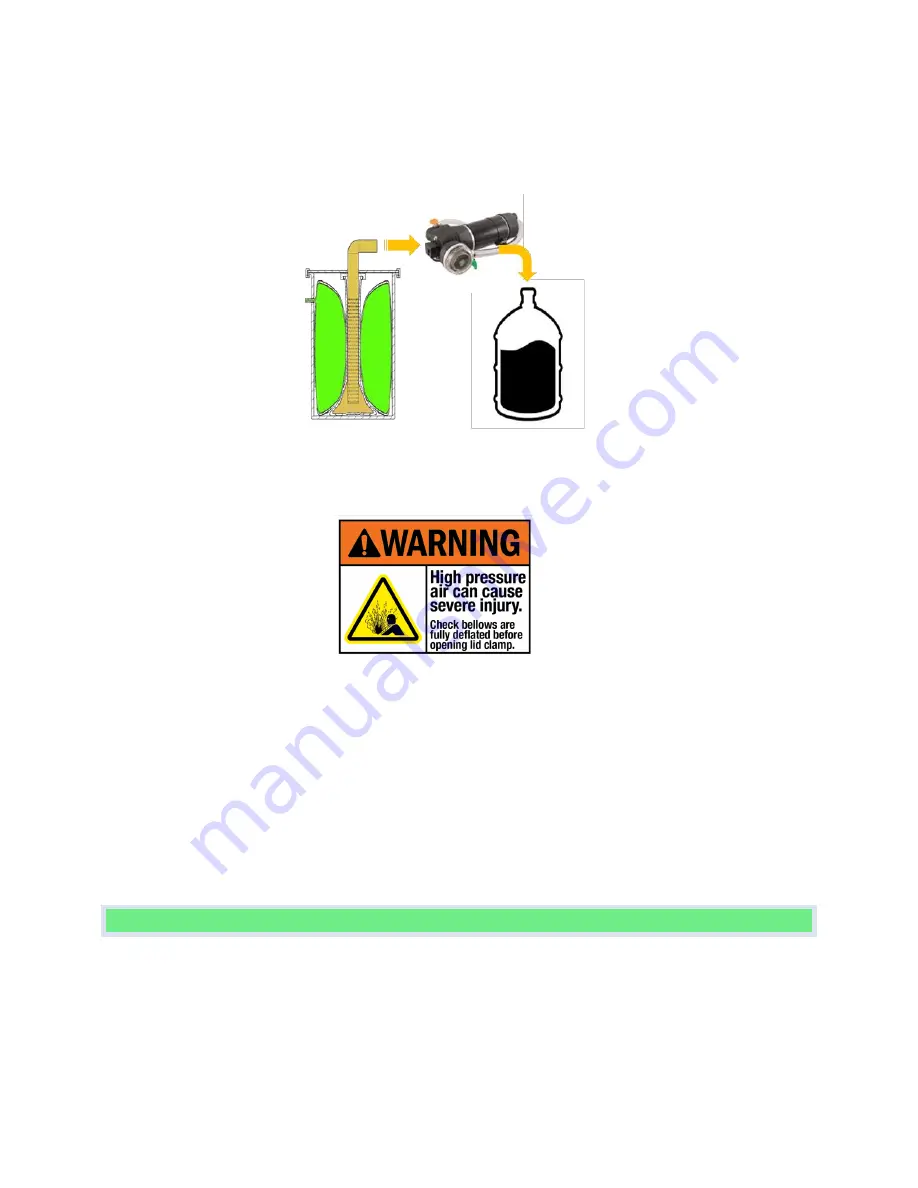
When no more juice is flowing start the wine transfer pump until no juice is being pumped. The PRESS operation 
will end automatically, and the bellows will deflate. Wait about 30 to 60 minutes and then repeat the PRESS 
operation. Again, use the pump to assist in collecting the juice. You can even try the PRESS a third time. You can 
expect a yield of 5 to 7 gallons/110 lb grapes.  


After the bellows deflate, you can pump out any residual juice. Once the operation is complete open the cover. 
Remove and discard the liner containing the spent grapes. 


THE CLEAR LID ENABLES YOU TO CHECK IF THE BELLOWS ARE INFLATED. DO NOT ATTEMPT TO OPEN THE LID 
CLAMP IF THE BELLOWS ARE VISIBLY PRESSURIZED. THIS MAY CAUSE THE LID AND/OR CLAMP TO OPEN IN A 
VIOLENT MANNER AND MAY CAUSE DAMAGE OR INJURY. ONLY OPEN THE LID CLAMP WHEN THE BELLOWS AND 
FERMENTATION LINER ARE COMPLETELY DEFLATED. 


FERMENTATION 

Add additives and yeast to the juice collected in your fermentation vessel and you are on your way to an excellent 
white wine.  

Using the GOfermentor JR allows the winemaker to use fresh grapes and avoid frozen juices and concentrates 
usually loaded with preservatives. Pressing white grapes in the GOfermentor JR minimizes oxidation of the juice 
and results in fresher fruitier wine with superior aroma. Sulfite use can be minimized or even eliminated. 

Summary of Contents for GOfermentor Jr

Page 1: ...ast and microvinification researcher Make wine using real grapes instead of juice for award winning results Advanced technology eliminates all the mess and cleaning Completely self contained Does not...

Page 2: ...mentor is a registered trademark US patent 9 260 682 9 611 452 France 3013726 Australia 2014268161 other foreign registrations pending Operating Manual 2019 2020 Version 3 0 June1 2020 www GOfermentor...

Page 3: ...out the wine 16 DEFLATION 20 AGING AND RACKING 21 WHITE WINE FERMENTATION 22 PREPARATION 22 PRESSING out the juice 22 FERMENTATION 24 APPENDIX 1 operating the controls 25 APPENDIX 2 Controller configu...

Page 4: ...onary winemaking technology The GOfermentor is used for commercial wineries with an operating capacity of up to 1 ton grapes per batch The GOfermentor JR uses the same technology but in a compact inex...

Page 5: ...e inlet tube on each bellow into the corresponding hole in the drum Drape the top of each bellow over the edge of the drum This will make it easier to fill the fermentation liner 4 Connect the circula...

Page 6: ...ons or pH adjustments You can mix these into the must using a stirring paddle If you are new to winemaking read some of the books in Appendix 3 CLOSING THE LINER Once the grapes and additions are in t...

Page 7: ...t so that the liner port is flush with the lid and secure using the U bolt clamp so that it is held up During fermentation and especially during pressing the system can build up to 1 psig pressure IT...

Page 8: ...GED FAILURE TO SECURE THE CLAMP CORRECTLY MAY CAUSE DAMAGE OR INJURY WE ARE NOT LIABLE FOR ANY DAMAGE OR PERSONAL INJURY CAUSED BY THE FAILURE TO SECURE THE LID CORRECTLY PER THESE INSTRUCTIONS If you...

Page 9: ...drum lid 2 Plug the end of the pressurization manifold tubing into the connector on the front panel of the controller You can release this plug later by pushing on the grey release button 3 Plug the...

Page 10: ...e probe cable on the press sampling tube into the jack located on the front panel of the GOfermentorJR Connect coolant lines to the control and pipe as shown in the diagram below Plug the control valv...

Page 11: ...ampling pressing tube needs to be rinsed after use Use a 2mm hex key to remove the perforated tube from the cap as shown below Insert the male adapter into the sampling quick connect fitting to open i...

Page 12: ...arting to inflate This is due to the CO2 generated by the yeast We are now in the anaerobic phase and the yeast will produce ethanol and CO2 from the sugar in the grapes It is also now time to start t...

Page 13: ...whole punch cycle takes about 15 minutes and progress is shown on the local control panel screen The operation is entirely automatic and only requires initiation by selecting the PUNCH operation and t...

Page 14: ...d punch will happen at noon not midnight The next at midnight and so on PUNCHES 1 2 3 4 5 6 7 8 TIME 0 00 0 00 0 00 0 00 0 00 0 00 0 00 0 00 12 00 8 00 6 00 4 48 4 00 3 25 3 00 16 00 12 00 9 36 8 00 6...

Page 15: ...attach a short length of tubing and use a syringe to suck out a sample For greater ease consider purchasing our GOfermentor hand sampler This connects to the sample port and enables you to withdraw a...

Page 16: ...liner and can be easily discarded without any mess cleaning or handling For safety reasons pressing can only be performed using the local controller panel The App CANNOT initiate the PRESS operation...

Page 17: ...the operation to PRESS 4 To start press the middle button START 5 The system will ask to confirm that you want to press Please CANCEL if you are in the PRESS by accident Otherwise press YES Push butto...

Page 18: ...gh the perforated tube and out into the wine collection vessel Seeds stems and skins are retained inside the fermentation liner Wine will now rapidly pour into the collection vessel 2 After 30 minutes...

Page 19: ...AND NOT PUSHING UP AGAINST THE LID Once they are deflated the lid can be opened 6 Remove the pressing sampling tube and wash it for the next use 7 Lift out the liner containing the spent pomace The p...

Page 20: ...ation can only be performed using the local controller panel The App CANNOT initiate the DEFLATE operation THE CLEAR LID ENABLES YOU TO CHECK IF THE BELLOWS ARE INFLATED DO NOT ATTEMPT TO OPEN THE LID...

Page 21: ...container completely full or by storing in a liner with no headspace After 20 to 30 days you perform the first racking This is a transfer of the clear wine to another container leaving the settled ye...

Page 22: ...es and crush manually if desired Close the open end with a hose clamp as for red wine but try to vent out as much air as possible You can press out the juice right away or you can let it cold soak for...

Page 23: ...pulpy nature of the must restricts the flow of the juice It is essential to wait for the squeezed juice to percolate out This takes time To further improve yields it is also recommended to connect an...

Page 24: ...YOU TO CHECK IF THE BELLOWS ARE INFLATED DO NOT ATTEMPT TO OPEN THE LID CLAMP IF THE BELLOWS ARE VISIBLY PRESSURIZED THIS MAY CAUSE THE LID AND OR CLAMP TO OPEN IN A VIOLENT MANNER AND MAY CAUSE DAMA...

Page 25: ...SMARTPHONE CONTROL APP FIRMWARE VERSION 3 UPDATE REQUIRED FIRST TIME USE Download the app to your SmartPhone Click on the GOFERMENTOR icon to start the app If you are using the app for the first time...

Page 26: ...the GOfermentor to connect to Click on Change to see other network that are in range You can pick any 2 4GHZ network shown Next enter the password for the selected network Click on Continue In App pre...

Page 27: ...your account email and password and the system will connect automatically to the assigned SSID If successful you will see the connected screen You can now assign a name to this GOfermentor so you can...

Page 28: ...ge of the original LAN SSID you assigned it the first time you can easily change the WiFi SSID Cycle power to the GOfermentor and click the center button within 30 seconds This will force the controll...

Page 29: ...artPhone App Use the SmartPhone App for all operations The local control panel on the GOfermentor is for backup and for these operations that are not possible from the App 1 Set date timezone DST 2 Re...

Page 30: ...ected App assigned tagname 1 to 99 Press button to START or CANCEL Press button to change process PUNCH PRESS DEFLATE Current Mode MAN or AUTO WiFi signal Press button to toggle between MANUAL and AUT...

Page 31: ...in a log file You can view the log by holding down the button under the MODE LOG caption Remember the white legend is short click and the cyan legend is long click The log file will look like this Scr...

Page 32: ...en has a tab to access the temperature functionality Control MODE OFF COOL HEAT Temperature reading OFF COOL HEAT Control setpoint reading OFF COOL HEAT Click to turn temperature control OFF ON Click...

Page 33: ...EL DISPLAY All GOfermentors in the login account are shown when the App is opened Click on any panel tile to access the GOfermentor DEVICE name assigned when added to App Current STATUS Click here to...

Page 34: ...H HISTORY You can see the punch history and duration on the main PUNCH tab LOGGED EVENTS Logged events and alarms can be viewed by clicking on the LOG tab Enter tag using pop up keypad Then press SEND...

Page 35: ...ia email text message These are sent as they occur AUX tab for setup PUNCH settings PRESS settings Temperature controller MODE Select method for notification Enter email address where notification sho...

Page 36: ...ill continue to operate normally except that no remote access is possible The unit will periodically try to reconnect If connection is lost the controller will display No WiFi and the App will show th...

Page 37: ...ISPLAY BRIGHTNESS DEFAULT 50 INACTIVITY TIMEOUT SET BACKLIGHT TIMEOUT ALWAYS ON TIMEZONE AND DST Set the local time zone relative to UTC EST is 5 PST is 8 Set Daylight Savings Time to ON if daylight s...

Page 38: ...0 3 0 3PSI PunchDefMins DEFLATION TIME DURING PUNCH MINS 0 TO 30 7 MINUTES PunchTOmins PUNCH TIMEOUT MINS 0 TO 30 10 MINUTES PressINflMins INFLATION TIME DURING PRESS MINS 0 TO 30 15 MINUTES PressPsig...

Page 39: ...nect to this new network This new network SSID is then remembered for the next power up FIRMWARE UPDATE GOfermentor JR firmware can be updated from the internet via OTA download For this the device MU...

Page 40: ...d Gasket 2 segmented TriClamp and rubber gasket Clamp and gasket to secure tube assembly to liner Rubber Bellows assembly 3 rubber bellows with base plate Bellows are placed in the drum and used to pu...

Page 41: ...ethylene FDA approved resins Meets FDA 21 CFR 177 1520 for food contact EU approved resins EU 10 2011 EU 1935 2004 Additives None No BPA No animal or GMO derived components Fill port Open top Vent Sam...

Page 42: ...Wine Technology by Yair Margalit This is book for commercial wineries but very well written Explains simple to complex concepts A must read Wine Science by Ronald S Jackson This is standard textbook f...

Page 43: ...k them up If all else fails or you want to ferment over Christmas you can use frozen must This is essentially grapes that have been destemmed and frozen Be careful that you are buying frozen whole gra...

Page 44: ...fermentor JR You need an area about 2 ft x 2ft The unit is 20 inches in diameter and 28 inches tall The space should be cool 60 70 F You need a 110 VAC household power outlet What do I need besides th...

Page 45: ...ypically the yeast nutrients are added and mixed into the grapes right before the yeast addition You need to measure pH of the grapes and adjust by adding tartaric acid if needed Winemakers add some p...

Page 46: ...wine This means that all the sugar in the grapes has been converted to alcohol and the residual sugar is less than 1 This is very important because if there is residual sugar the wine might referment...

Page 47: ...are fully deflated Bellows do not seem to inflate during punch The bellows take about 3 to 5 minutes to inflate You can verify inflation by looking into the clear lid If the bellows are not inflating...

Page 48: ...ier offer many options for home bottling You can also buy custom labels for your wine Can I sell my wine No Federal law prohibits sale of homemade wine It is expressly for your personal consumption Do...

Page 49: ...ems such as fermentation liners are meant for single use They are warranted against any defects and will be replaced if found to be defective Damage caused by improper installation or user error is no...

Page 50: ...hase except that with respect to GOliners and SmartBarrel Liners or any other Product that has a one time use the foregoing warranty expires upon use THIS LIMITED WARRANTY IS GRANTED ONLY TO THE ORIGI...

Page 51: ...ve Remedy provided herein 5 ASSUMPTION OF RISK and RELEASE AND WAIVER a Assumption of Risk PURCHASER acknowledges that the Products are currently experimental in nature and assumes any and all risks a...

Page 52: ...of the Products or this Agreement Purchaser hereby acknowledge and agrees as follows a California Code of Civil Procedure section 1542 provides that A general release does not extend to claims which t...

Reviews: