


E6 Series User Manual Page 26 of 28
19.0 Formatting the Player
19.1 Understanding File systems
Your player is like a small hard drive of data, and like any such storage
device, it has a
file system
. If you wish to reformat the player's file system,
you may use any standard formatting tools as long as it is formatted with
FAT32 file system.
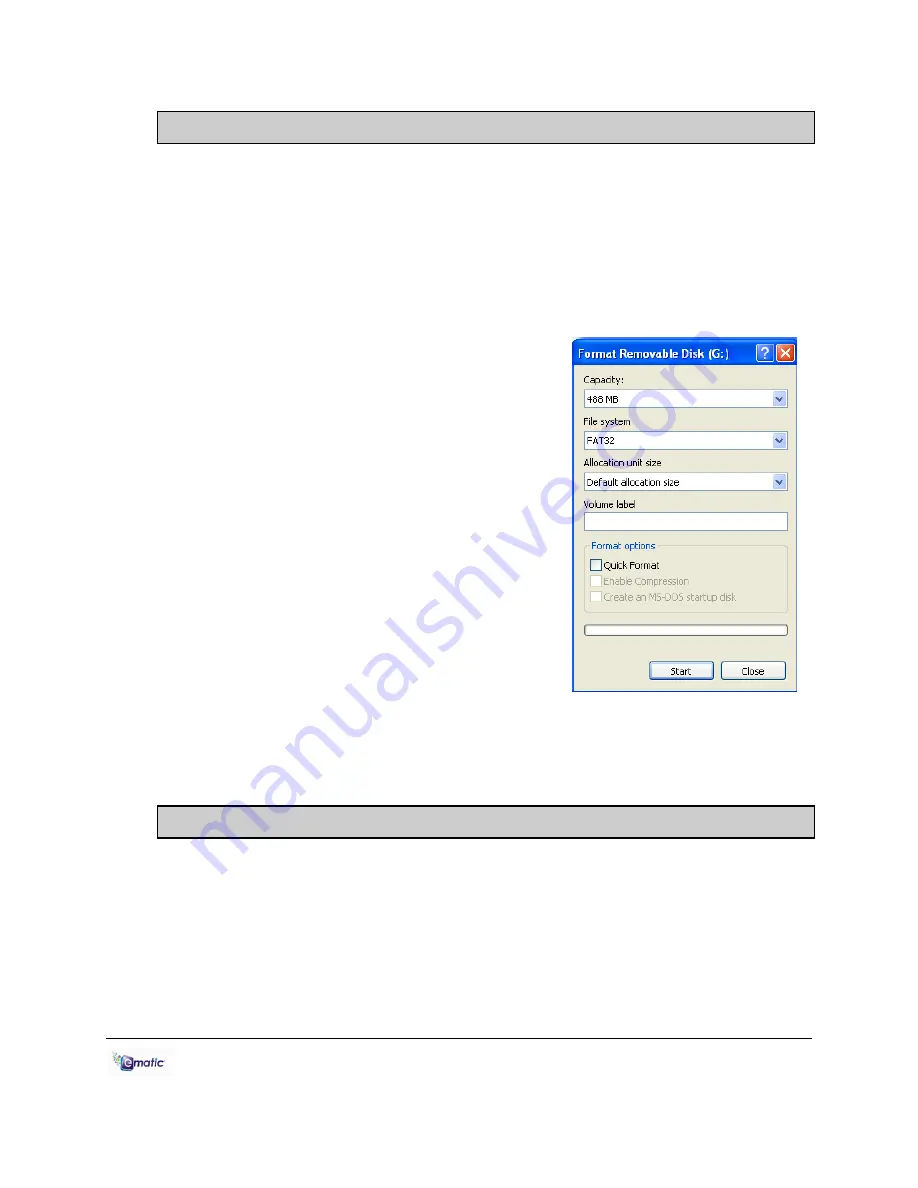
19.2 Reformatting Your Player in Windows
Follow these steps to reformat your player:
Connect the player to your computer via
the USB cable.
Double-click
My Computer
. Find the icon
representing the player, which will
probably appear as
Removable Disk
.
Right-click the player's icon and select
Format
.
Make certain the
file system is FAT32
;
otherwise the player will not work!
Click
Start
.
When the Warning message appears, click
OK
.
Once started DO NOT remove
the USB cable as this may damage
the player!
Once the formatting is complete, you may access the drive through
My
Computer.
20.0 TV OUT
You can connect your player to your TV and use it to watch movies, view
photos, or listen to music. To do so, go to
System Settings
>
Other Settings
on
the player, then set the TVOUT setting to ‘ON’ (from this menu, you can also
select between PAL and NTSC formats, in the USA, this should be NTSC).
Finally, connect the small end of the included RCA cables to the TV-OUT port
on your player, then connect the large end of the cables to your television. Now
when you play media on the device it will stream to the television. You must turn
‘OFF’ the TVOUT Setting in order to watch videos on the device again.