


36
Installation and maintenance instructions EASICOM 3 0020239562_04
1
A
B
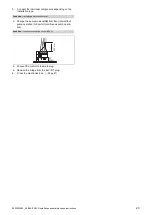
3.
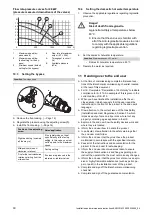
Remove the gas pipe
(1)
.
1
2
3
5
4
A
B
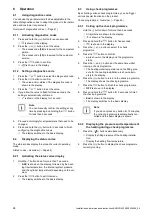
4.
Remove the temperature sensor
(3)
.
5.
Remove the upper clip
(1)
.
6.
Remove the lower clip
(4)
.
7.
Remove the supply pipe
(5)
.
2
2
3
B
1
A
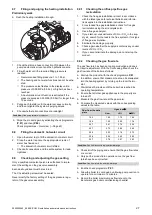
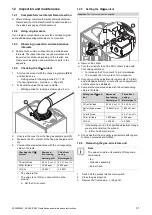
8.
Remove the upper clip
(1)
.
9.
Remove the lower clip
(3)
.
10. Remove the return pipe
(2)
.
1
A
2
3
4
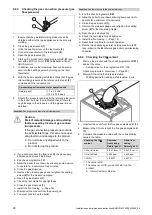
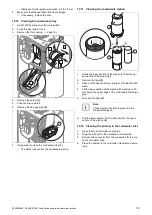
11. Remove the clip underneath the condensate tray
(1)
.
12. Undo the four screws
(2)
.
1
2
B
C
A
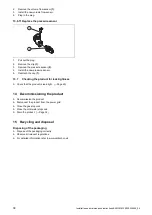
13. Lift the heat exchanger up slightly and remove it to-
gether with the condensate tray.
14. Remove the ignition transformer
(1)
.
15. Remove the ignition electrode
(2)
.
16. Use the screws to secure the ignition transformer and
the ignition electrode to the new heat exchanger.
17. Install the new heat exchanger in reverse order.
13.6.5 Replacing the pump head
1
2
1.
Disconnect the pump cables from the electronics box.
2.
Undo the four screws
(1)
.
3.
Remove the pump head
(2)
.
4.
Replace the O-ring.
5.
Use four screws to secure the new pump head.
6.
Connect the pump cables to the electronics box.
Summary of Contents for EASICOM 3 24c
Page 1: ...en Installation and maintenance instructions EASICOM 3 24c 28c 0020239562_04 31 07 2020 ...
Page 54: ......
Page 55: ......


