


0020313973_01 Compact Installation and maintenance instructions
37
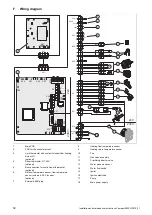
6.
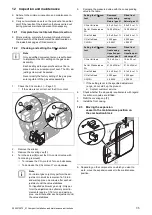
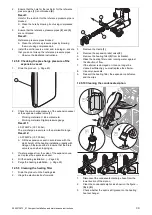
Undo the four nuts
(1)
on the burner flange
(2)
.
A
1
B
7.
Remove the entire compact thermal module
(1)
from
the heat exchanger.
8.
Check the burner and burner insulating mat for dam-
age. (
9.
Check the heat exchanger for damage.
Result:
Heat exchanger damaged
▶
Replace the heat exchanger (
→
"Heat exchanger"
spare parts instructions).
10.
Check the heat exchanger for dirt.
Result:
Heat exchanger dirty
▶
Clean the heat exchanger. (
11.
Check the insulating mat on the heat exchanger for
damage.
Result:
Insulating mat damaged
▶
Replace the insulating mat (
→
Spare parts instruc-
tions for the heat exchanger insulating mat).
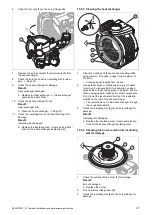
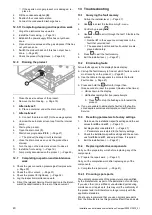
12.5.3 Cleaning the heat exchanger
1
2
3
4
1.
Clean the heating coil
(2)
on the heat exchanger
(4)
using water or, if required, vinegar (to a maximum of
5% acid).
–
Cleaning agent reaction time: 20 min
2.
Use a plastic brush or sufficiently strong jet of water
to remove the loosened dirt (for example, by using a
spray bottle with ascending pipe). In doing so, ensure
that no spraying water reaches the other components.
Do not point the jet of water directly at the insulating
mat
(3)
on the rear of the heat exchanger.
◁
The water flows out of the heat exchanger through
the condensate siphon.
3.
Check the insulating mat
(3)
on the burner flange for
damage.
Result:
Insulating mat damaged
▶
Replace the insulating mat (
→
Spare parts instruc-
tions for the heat exchanger insulating mat).
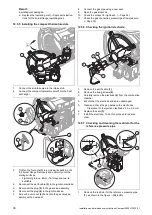
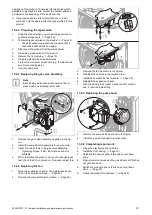
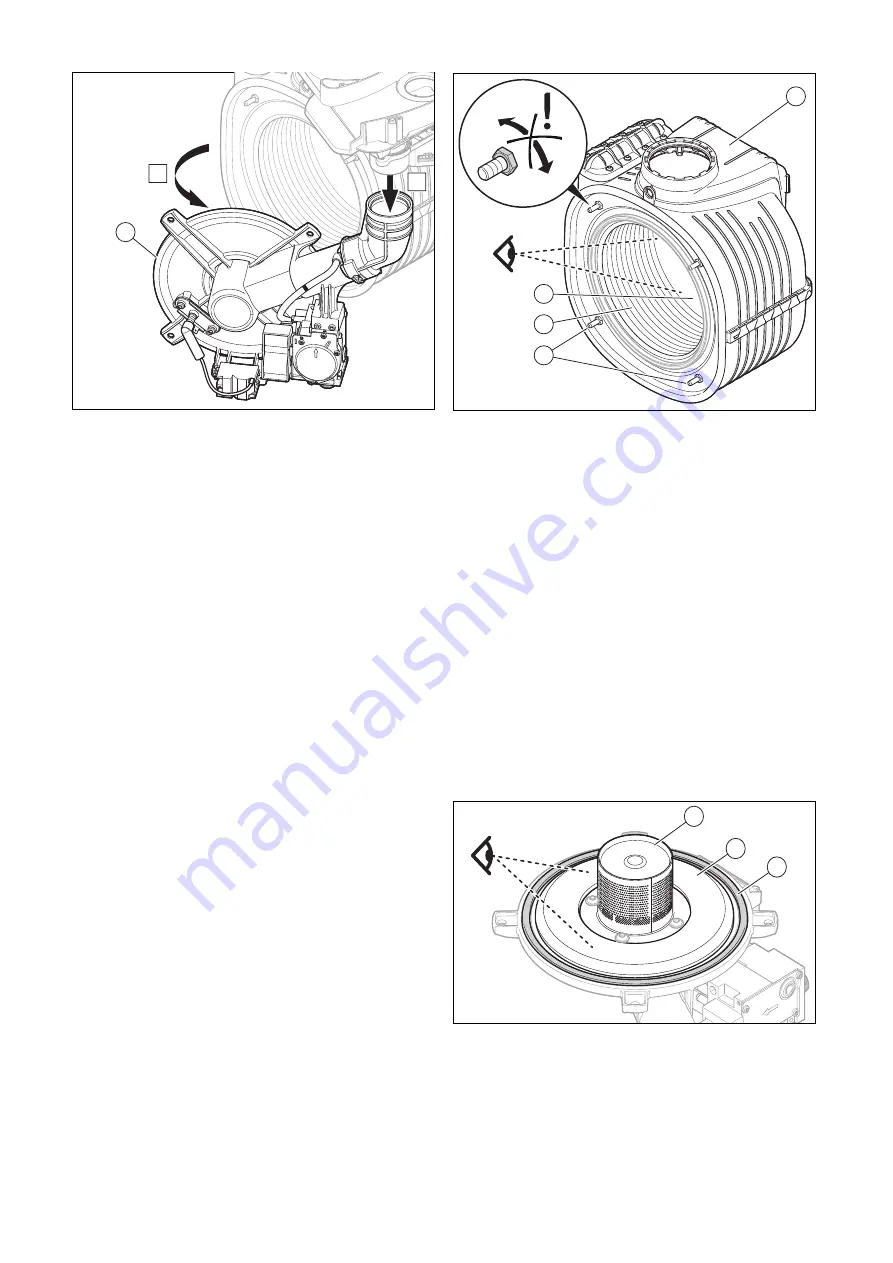
12.5.4 Checking the burner and burner insulating
mat for damage
1
2
3
1.
Check the surface of the burner
(1)
for damage.
Result:
Burner damaged
▶
Replace the burner.
2.
Fit a new burner flange seal
(3)
.
3.
Check the insulating mat
(2)
on the burner flange for
damage.
Summary of Contents for Compact 24c-AS/1
Page 59: ......


