


21
13.
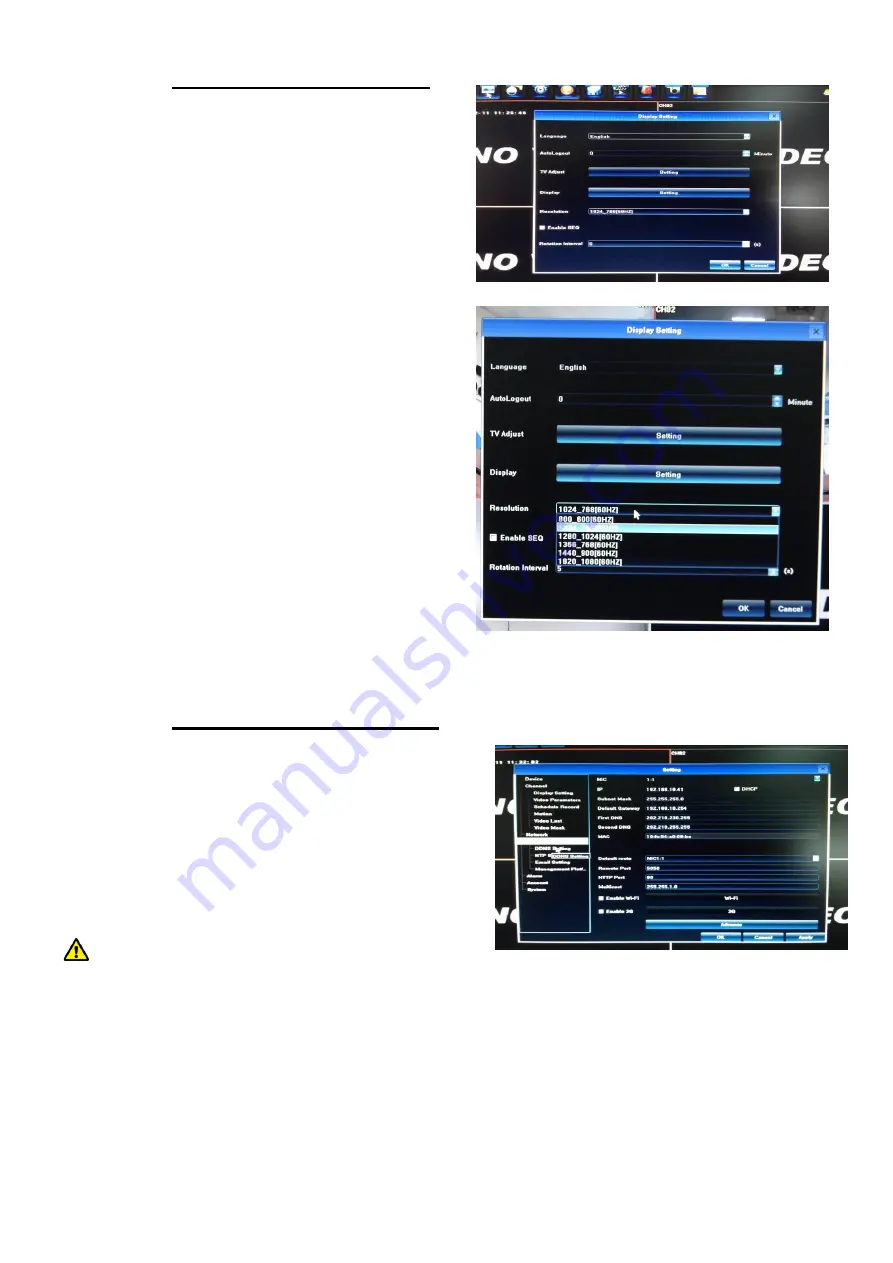
HDVS IP Display Setting
Click
【
Display
】
on the menu bar; Show the
menu as the right side:
1)
Language: select different language according
to the necessary, after that need restart the
device.
2)
Auto Logout: system automatic logout and
lock time.
3)
TV Adjust: adjust the display position.
4)
Display: set monitor lightness, contrast,
saturation and color.
5)
Resolution: the default setting is 1024x768;
please select the best resolution according to
the monitor or it will affect the image definition.
6)
Rotation interval: Setup the time interval of
rotation. Tick “Enable SEQ” to start rotation.
14.
HDVS IP Network Setting
Connect HDVS IP Series with network cable to
LAN switch. After power on, click
【
Setting
】
on the
menu bar
Network
Network Setting to enter
setting menu, set HDVS IP address, subnet mask,
and gateway and so on. Then use PC to run ping
command to check HDVS IP has connected with
LAN
Notice: IP address might conflict with each other,
please set the gateway correctly, or HDVS might fail to work.
Please ensure all the IP addresses in LAN are unique.
Remote port setting:
the default is 5050, if there are several IPs in the LAN, need to change this
port is for login IP by IE, CMS. Login IP by mobile, the port should be +3 based on the device port.
HTTP port:
the default port is 80, suggest modifying it. This port is for login IP by IE, input IP
address or domain name; need to add colon and HTTP port number.