background image

3

Bench Top Drill Press

1. Install the machine on a flat, level bench top that is sturdy enough to support the weight and vibrations of

the drill press.

2. Always wear protective safety glasses or goggles when operating the machine.
3. Clear woodchips, sawdust and metal chips before operation.
4. Make sure head and table supports are secure before drilling
5. Check all nuts, bolts and screws for tightness regularly. Vibration during operation may cause hardware to

loosen.

6. Use the correct drill bit. Ensure that you have selected the correct drill bit and drill speed based on the

workpiece's material and thickness. Ensure that there are no nails or other hard objects in the path of the

drill bit. Take care not to force the drill bit, you may permantly damage the bit and the workpiece.

7. Do not use a drill bit longer than 175mm (150mm outside chuck jaws).
8. Do not place drill bit against workpiece before turning power switch on. Turn on the drill before and allow

the bit to come up to full speed before drilling.

9. Make sure you are drilling at the correct speed based on hole size and workpiece material.
10. Make sure there are no nails or other hard obstacles in the way of the drill bit inside the workpiece
11. Jog the motor before drilling to ensure that drill bit is secure and motor is in working order.
12. Hold workpiece securely at a safe distance from the drill bit or use clamps or vise. Never drill into an

unsecured workpiece.

OPERATION INSTRUCTIONS

OPERATION INSTRUCTIONS

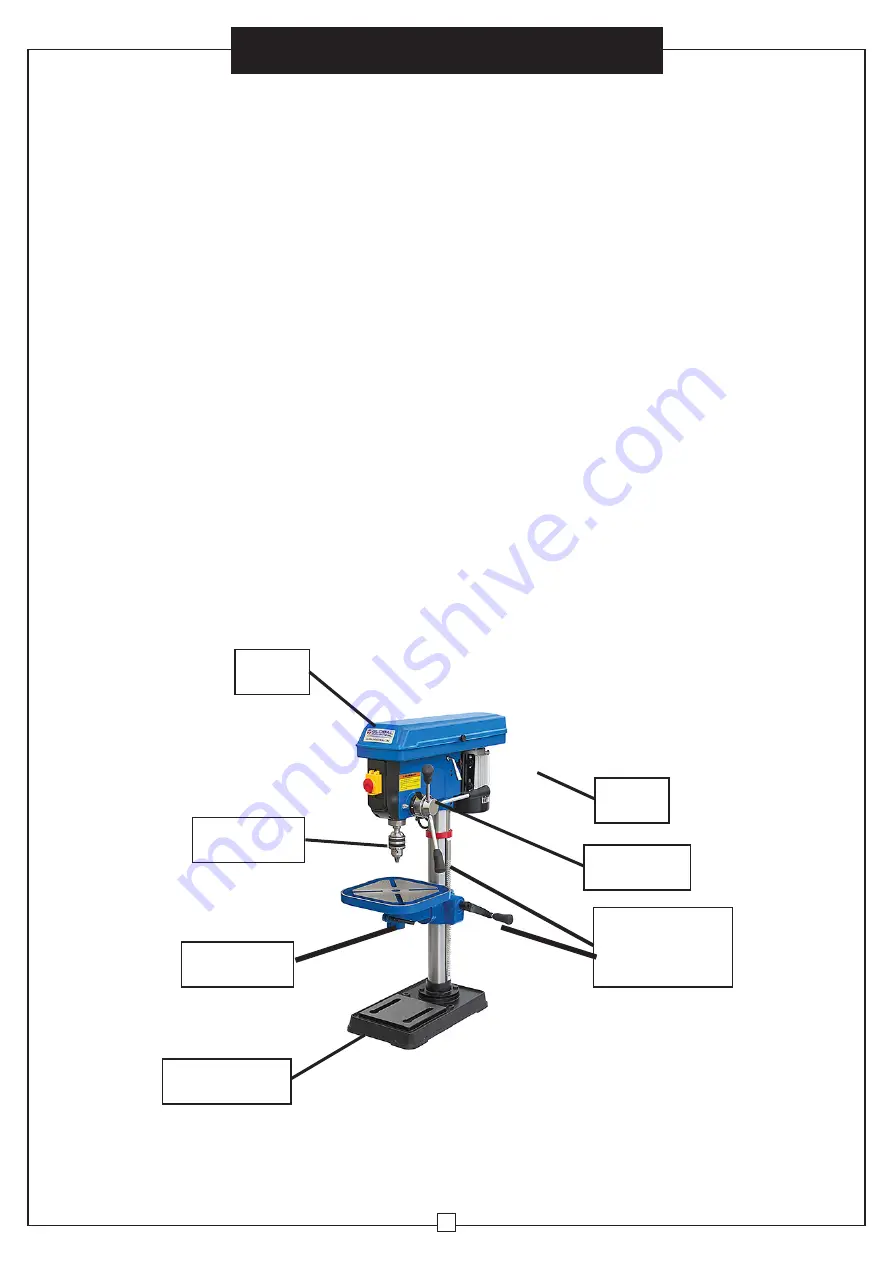
Head

Drill Chuck

Motor

Feed Crank

Lifting Rack 

and Crank

Base Platform

Work Table

Summary of Contents for 257272

Page 1: ...645 2986 Service la client le Canada 888 645 2986 WARNING Read and understand all instructions before operating this machine Failure to follow these instructions may result in electric shock fire and...

Page 2: ...es or moving parts Cease operation and replace Power Cords immediately if damaged 10 Disconnect power cord before making any adjusments maintenance or storing the machine 11 Avoid Accidental start ups...

Page 3: ...he drill bit Take care not to force the drill bit you may permantly damage the bit and the workpiece 7 Do not use a drill bit longer than 175mm 150mm outside chuck jaws 8 Do not place drill bit agains...

Page 4: ...y Description Description Description Description Head Assembly Table Base Platform Column Assembly Table Support Assembly Lifting Crank Drill Chuck and Key Arbor Feed Handles Hardware not all picture...

Page 5: ...g rack using the set screw it came with 4 Lift the Head Assembly 1 on top of the column and slide it down as far as it will go Align the Head Assembly with the Base Platform 3 Tighten the set screw to...

Page 6: ...t the scale to drill different holes to equal depths 5 The spindle can be locked at different heights Set the spindle to the desired height using the feed crank then tighten the feed crank set screw T...

Page 7: ...500 NR 400 1000 250 BRAD POINT BITS 1 8 1800 1200 1500 NR NR NR 1 4 1800 1000 1500 NR NR NR 3 8 1800 750 1500 NR NR NR 1 2 1800 750 1000 NR NR NR 5 8 1800 500 750 NR NR NR 3 4 1400 250 750 NR NR NR 7...

Page 8: ...y DO NOT TURN ON DRILL PRESS WITH CHUCK DO NOT TURN ON DRILL PRESS WITH CHUCK KEY STILL IN CHUCK CHUCK KEY MAY BE FORCIBLY EJECTED AND CAUSE PERSONEL INJURY OR PROPERTY KEY STILL IN CHUCK CHUCK KEY MA...

Page 9: ...clear chips Drill bit is dull Sharpen or replace bit Drill bit is bent Replace bit Drill bit is improperly installed Reinstall bit properly Drill chuck is improperly installed Reinstall chuck properl...

Reviews: