Page
19
of
25
Dante Controller TIP
If you have never run Dante controller before then make sure that on the bottom left
of the Dante controllers’ screen ‘P’ or ‘S’ is next to a green square as this indicates
that it is connected to a network. By clicking ‘P’ or ‘S’ a pop up box opens to allow
you to set what network interface the controller is using.
Device Not Showing Up In Dante Controller
If your Dante
®
device does not show up in Dante
®
Controller then the most likely
issue is that the device’s IP Address is not appropriate for your network.
A) It maybe that the device is set to obtain an IP address automatically using
DHCP (this is the default configuration) and your network is setup for fixed IP
addresses only and does not have a DHCP server.
B) It maybe that the device has had a fixed IP address assigned but that this
address is not suitable for your network.
The solution to both scenarios is basically the same.
1) You must connect your Dante
®
device directly to the Ethernet port of your
computer using an Ethernet cable.
2)
Make sure that your computer is set to ‘Obtain an IP address automatically’
3) After a few minutes the Dante
®
device should now appear in Dante
®
Controller.
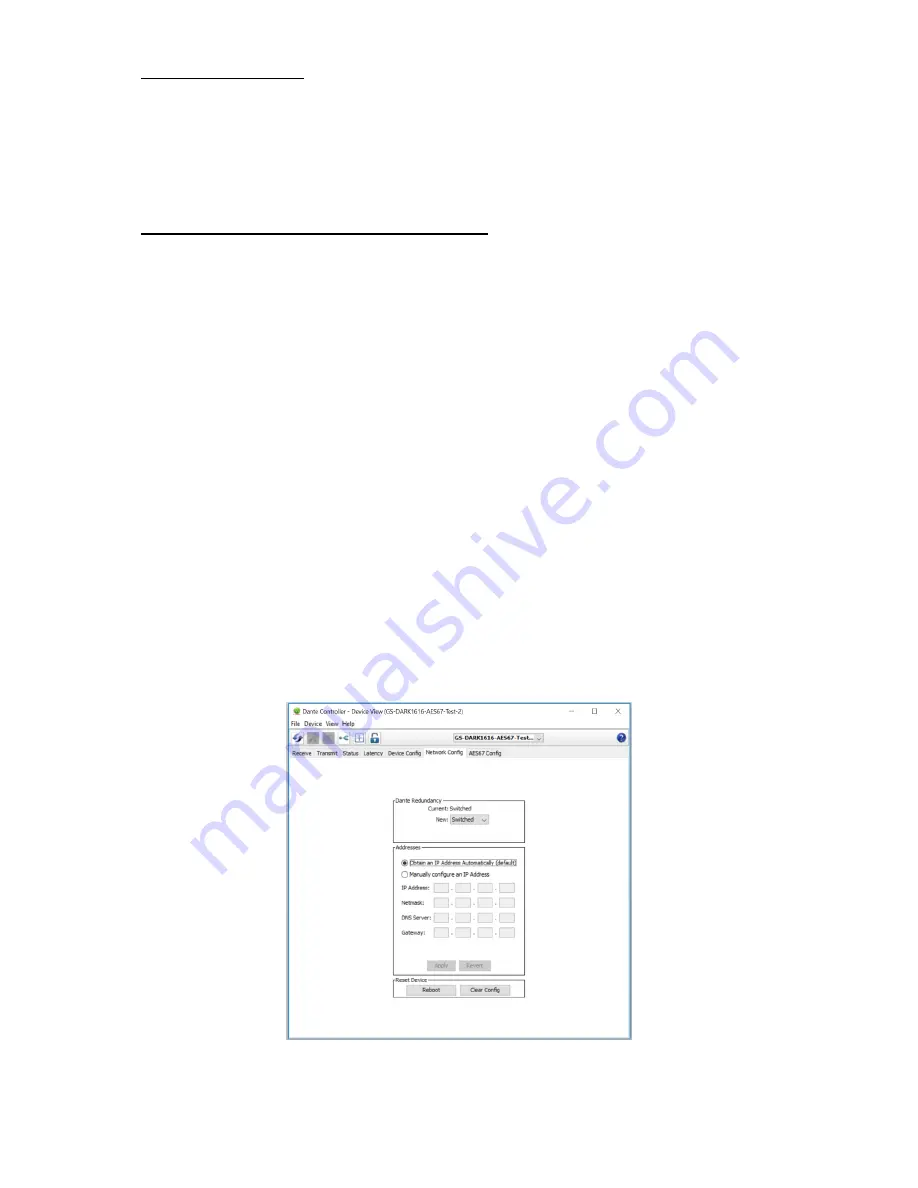
4) Double click the device name to open up device view.
5)
Open up the ‘Network Config’ tab
6)
Either turn on ‘Obtain an IP Address Automatically’ or correctly configure the
‘Manually configure an IP Address’ options for your network.
7)
Click on ‘Apply’ to confirm the new settings, then disconnect the computer and
reconnect the Dante
®
device to your network.


