background image

14

4. 將榨汁筒及旋轉架安裝到榨汁杯上,並確保安裝位置準確。
    (如下圖)

確保榨汁筒上的箭頭標示和榨汁杯上
的白色圓點對準並緊扣到位。(如上圖)

請確保螺旋推進器的六角形
位置 

(A) 

和主機上的六角形旋

轉機頭 

(B) 

完全連接

5. 將螺旋推進器向下方安裝到榨汁筒中間。

小貼士 :

(A)

(B)

Summary of Contents for gemini GSJ15S

Page 1: ...1 MODEL NO GSJ15S 150W SLOW JUICER A GILMAN GROUP BRAND...

Page 2: ...parts Children shall not play with the appliance Do not leave the appliance unattended when connected to the mains supply Keep hair loose clothing fingers and all parts of the body away from openings...

Page 3: ...is damaged it must be replaced by an electrical technician or a person with similar qualification in order to avoid any hazards Never use the appliance in the vicinity of flammable material NOTE The...

Page 4: ...ueezing Screw 3 Strainer 4 Spinning Rack 5 Juicing Jug Product REview 1b 1a 2 5 Juice outlet Pulp outlet 6 ON OFF or Reverse button 7 10 11 8 9 3 4 6 Main unit 7 Cleaning Brush 8 Pusher 9 Pulp Cup 10...

Page 5: ...image 2 Fit the top of hopper into hopper 3 Fit the strainer into spinning rack Assembling your Slow Juicer Insert the C lock area of juice outlet stopper to the embossed part of juice outlet as above...

Page 6: ...ack into the juicing jug refer the step of TIPS below and turn until it locates in position Ensure the arrow of the strainer and white dot on the jug should be aligned and hold in position as above im...

Page 7: ...d Pull out the rubber plug slightly and clean After clean re install the rubber plug according to the diagram below 1 Pull out the rubber plug by clockwise direction from the channel of pulp outlet wh...

Page 8: ...r the pulp outlet on the left of the unit and position the juice cup under the juice outlet on the right of the unit Prepare your ingredients by cutting and de seeding them if required Plug the slow j...

Page 9: ...y The motor has stopped There is a blockage in the juicing jug Press the reverse button to clear the blockage The motor has cut out due to over use Switch off unplug and allow to cool down for 10 minu...

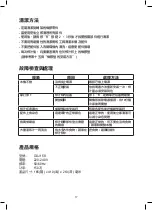
Page 10: ...10 0 8 8 R 2 3...

Page 11: ...11 20 20...

Page 12: ...12 1a 1b 2 3 4 5 6 7 8 9 10 11 1b 1a 2 5 6 7 10 11 8 9 3 4...

Page 13: ...13 1 3 3 2 C...

Page 14: ...14 4 A B 5 A B...

Page 15: ...15 6 1 1 2 2 3 3 1 2 3...

Page 16: ...16 ON R R 2 3 2 2 ON O R ON 20 20...

Page 17: ...17 R 2 3 R 10 GSJ15S 220 240V 50 60Hz 150 165 x 410 x 210...

Page 18: ...18...

Page 19: ...19...

Page 20: ...20...

Reviews: