background image

42

ENGLISH

Recovery Update Notices

42

How to restore your W468N to factory defaults

Time to restore: When your computer is infected by virus or there is 
any other reason that you want to restore your operation system to 
the factory defaults.

Execute Xpress Recovery2 Lite (XR2 Lite) Professional Recovery 
Utility.Please take the following procedures:

1.  Start up your computer first. Restart your computer if it has 

already booted into system.

Note:  If your system OS is Microsoft Vista, you have to insert 

the driver DVD and boot from the ODD device to run the 
Express 2 Recovery function.

2.  Right after you see the startup screen (such as trademark, logo 

or text), the DOS screen will appear. Press F9.

*  F9 is a typical hotkey to restore professional settings. Please 

consult with your computer manufacture if your hotkey doesn't 
function.

3.  There are three options on the menu: "RESTORE" (to restore 

data), "ABOUT" (to display XR2 Lite related information) and 
"REBOOT" (to cancel the recovery and restart the computer). 
We recommend you to select "RESTORE" to restore factory 
defaults.

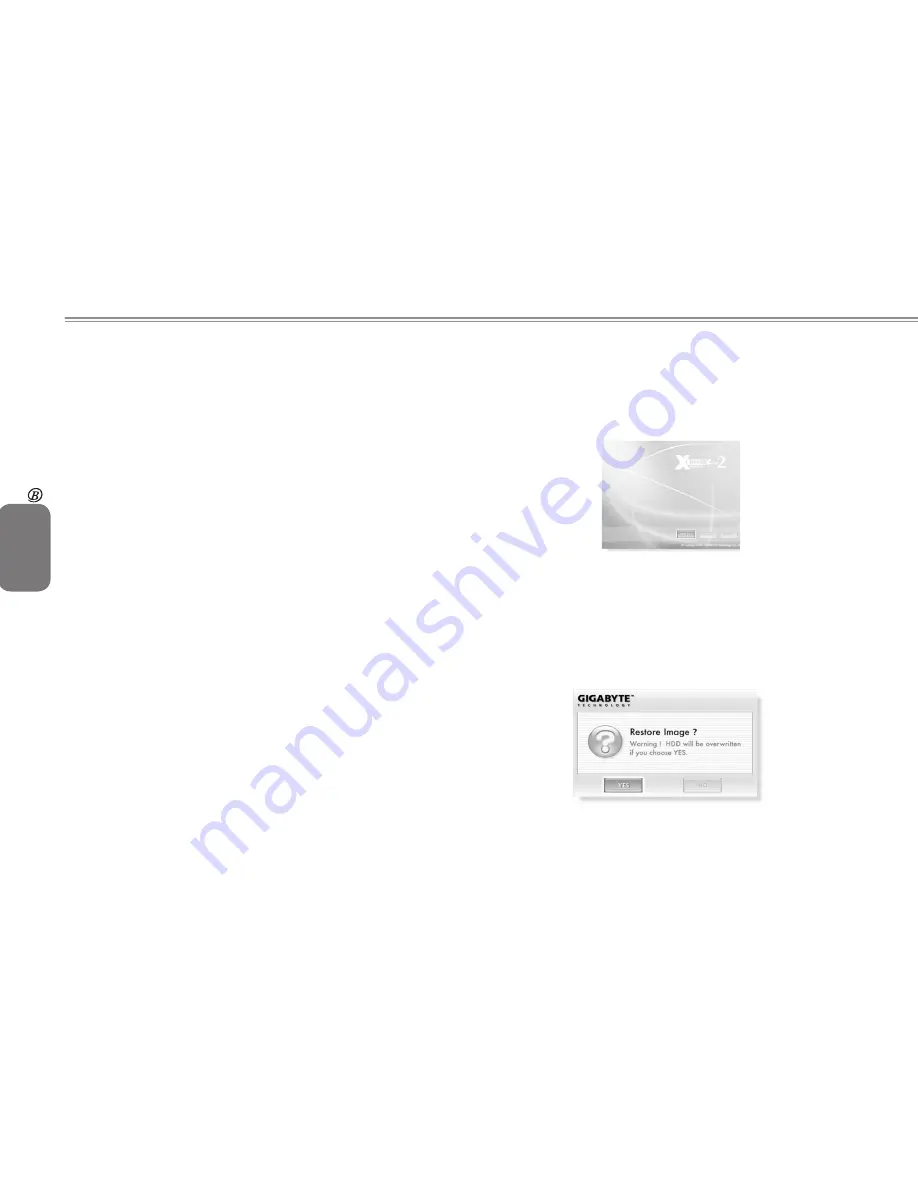
4.  Then the prompt "Restore Image?" will appear on the menu. 

We recommend you to select "YES" to restore an image 

file.* "Image file" is a compressed file that compresses all the 
Windows operation system data. Recovery an image file allows 

you to restore your operation system to factory defaults.

Summary of Contents for W468N

Page 1: ...onic mechanical photocopy recording or otherwise without prior written consent Trademarks Product names used herein are for identification purposes only and may be the trademarks of their respective companies Microsoft MS DOS Windows and Windows Sound System are trademarks of Microsoft Corporation Intel Centrino Centrino Duo Pentium M Banias Calexico are registered trademarks of Intel Corporation ...

Page 2: ...Do not push objects into the air vents or openings of your computer or accessories Doing so can short out interior components and may cause fire or electric shock When installing memory modules ground yourself by touching a grounded conductive surface such as a device with a grounded plug Avoid touching the pins and leads on the memory module or internal circuitry of the computer When setting up t...

Page 3: ... of the extension cable Place the AC adapter in a ventilated area such as a desktop or on the floor when you use it to run the computer or to charge the battery Do not cover the AC adapter with papers or other items that will reduce cooling also do not use the AC adapter while it is inside a carrying case Disconnect power cords and cables by grasping the connector not by pulling on the cable itsel...

Page 4: ...ls where you live or look for a rechargeable battery recycling website that lists disposal locations near you Do not dispose of battery packs in a fire throw them in a trash receptacle put them in a recycling bin not intended for their disposal or otherwise discard them in a manner that may result in their being hazardous to the environment Internal Modem Warnings CAUTION When using your telephone...

Page 5: ...vidual PSTNs provided in different countries the approval does not in itself give an unconditional assurance of successful operation on every PSTN termination point In the event of problems you should contact your equipment supplier in the first instance Important Safety Instructions Read these instructions carefully Save these instructions for future reference 1 Follow all warnings and instructio...

Page 6: ...roduct was exposed to rain or water d If the product does not operate normally when the operating instructions are followed adjust only those controls that are covered by the operating instructions Improper adjustment of other controls may result in damage and will often require extensive work by a qualified technician to restore the product to normal condition e If the product has been dropped or...

Page 7: ... is protected by methods and claims of certain U S patents and other intellectual rights owned by Macrovision Corporation and other rights owners Use of this copyright protection technology must be authorized by Macrovision Corporation and is intended for home and other limited viewing uses only unless authorized by Macrovision Corporation Reverse engineering or disassembly is prohibited ...

Page 8: ...to read the manual from the beginning to end Simply find your way to the section that interests you using the table of contents or browse through the manual You will come across the following icons in the manual Helpful pointers and tricks to get more from your notebook To help you note and avoid possible damage to your notebook s hardware or software or loss of your work Points out possible damag...

Page 9: ...Power USB Port 6 1 3 6 IEEE 1394 Port 7 1 3 7 New Card Slot For PCI Express Card 7 1 3 8 Multiple Digital Media Card Slot 7 1 3 9 Audio Ports 7 1 4 Rear Side 7 1 5 Bottom Side 8 1 5 1 Battery Pack 8 1 5 2 Battery Release Latch 8 Chapter 2 Operating Your Notebook 2 1 Keyboard and Touch Pad 10 2 1 1 Numeric Keypad 10 2 1 2 Keyboard Shortcuts 10 2 1 3 Windows Logo Key Functions 11 2 1 4 Touch Pad 12 ...

Page 10: ...king With Extra Battery Packs 24 5 1 10 Maximizing Battery Life 24 Chapter 6 The BIOS Setup Program 6 1 Introduction 26 6 2 Navigating through the BIOS Setup Program 26 6 2 1 Accessing the BIOS Setup Program 27 6 2 2 Launching Submenus 28 6 2 3 Saving Changes and Exiting the Setup Program 28 6 3 The Main Menu 28 6 4 The Advanced Menu 29 6 5 The Security Menu 30 6 6 The TPM State menu 33 6 7 The Bo...

Page 11: ...W468N Notebook User s Manual ENGLISH Introducing Your Notebook Chapter 1 Introducing Your Notebook ...

Page 12: ...s Power Status 1 1 1 LCD Module Latch The LCD Module Latch secures the display case to your notebook To open the display slide the latch to the right and lift the display When you close the display the latch secures it automatically 1 1 2 Built in Camera The built in camera features a 2 0 mega pixel CMOS web camera 1 1 3 Built in Microphone The built in microphone allows you to communicate without...

Page 13: ...e notebook offers these buttons for quick launch programs and functions Internet access button Email button Q Charging button Power USB button Mute button Keyboard Indicators HDD access indicator Num Lock On Off indicator Caps Lock On Off indicator Scroll Lock On Off indicator 1 1 6 Keyboard The keyboard includes a numeric keypad and the Microsoft Windows logo key See 2 1 Keyboard and Touch Pad fo...

Page 14: ...unication Switch Turns the wireless communication function on or off The wireless communication LED on the front side of notebook lights when the function is activated 1 1 11 Device Status Indicators Power Status The LEDs on the front side of notebook indicate the device and power status 1 Power On Blue 2 Battery Charge Blue Amber 3 Wireless Blue Bluetooth Amber The flashing Power On LED indicates...

Page 15: ... size external keyboard or printer to the computer USB is a peripheral expansion standard that supports a data transfer rate up to 480 Mbps USB peripherals have a single standard for cables and connectors You can install and remove USB devices while the computer is on This is known as hot swapping 1 2 3 AC Adapter Connector The AC adapter connector allows you to connect an AC adapter when your not...

Page 16: ...e RJ 45 network jack allows you to connect your notebook to a local area network LAN Be careful not to plug the telephone line into the slightly larger network connector 1 3 3 Modem Jack The modem jack allows you to connect the notebook to a telephone line with a standard RJ 11 connector 1 3 4 S Video out Port The S Video out port allows you to connect an external display device like TV set or dev...

Page 17: ... Supports 54mm type PCI Express Card For more information see 4 1 PCI Express Cards 1 3 8 Multiple Digital Media Card Slot Supports one SD MMC MS card which is used in digital still camera and various forms of portable information equipment 1 3 9 Audio Ports You can connect a headphone or an external speaker to the port and a microphone to the port The built in speakers are disabled when a device ...

Page 18: ...tery pack installed you can use your notebook without connecting it to an electrical outlet For more details see 5 1 Battery To remove the Battery Pack 1 Move the Battery Lock Switch to the right Unlock position 2 Slide the Battery Release Latch to the left and gently pry the Battery Pack from the computer chassis 1 5 2 Battery Release Latch The Battery Release Latch secures the battery pack To re...

Page 19: ...W468N Notebook User s Manual ENGLISH Operating Your Notebook Chapter 2 Operating Your Notebook ...

Page 20: ...pad press The indicator will light when the numeric lock is on To disable the numeric keypad press again To use the primary function of a dual function key when the numeric keypad is enabled press and the desired key 2 1 2 Keyboard Shortcuts Sleep Wireless Bluetooth On Off To enable this function you need to install Wireless Select Switch Switches Display Mode LCD CRT TV LCD CRT Simultaneous LCD T...

Page 21: ... Lock 2 1 3 Windows Logo Key Functions Opens Windows Explorer Opens the Run dialog box Opens the Search Results dialog box Opens the Search Results Computers dialog box when your notebook is connected to a network Opens the System Properties dialog box To adjust keyboard operation including character repeat rate in the Control Panel click Hardware and Sound Keyboard ...

Page 22: ...u want to select and then press the left button one time and release it The functionality of these buttons depends on your software Double clicking is a common technique for selecting objects or launching programs You may also select object or execute applications from icons by double tapping This is similar to double clicking instead of pressing the Touch Pad buttons you tap the Touch Pad itself ...

Page 23: ...er printer Do not paste stickers or write on the finger printer Do not touch the sensor with a finger or any object with built up static electricity 2 1 6 1 Delete the Finger Printer Data Saved fingerprint data is stored in the non volatile memory inside the finger printer Fingerprint data are recommended to delete before you hand over the computer the others or dispose of it To delete the fingerp...

Page 24: ...14 ENGLISH Caring for Your Notebook 14 Chapter 3 Caring for Your Notebook ...

Page 25: ...er or a recommended computer cleaner 3 1 2 Cleaning the Display 1 Shut your notebook down turn it off and disconnect it from the electrical outlet and any external devices such as a printer 2 Remove the battery pack 3 Use a slightly moistened soft lint free cloth to wipe your notebook s display Use only water or a recommended computer cleaner 3 1 3 Cleaning the Touch Pad 1 Shut your notebook down ...

Page 26: ...ation such as in a car Do not put your notebook in a car that is directly exposed to the sun Do not place any heavy objects on the LCD monitor Use the AC adapter coming with the package instead of other adapters 3 2 Traveling Ø Identifying Your Notebook Ø Packing Your Notebook Ø Setting a Password Ø Travel Tips Ø If Your Notebook Is Lost or Stolen 3 2 1 Identifying Your Notebook Attach a nametag o...

Page 27: ...ry proof of ownership or of your right to use the computer if it is company owned to speed your passage through customs Investigate the customs regulations of the countries you plan to visit and consider acquiring an international carnet also known as a merchandise passport from your government Ensure that you know which electrical outlets are used in the countries you will visit and prepare the a...

Page 28: ...18 ENGLISH Peripherals 18 Chapter 4 Peripherals ...

Page 29: ...transfer and requires less power than PC Cards A PCI Express Card is not a bootable device 4 1 2 Installing a PCI Express Card PCI Express Cards with hot plug feature allow you to install and remove cards when your notebook is running The card will be detected automatically when installed Usually Express Cards have a mark or symbol to show which end to insert into the slot Insert the card accordin...

Page 30: ...ch resistance do not force the card Check the card orientation and try again 4 1 3 Removing a PCI Express Card 1 Push the card all the way to in to release it 2 Pull the card out of the slot 4 2 Adding and Removing SD MMC MS Cards Before removing an SD MMC MS card stop it running from the configuration utility on the taskbar Failure to do so could result in data loss Insert the SD MMC MS card into...

Page 31: ...W468N Notebook User s Manual ENGLISH 21 The Battery Chapter 5 The Battery ...

Page 32: ...arge is low Ensure any battery you use is compatible Failure to do so may risk fire or explosion For more details on purchasing compatible batteries contact your notebook retailer Batteries should never be disposed of with household waste Contact your local waste disposal or environmental agency for advice on disposing of used lithium ion batteries Only use the SQU 528 ID6 CBPIL48 battery pack wit...

Page 33: ... charged Connect the computer to an electrical outlet and allow the battery to fully charge indicated by the battery indicator light on the front panel of the notebook Once a battery pack is fully charged for the first time use your notebook on battery power until the battery discharges completely This will extend battery life and helps ensure accurate monitoring of battery capacity If necessary t...

Page 34: ...t may be a good idea to carry additional battery packs so you can quickly replace a discharged battery and continue working 5 1 10 Maximizing Battery Life A battery can be recharged many times but over time it will lose its ability to hold a charge To maximize battery life If you are not using your notebook for a long period remove the battery If you have a spare battery pack alternate the batteri...

Page 35: ...W468N Notebook User s Manual ENGLISH 25 The BIOS Setup Program 6 Chapter 6 The BIOS Setup Program ...

Page 36: ... section explains how to move around in the Setup program as well as how to specify and save your new settings A brief discussion of the optional settings among the different submenus follows 6 2 Navigating through the BIOS Setup Program Ø Accessing the BIOS Setup Program Ø Launching Submenus Ø Saving Changes and Exiting the Setup Program The Setup program has been designed to make it as easy to u...

Page 37: ...ate Boot Exit Item Specific Help System Time 19 34 35 Tab Shift Tab or Enter selects field System Date 01 01 2005 Hard Disk Hard Disk Model Name Quiet Boot Enabled System Memory 640 KB Extended Memory 102 2 MB BIOS Version XXXXX Language English US F1 Help Select Item F5 F6 Change Values F9 Setup Defaults Esc Exit Select Menu Enter Select Sub Menu F10 Save and Exit The Menu Bar The top of the Setu...

Page 38: ...amiliarize yourself with each of the submenus and their corresponding functions If you accidentally make unwanted changes to the current configuration go to the Exit menu and select Discard Changes 6 2 3 Saving Changes and Exiting the Setup Program Refer to The Exit Menu section of this chapter for detailed information on saving changes and exiting the Setup program 6 3 The Main Menu When the Setu...

Page 39: ... current version of the BIOS Language This field allows the user to change the languages between English and Japanese in the BIOS Setup Program 6 4 The Advanced Menu Selecting Advanced on the menu bar displays the Advanced Menu Each field on this menu is covered below PhoenixBIOS Setup Utility Main Advanced Security TPM State Boot Exit Item Specific Help AHCI Configuration Enabled Enhanced AHCI Wi...

Page 40: ... user password can be set Set User Password Set Supervisor Password PhoenixBIOS Setup Utility Main Advanced Security TPM State Boot Exit Item Specific Help Supervisor Password Is Clear Supervisor password controls access to the setup utility User Password Is Clear Set Supervisor Password Enter Set User Password Enter Password on boot Enabled Built in HDD1 Status Clear Built in HDD1 Password Select...

Page 41: ...ord in field of Enter New Password and re enter password in field of Confirm New Password for verification If verification OK Setup Notice Changes have been saved Continue The supervisor password is set complete after user press Enter If verification fails Setup Warning Passwords do not match Re enter p assword Continue The formats of the password are as follows Length No more than 8 characters Ch...

Page 42: ...ield of Enter New Password and re enter password in field of Confirm New Password for verification If verification OK Setup Notice Changes have been saved Continue The HDD supervisor password is set complete after user press Enter If verification fails Setup Warning Passwords do not match Re enter p assword Continue If password on boot is required the password must be set otherwise it cannot be en...

Page 43: ...hange Enable Activate Enable chip encrypted data and user from taking ownership Disable Deactivate Disable security chip prevents encrypted data from being used and Deactivated security chip prevents a user from taking ownership 6 7 The Boot Menu This menu allows the user to decide the order of boot devices to load the operating system Bootable devices include the diskette drive in module bay the ...

Page 44: ...r press Enter on the item Setup Confirmation Save configuration changes and exit now Yes No Yes Exit SETUP and reboot No Go back to previous screen Exit Discarding Changes Allows the user to exit Setup without saving changes to CMOS The following message is prompted when user press Enter on the item Setup Warning Configuration has not been saved Save before exiting Yes No Load Setup Defaults Allow...

Page 45: ...W468N Notebook User s Manual ENGLISH 35 Software Description Button Definition Chapter 7 Software Description Button Definition ...

Page 46: ...attery icon The main screen appears v Check to display the smart battery icon in the system tray Click to close window Click to apply default settings Click to apply changes and close window Click to close window without saving changes Check the battery charging mode you require Battery Full Charging The battery is charged to full capacity when connected to AC power The Q Charging button is disabl...

Page 47: ...nction which allows you to increase the power output when charging an external USB device such as a mobile phone or PDA Press the Power USB button to increase the power output to 1 ampere When not pressed power output is 0 5 ampere You can also charge external USB devices when the laptop is powered off but this button must be pressed in order to do so ...

Page 48: ...38 ENGLISH Specifications 38 Appendix A Specifications ...

Page 49: ...d Disk Drive HDD 9 5mm height 2 5 HDD Up to 160GB capacity 5400 RPM Easily removable Supports SATA 1 5Gb s 150MB s Optical Disc Drive ODD 5 25 12 7mm height DVD Super Multi Drive Options 256MB 512MB 1GB 2GB SO DIMM DDR II modules Mini card WLAN module MDC V1 5 Modem Bluetooth module Dual Band builds in antenna for WLAN communication Pointing Device Touch Pad with two buttons Left button Right butt...

Page 50: ...llent Power Management Function Suspend to RAM or Suspend to Disk mode by time out or by hot key HDD Local Stand By mode by time out LCD Local Stand By mode by time out Low battery alarm by beep Auto backlight off when LCD cover closed Full ACPI 1 0B support LCD Auto DIM mode by time out Easy Buttons Power button Internet button E mail button Power USB button Q Charging button Mute button AC Adapt...

Page 51: ...W468N Notebook User s Manual ENGLISH 41 Recovery Update Notices Appendix B Recovery Update Notices ...

Page 52: ...ery function 2 Right after you see the startup screen such as trademark logo or text the DOS screen will appear Press F9 F9 is a typical hotkey to restore professional settings Please consult with your computer manufacture if your hotkey doesn t function 3 There are three options on the menu RESTORE to restore data ABOUT to display XR2 Lite related information and REBOOT to cancel the recovery and...

Page 53: ...ate Notices 5 After all the selections have been made the screen shows RESTORE NOW indicating your computer is now recovering the operation system data When the recovery is complete the computer will automatically restart and restore to factory defaults ...

Page 54: ...44 ENGLISH Service Center C 44 Appendix C Service Center This appendix will list our global service centers for your W468N Notebook ...

Page 55: ...EL 1 626 854 9338 FAX 1 626 854 9339 WEB Address http www gigabyte us Japan NIPPON GIGA BYTE CORPORATION TEL 81 3 5791 5438 FAX 81 3 5791 5439 WEB Address http www gigabyte co jp China G B T TECH TRADING CO LTD Shanghai TEL 86 21 63410999 FAX 86 21 63410100 GuangZhou TEL 86 20 87586074 FAX 86 20 85517843 Beijing TEL 86 10 62102838 FAX 86 10 62102848 Chengdu TEL 86 28 85236930 FAX 86 28 85256822 Wu...

Reviews: