- 15 -
Hardware Installation
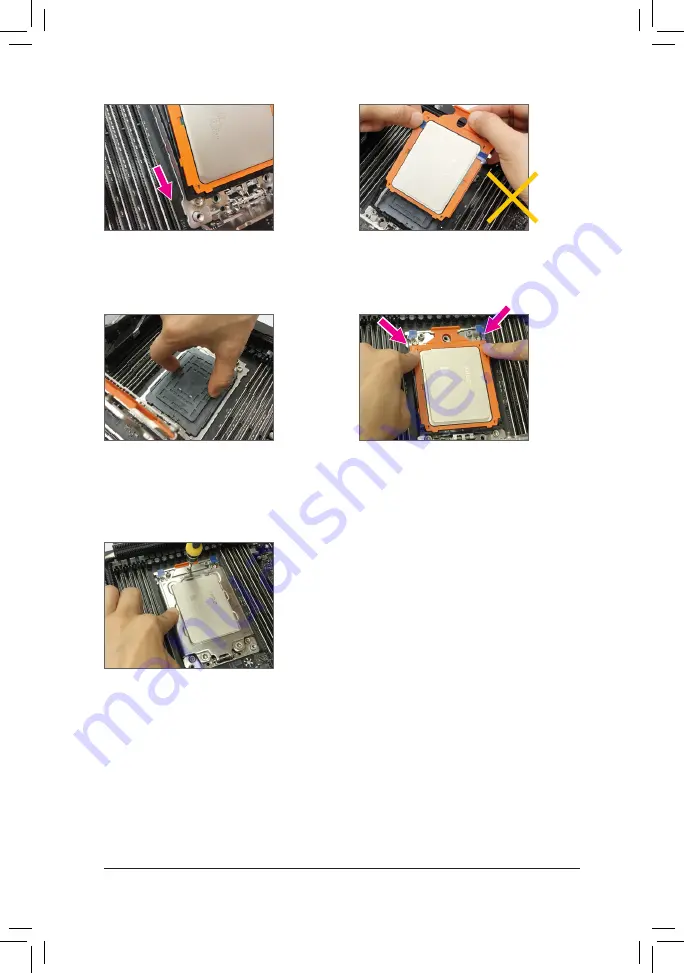
Step 8:
After installing the CPU, use two fingers to push down
on the upper portion of the sides of the CPU carrier
frame to fasten the rail frame back to the CPU socket.
Step 9:
Close the metal load plate. With one finger pressing
down on the load plate, begin tightening Screw 1
slightly. Then do the same to Screw 2 and Screw 3.
Next, fully tighten the three screws. Make sure the
motherboard is placed on a stable surface during
the tightening process.
Step 6:
Push the carrier frame into place and you will hear a
"click" sound when it is pushed to the bottom.
Warning!
The CPU carrier frame cannot be placed
outside the rails.
Step 7:
Remove the CPU socket cap.


