background image

English

3

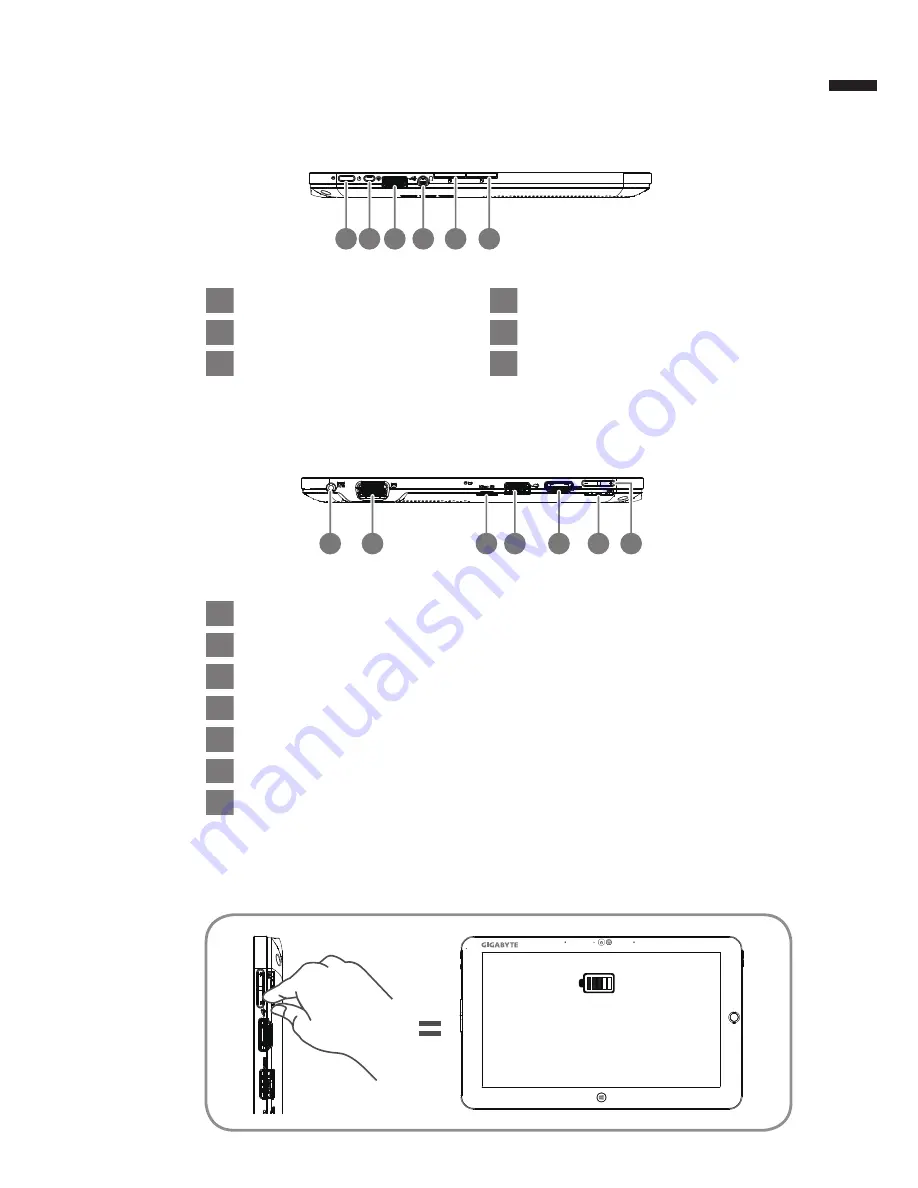
Left View

1

3 4

5

6

2

Tip:


Press the "-" volume button when the computer is off and the display will indicate the 
battery capacity status.

Main Battery

1

DC-in

2

D-sub (VGA) Port

3

Micro SD Card Reader

4

USB Port

5

HDMI Port

6

SIM Card Slot

7

Volume Control Key 

1

Power Button

2

Rotation Lock Button

3

USB Port

4

Headphone-in

5

Left Button of Mouse

6

Right Button of Mouse

Press "

+

" or "

-

"

 to control volume.

● Press and release the Power button to 

turn on the operation system. Press "

+

to enter into GIGABYTE BIOS Setup 

Utility. USB Keyboard is recomended to  

use for setting up BIOS functions under 

GIGABYTE BIOS Setup Utility.

● Press and release the Power button 

to  turn on the operation system. Press 

"

-

"

  to  enter  into  GIGABYTE  System 

Recovery. Use Directing Hot Key to 

operate GIGABYTE Smart Recovery.

Right View

1

3 4

5

6

2

7

Summary of Contents for S1185

Page 1: ...ction with any other antenna or transmitter End users and installers must be provided with antenna installation instructions and transmitter operating conditions for satisfying RF exposure compliance...

Page 2: ...if not installed and used in accordance with the instructions may causeharmful interference to radio communications However there is no guarantee that interference will notoccur in a particular insta...

Page 3: ...does not emit radio frequencies simultaneously from both antennas One of the antennas is selected automatically or manually by users to ensure good quality radiocommunication 2 An improper installatio...

Page 4: ...ses The run time of your battery will vary depending on the product s configuration and the applications that you run Routinely check the battery s charge status Battery terminals must avoid contact w...

Page 5: ...ge life Handling Precautions Do not disassemble crush or puncture a battery Do not short the external contacts on a battery Do not dispose of a battery in fire or water Do not expose a battery to temp...

Page 6: ...on the model at the point of your purchase GIGABYTE reserves the right to amend without prior notice For more detailed information please visit our website at http www gigabyte com 1 Connect the powe...

Page 7: ...er Status Indicator 7 Left Button of Mouse 8 Right Button of Mouse 9 Windows Button To control mouse direction press the directing hot key to simulate as left key of mouse Back to Windows 8 Style UI m...

Page 8: ...USB Port 4 Headphone in 5 Left Button of Mouse 6 Right Button of Mouse Press or to control volume Press and release the Power button to turn on the operation system Press to enter into GIGABYTE BIOS S...

Page 9: ...English 4 Base View Back View 1 1 2 1 Keyboard docking connection port 1 Rear Camera 2 Kickstand Enjoy movies and entertainment without any hassle by simply unfold the stand...

Page 10: ...ded automatically Users are able to tell from the driver version on the machine and online that decide to update drivers GIGABYTE Smart Recovery If the machine you purchase already has operating syste...

Page 11: ...d information please refer to the warranty card or GIGABYTE service website as the below link http www gigabyte com support downloads technical support aspx FAQ FAQ Frequent Asked Questions please ref...

Reviews: