background image

Softw are Installation

- 27 -

English

The base  mipmap is the highest quality texture,  and all subsequent mipmaps are smaller sized

textures of the same image. Moving the slider to the right selects a higher quality base mipmap,
deliv ering the highest quality application ex perience. Moving the slider to the left  selects a lower
quality mipmap, delivering the highest  application performance.

n

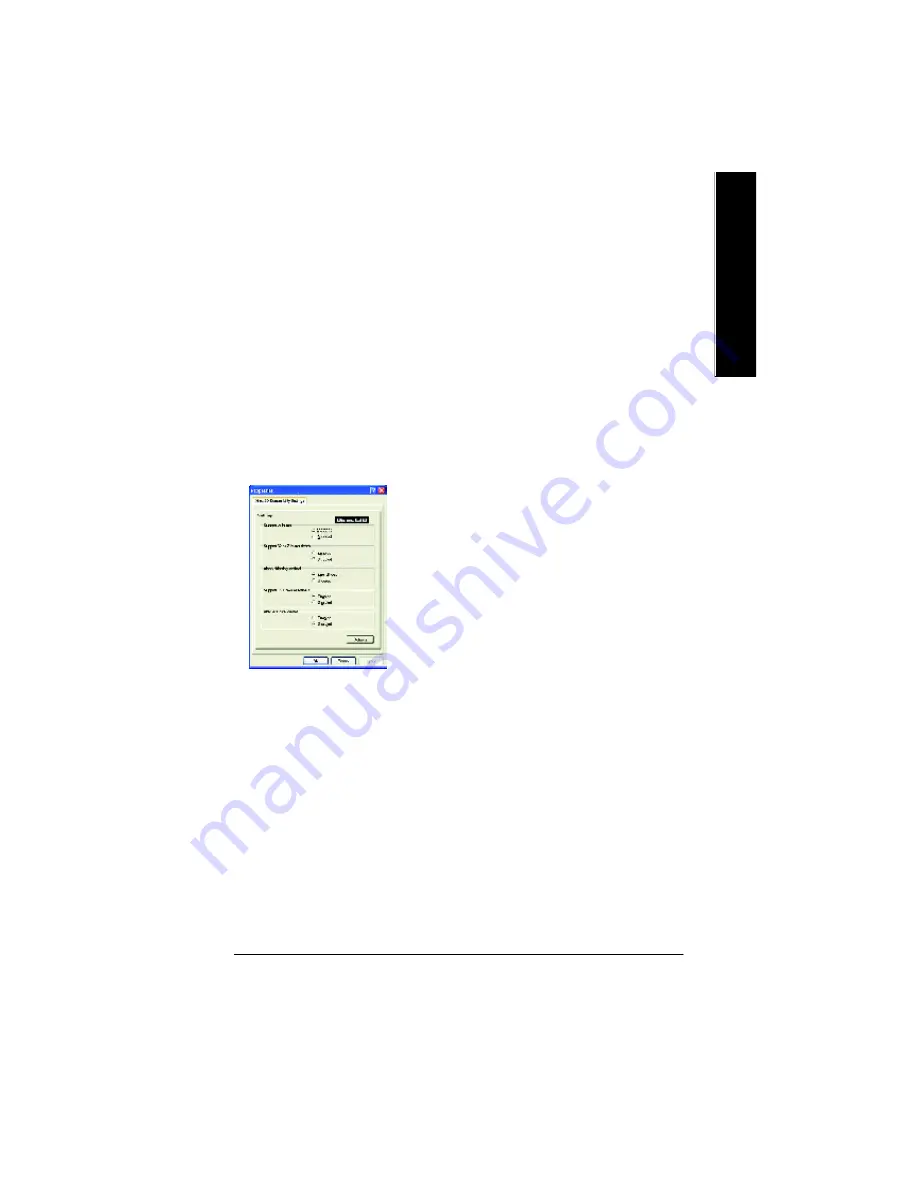
Wait for Vertical Sync

This will lower the frame rate of full screen games but reduce the image tearing that can occur
with the  higher frame rate. Selecting 

Application Preference 

allows the application to decide

whether or not it should display its frames at the refresh rate of the monitor. Selecting 

Always

Off 

allows the  application to run at its highest possible frame rate, regardless of the monitor’s

refresh rate which is typically less than the  frame rate at which the  application will run.

n

Compatibility S ettings button

This button allows you to access advanced settings that can solve compatibility issues for a few
specific Direct  3D applications.

l

Support W-buffer

l

Support 32bit Z-buffer dephth

l

Alphe dithering method

l

Support DT X texture formats

 allows applications to use

this kind of texture format. There are a few applications that
can only support a limited number of texture formats. By se-
lecting 

Disabled

,  the driv er  will  not support DTX  tex ture

formats,  thus reducing the  number  of  tex ture  formats
supported.

l

Alternate pixel center

 This may eliminate problems with some Direct 3D games which display

vertical and horizontal lines around textures, or text that appears incorrect. However,
this setting should only be used if y ou are experiencing the symptoms mentioned, as it may
cause problems w ith other games.

l

Defaults button

 allows you to reset the Direct 3D Compatibility S ettings to default values.

n

Defaults button

This button allow s you to reset the Direct 3D Settings to default values.

Summary of Contents for GV-R7500L

Page 1: ...GV R7500L RADEONTM 7500 Graphics Accelerator REV 101 12MD R7500L 101 USER SMANUAL Upgrade your Life...

Page 2: ...hich may appear in this document nor does it make a commitment to update the information contained herein Please do not remove any labels on VGA card this may void the warranty of this VGA card Oct 31...

Page 3: ...Driver And Utilities Installation 9 3 1 1 Operating system requirement 9 3 1 2 DirectX installation 10 3 1 3 Driver installation 12 3 1 4 Utilities on driver CD 15 3 1 5 Taskbar Icon 16 3 1 6 Property...

Page 4: ...f DirectX 8 and OpenGL applications n CHARISMA ENGINE supports full Transformation Clipping and Lighting T L at 45 million triangles second peak processing capability n PIXEL TAPESTRY the RADEON 7500...

Page 5: ...the power supply case 3 Place components on a grounded antistatic pad or on the bag that came with the components whenever the components are separated from the system The card contains sensitive elec...

Page 6: ...erator 6 English 2 2 BOARD LAYOUT GV R7500L 8Mx16 64MB DDRAM TV out VGA Monitor Connector 15pin AVOutput NTSC PAL TV Projector S VideoOutput Analog LCD Monitor Analog Monitor OR VGAOutput TV Out VGA M...

Page 7: ...card 1 Pow er off the computer and monitor then disconnect the display cable from the back of your computer 2 Remove the computer cover If necessary consult your computer s manual for help in remov i...

Page 8: ...ully eated GV R7500L Graphics card AGP Slot GV R7500L Graphicscard ToTV or VCR ToVGAMONITOR You are now ready to proceed with the installation of the Graphics card driver For detailed instructions sel...

Page 9: ...xe Then you can follow guides to setup your GV R7500L driver Please follow the subsection 3 1 3 Step By Step Installation to install the driver for your graphics accelerator 3 1 1 Operatingsystemrequi...

Page 10: ...e 3D hardware acceleration support for Win98 98SE M E to achieve better 3D performence Note For software MPEG support in Win98 98SE or WinME you must DirectX first install MMust be install DirectX 8 1...

Page 11: ...Software Installation 11 English Then the DirectX 8 1 installation is completed 4 Click OK item...

Page 12: ...can press C Windows System directory Step 4 System Setting Change 1 Click Next icon 2 Click Finish icon MDon t click Cancel because the system will hang if you press it Step 2 Update Device Driver Wiz...

Page 13: ...finished loading insert the GV R7500L driver CD disk into your CD ROM and then y ou can see theAUTORUN window If it does not show up please run D setup exe Step 5 Driver Setup 1 Click Install Display...

Page 14: ...GV R7500LGraphics Accelerator 14 English 3 Click Yes 4 Click Finish to restart computer...

Page 15: ...y Driver and V Tuner utilities Please browse the driver C D for detail Other U tility V Tuner and Hydravision Follow the setup that showing on the screen to install the Utility A Installing V Tuner Ut...

Page 16: ...ontrol panel showing a menu composed of shortcute of the graphics card s enhanced and other functions You may click the Display Properties item and then click Settings Click Advanced after clickng Set...

Page 17: ...he working frequency of the graphic engine and video memory Core Clock and Memory Clock Display Memory Clock Close V Tuner Min V Tuner Display Core Clock Display Adjust Core Clock Link to the Websit o...

Page 18: ...elerator 18 English VGAInfo VGA Info lists the relevant information about your card ColorAdjust Color Adjust allows you to make color adjustments such as brightness contrast and gamma values for each...

Page 19: ...A RADEON 7500 with only one display output can still take advantage of the many features of HYDRAVISION H YDRAVISION installation enables the Desktop M anager and creates a Window s program group for...

Page 20: ...ze to the monitor s that contain the window s upper left and low er right corners Max to full desktop causes windows to maximize to the entire monitor array Max child windows Keeps windows generated b...

Page 21: ...top M anagement dialog box MultiDesk Properties This button gives access to all the M ultiDesk Properties Here you can enable disable and name activ e desktops MultiDesk will not reload automatically...

Page 22: ...ts to your desktop Configure the visibility of dialogs and drop down menus Configure dialogs for fade in when opened Add a shadow effect to dialogs Visibility of windows and application menus can be i...

Page 23: ...rsion number 2D v ersion number and the driver build information n Details button access to the Details tab which lists the card s hardware details and driver information n Show D3D warning messages a...

Page 24: ...v ide the most realistic 3D image l Anisotropic Filtering checkbox uses a texture filtering technique that blends multiple tex ture samples together Selecting Application Preference will result in hig...

Page 25: ...highest possible frame rate regardless of the monitor s refresh rate which is typically less than the frame rate at which the application will run n Compatibility Settings button This button allows yo...

Page 26: ...mple patterns and sample points such as 2X 4X or 6X M oving this slider to the right increases sampling to prov ide the most realistic 3D image l Anisotropic Filtering checkbox uses a texture filterin...

Page 27: ...ich the application will run n Compatibility Settings button This button allows you to access advanced settings that can solve compatibility issues for a few specific Direct 3D applications l Support...

Page 28: ...e gamma v alue the higher the brightness and contrast of your display n Color Curve adjusts the selected color red green or blue by mov ing the color curv e with your mouse n Game Gamma button accesse...

Page 29: ...your computer and installing the enhanced graphics driver see the user s manual Determine if your television or VCR has an S Video or Composite video connection Looking at the back of your computer l...

Page 30: ...ure l Hue allows you to adjust the pureness or tint of the red green and blue components of the color l Gamma allows y ou to adjust the overall intensity of the video image Rotation Properties The Rot...

Page 31: ...river for Windows NT 1 Insert the INSTALLATION CD into your CD ROM drive If Windows runs the CD automatically 2 Click Start 3 Select Run 4 Type the following D SETUP If D is not your CD ROM drive subs...

Page 32: ...he GV R7500L driver for Windows 2000 1 Insert the INSTALLATION CD into your CD ROM drive If Windows runs the CD automatically 2 Click Start 3 Select Run 4 Type the following D SETUP If D is not your C...

Page 33: ...ed or to become the secondary display n Make sure you selected the appropriate display device and graphics card when you installed the graphics driver n For more troubleshooting tips right click the A...

Page 34: ...ct the Zip file to the drive C orA 2 Restart your PC in MS DOS mode This function only for Windows 95 or Windows 98 If y our OS is Window s 2000 Windows Me Windows XP please use the bootable disk to M...

Page 35: ...Appendix 35 English 3 Change the command path to the file location C or A 4 Reflash BIOS command as below C atiflash p 0 filename 5 Reboot your PC when it s done...

Page 36: ...3 36 0 P P P 90 45 4 37 8 P P P 100 50 9 43 1 P P P 120 61 8 52 4 P P P 160 84 3 72 8 P P P 200 108 0 95 0 P P P 60 37 9 39 9 P P P 70 43 7 45 5 P P P 72 48 1 50 0 P P P 800x600 75 46 9 49 5 P P P 85...

Page 37: ...6 7 P P P 75 67 5 108 0 P P P 1152x864 80 72 4 112 3 P P P 85 77 0 119 6 P P P 100 91 5 143 4 P P P 120 111 1 176 0 P P P 150 141 4 226 3 P P P 160 151 6 242 6 P P P 60 60 0 108 0 P P P 70 69 8 120 6...

Page 38: ...7 P P P 120 111 2 234 9 P P P 160 151 3 322 1 P P P 60 56 0 119 3 P P P 75 70 5 152 4 P P P 85 80 1 174 4 P P P 1600x900 100 95 5 209 3 P P P 120 115 6 255 3 P P P 60 62 1 133 2 P P P 75 78 1 168 8 P...

Page 39: ...0 86 5 218 7 P P P 72 104 0 264 6 P P P 75 112 5 288 0 P P P 90 132 1 340 2 P P P 60 67 1 172 8 P P P 1920x1080 70 78 7 205 2 P P P 75 84 5 220 5 P P P 85 96 5 253 1 P P P 1920x1200 60 74 7 193 5 P P...

Page 40: ...GV R7500LGraphics Accelerator 40 English...

Reviews: