


48
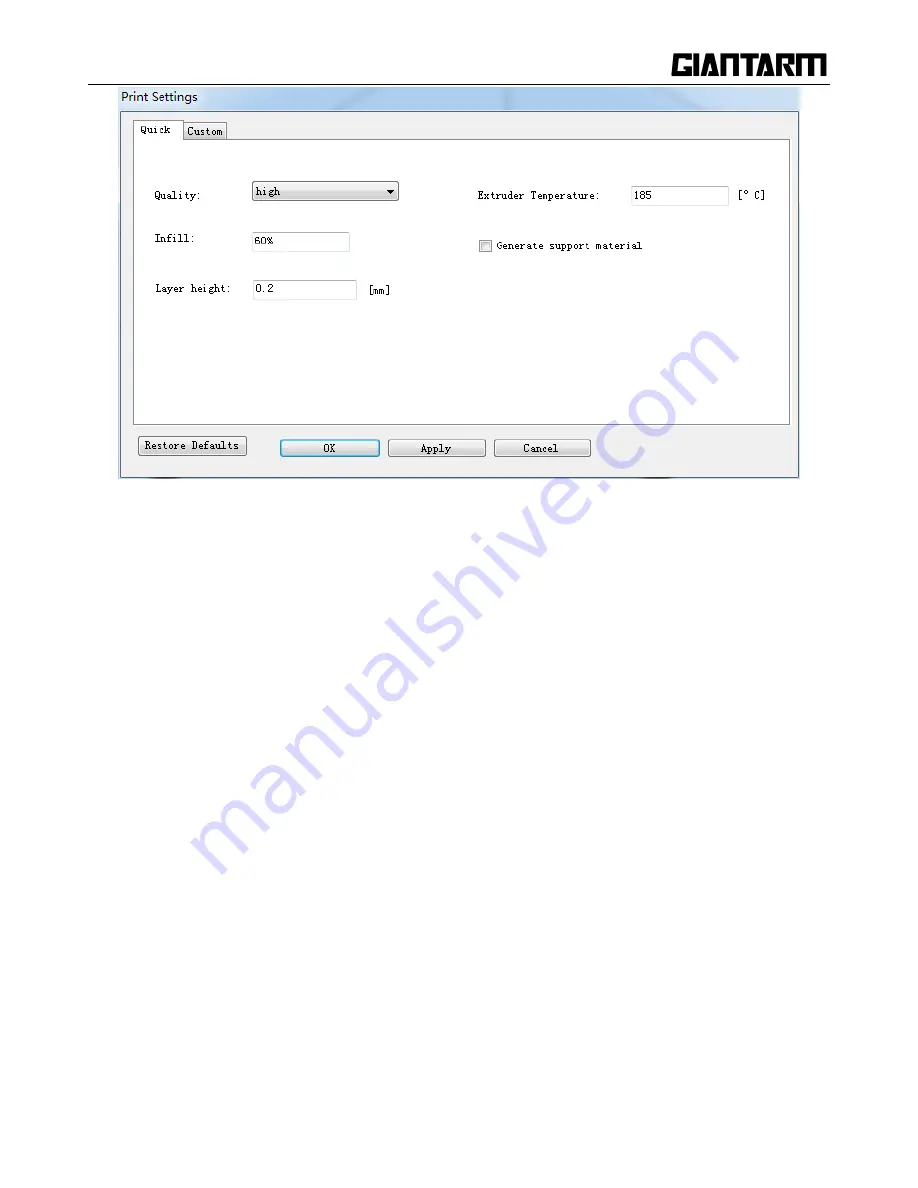
Quality
High: Objects sliced with the High quality profile will have finer layers and will print more slowly.
Standard: Objects sliced with the Standard quality profile will be printed using the default settings.
Low: Objects sliced using the Low quality profile will be printed with thicker layers and will print
faster.
Infill: The density of the infilling structure.
Extruder temperature: Different filament requires different temperature for extruders; please refer to the
suggested temperature.
Layer height:
the thickness of each layer. You can leave it as default.
Supports
Select this checkbox to have your object printed with support structures. Easy Print 3D will automatically
generate supports for any overhanging sections of your object. Supports will be easily removable once you
remove your finished object from the build plate.
When you have finished the setting process, click [Apply] and [OK]. The current settings will be used to
slice your model next time you print or export a print file.
Summary of Contents for D200
Page 1: ...1 GiantArm D200 User Manual Version 1 ...
Page 7: ...7 1 Extruder 2 Control panel 3 SD card slot 4 Heat resistant glass 5 Heatbed 6 Build platform ...
Page 34: ...34 printing via SD card or Wi Fi printing via serial port printing via SD card or Wi Fi ...
Page 56: ...56 333 66mm 5m 27 s 6 Octagram Spiral 318 63mm 5m 15 s 7 Honeycomb 362 73mm 5m 39s 5 Filament ...
Page 66: ...66 ...
Page 68: ...68 ...
Page 85: ...85 Click OK to automatically return to the Filament interface as shown in the picture below ...


