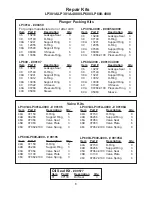
8
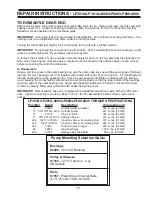
6) Loosen the 8 nuts (49A)
with a 19mm socket and
pull off valve casing (43)
to the front.
TO CHECK SEALS AND PLUNGER PIPE
7)
Remove the seal sleeve
(35) from the manifold
and /or crankcase.
8) Remove seal case (37)
from seal sleeve (35).
9)
Check O-rings (39 & 38) and support rings (39A &
38A) on seal case (37).
39
39A
37
38A
38
10) Remove leakage seal
(36) from the seal sleeve.
If worn or damaged re-
place with new seal.
11)
Remove the pressure ring (40A), v-sleeves (40),
sleeve (40C in LP600 only), and support ring (40B),
from the seal sleeve. For LP301A and LP301A-4000
pumps, remove the pressure spring (41). Examine seals
carefully and replace if worn.
Clean surfaces of seal
sleeves (35) which come in contact with the crank-
case (1) and sealing surfaces of valve casing (43).
35
40A
40
40
40B
(40C in LP600)
REPAIR INSTRUCTIONS -
LP301A/LP301A-4000/LP600/LP600-4000
NOTE:
Always take time to lubricate all metal and non-metal parts with a light film of oil before reassembling. This step
will help ensure proper fit, at the same time protecting the pump non-metal parts (elastomers) from cutting and scoring.


