background image

13

MANUTENZIONE - MAINTENANCE - ENTRETIEN - WARTUNG - 

MANUTENCIÓN - ОБСЛУЖИВАНИЕ - ΣΥΝΤΗΡΗΣΗ - 

保养

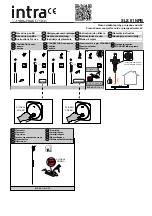
Fig. 17

Fig. 18

X


2,5 mm

Ch. 28 mm

SOSTITUZIONE DELLA CARTUCCIA

Prima di sostituire la cartuccia, accertarsi che il raccordo dell’acqua sia chiuso. 

Togliere  il  tappino  in  finitura  facendo  attenzione  a  non  danneggiarlo  e  svitare  il  grano  utilizzando  una 

chiave a brugola, estrarre quindi la maniglia sfilandola dalla cartuccia. Sollevare la ghiera copricartuccia  

facendo leva tramite l’apposita scanalatura di riferimento. Allontanare l’anello indicatore, svitare la ghiera 

di fissaggio e togliere la cartuccia dal corpo del miscelatore. 

Infine introdurre la nuova cartuccia, accertandosi che le due spine di centraggio siano nella loro sede (X) e 

che le guarnizioni siano correttamente posizionate.

CARTRIDGE REPLACEMENT

Before carrying out this operation make sure that water supply is turned off. 

Remove  the  finish  plug  paying  attention  not  to  damage  it  and  unscrew  the  screw  using  an  Allen  key, 

remove the handle from the cartridge. Lift the finishing ring nut using the reference notch. Remove the 

indicator ring, unscrew the fixing ring nut and take the cartridge out from the mixer body. 

Put the new cartridge into the body checking that the two centering pins enters into the respective seats (X) 

and that gaskets are well positioned.

SUBSTITUTION DE LA CARTOUCHE

Avant d’effectuer la substitution de la cartouche, vérifier que la connexion de l’eau est fermée. 

Enlever le bouchon en finition faisant attention à ne pas l’abîmer et dévisser les grains de fixage utilisant 

une clé à griffe, extraire en suite la poignée en la soulevant de la cartouche. Soulever la virole de finition 

en utilisant la rainure de référence. Quitter la bague d’indication, dévisser la virole de fixation et enlever la 

cartouche du corps de mitigeur. 

Introduire enfin la cartouche nouvelle, en vérifiant que les deux pivots de centrage entrent dans les sièges 

respectifs (X) et que les garnitures sont bien positionnées.

Summary of Contents for RETTANGOLO

Page 1: ...Italy Phone 39 0163 454111 Facsimile 39 0163 459273 www gessi com gessi gessi it PROGRAMMA MISCELAZIONE BAGNO BATH MIXING PROGRAM PROGRAMME DU MITIGEUR POUR LA SALLE DE BAIN BAD MISCHUNGSPROGRAMM PRO...

Page 2: ...2 PRELIMINARI PRE INSTALLATION INFORMATION PR ALABLES VORBEREITUNG PRELIMINARES Dimensioni in mm Measures in mm Dimensions en mm Ma im mm Medidas en mil metros mm Art 20043 Art 20343...

Page 3: ...3 bar in case of water pressure higher than 5 bar it is recommended to install pressure reducers Avant l installation et la mise en fonction Attention Les tubes d alimentation doivent tre rinc s avec...

Page 4: ...al en el mezclador pueden entrar cuerpos extra os capaces de da ar los empaques anillos de cierre Para garantizar un plazo largo de vida del producto instalen las llaves de paso con filtro debajo del...

Page 5: ...mente hasta percibir un contacto mec nico OR O Non incassare il condotto nel muro Don t set the hose in the wall Ne pas encaisser le conduit dans le mur Bauen Sie die Rohrleitung in die Mauer nicht ei...

Page 6: ...minimum bend radius DN nominal internal diameter Respecter le rayon minimum de courbure DN diam tre interne nominale Halten Sie den mindeste Biegungshalbmesser ein DN Innerer nominell Durchmesser Res...

Page 7: ...ble de liaison G1 2 Verbindungschlauch G1 2 Flexible de conexi n G1 2 G1 2 G1 2 G1 2 Flessibile di collegamento G1 2 Connection flexible G1 2 Flexible de liaison G1 2 Verbindungschlauch G1 2 Flexible...

Page 8: ...TALLATION INSTALLATION INSTALACI N Dimensioni in mm Measures in mm Dimensions en mm Ma im mm Medidas en mil metros mm Fig 2 Art 20043 Fig 1 Art 20343 Fig 2 Art 20343 Fig 1 Art 20043 Ch 11 mm Ch 31 mm...

Page 9: ...idas en mil metros mm Fig 4 Fig 5 Fig 6 Fig 3 Ch 24 mm Ch 19 mm Fig 7 Guarnizione filtro Filter washer Jointe filtre Filterdichtung Junta filtro collegamento al dispositivo di erogazione distribution...

Page 10: ...INSTALLATION INSTALLATION INSTALLATION INSTALACI N Fig 10 Fig 8 Ch 24 mm 2 5 mm 2 5 mm Fig 9 Fig 11a Case 1 Red Blue Ch 19 mm Cold Hot Integrated Gasket Ch 19 mm Red Blue Cold Hot Fig 11b Case 2 NO I...

Page 11: ...11 FUNZIONAMENTO WORKING FONCTIONNEMENT FUNKTIONST TIGKEIT FUNCIONAMIENTO Fig 12 OFF ON HOT MIX COLD Fig 14 Fig 15 Fig 16 APRIRE OPEN CHIUDERE CLOSE Fig 13 HOT COLD...

Page 12: ...usieurs composants contacter un centre autoris ou visiter le site WWW GESSI COM L entretien du produit ne doit tre effectu que par du personnel qualifi WARTUNG Falls das Auswechseln von einem oder meh...

Page 13: ...ug paying attention not to damage it and unscrew the screw using an Allen key remove the handle from the cartridge Lift the finishing ring nut using the reference notch Remove the indicator ring unscr...

Page 14: ...erie entfernen Schlie lich eine neue Kartusche einsetzen wobei man sich vergewissert dass sich die beiden Zentrierstifte in ihrem Sitz X befinden und das die Dichtungen korrekt positioniert sind SUSTI...

Page 15: ...remove the handle Disassemble the support and remove the washer Disassemble the screwdown by using a 17 mm key Insert the new head valve and screw it firmly in its seat WARNING During this procedure c...

Page 16: ...von Verunreinigungen und Kalkablagerungen sind und dass die Dichtungen der Oberteil korrekt positioniert sind Alle Bestandteile in umgekehrter Folge wieder montieren SUSTITUCI N DE LA MONTURA Antes de...

Page 17: ...ng hose is possibile because it is equipped with a braided extension flexible device of 500 mm which allows to replace the former by extraction without having to disassemble the other parts of the mix...

Page 18: ...ziehen dann abschrauben Besch digten Schlauch ersetzen und obige Schritte umgekehrt ausf hren SUSTITUCI N DEL FLEXIBLE DE LA DUCHA Antes de efectuar dicha operaci n aseg rense que el agua de la red h...

Page 19: ...19 MANUTENZIONE MAINTENANCE ENTRETIEN WARTUNG MANUTENCI N Fig 22 Fig 23 Fig 24 2 5 mm 2 5 mm Ch 24 mm Ch 18 mm...

Page 20: ...rer que l eau du r seau hydrique est ferm e Enlever les composants illustr s dans la figure D visser le d viateur ab m et le remplacer en suivant la proc dure inverse au d montage AUSWECHSELN DER UMSC...

Reviews: