background image

Gerber P2C™ 600 

 User’s Manual


General Information 

1-23 


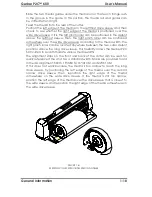
-     Tighten the clamp screw. 

6. 

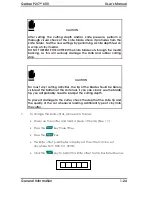
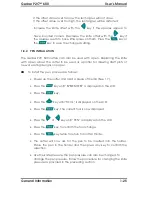
Set the knife pressure as follows: 


Power up the cutter and load a piece of media (See 1.7).  


Press the 

 key twice. 


Press the 

 key.  


The knife pressure parameter is displayed. The pressure can be set 
anywhere from 0 to 400gr. 


Press the 

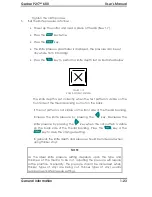
 key to perform a knife depth test as illustrated below. 


FIGURE 1-12 

KNIFE DEPTH TEST PATTERN 


  The  knife  depth  is  set  correctly  when  the  test  pattern is visible on the 

front side of the media backing but not on the back. 


If the cut pattern is not visible on the front side of the media backing, 

increase  the  knife  pressure  by  pressing  the 

  key.  Decrease  the 

knife  pressure  by  pressing  the 

  key  when the cut pattern is visible 

on  the  back  side  of  the  media  backing.  Press  the 

  key  or  the 

 key to save the changed setting. 


In general, the knife depth and pressure should be increased when 
using thicker vinyl. 


NOTE


As  the  ideal  knife  pressure  setting  depends  upon  the  type  and 
thickness  of  the  media  to  be  cut,  adjusting  the  pressure  will  require 
some  practice.  Generally,  the  pressure  should  be  increased  when 
thicker  types  of  vinyl  are  being  cut.  Thinner  types  of  vinyl  usually 
require lower knife pressure settings. 

Summary of Contents for P2C 600

Page 1: ...complete the attached Warranty Registration Card and return it to Gerber today or go through the online registration at http www gspinc com products registration index html Failure to register may res...

Page 2: ...commercial environment This equipment generates uses and can radiate radio frequency energy and if not installed and used in accordance with the instruction manual may cause harmful interference to r...

Page 3: ...n distribution or display is prohibited All rights reserved All queries comments or suggestions concerning this and other Gerber manuals should be directed to Gerber Scientific Products 83 Gerber Road...

Page 4: ...PlastiGraphix Gerber QUANTUM Gerber Vision and FastFacts are trademarks of Gerber Scientific Products Corporation 3M Scotchcal Scotchlite Controltac Comply and Panaflex are trademarks of the 3M Corpor...

Page 5: ...ES 1 8 1 4 POSITIONING THE 600 CUTTER ON A TABLE 1 9 1 5 CUTTER COMPONENTS 1 10 1 5 1 REAR PANEL CONTROLS 1 10 1 5 2 FRONT PANEL CONTROLS 1 12 1 6 POWERING UP THE CUTTER 1 14 1 6 1 EARTHING GROUNDING...

Page 6: ...P 2 7 2 3 SYSTEM SETUP 2 8 2 3 1 CONFIDENCE 2 9 2 3 2 DIN CUT 2 9 2 3 3 TOOL 2 9 2 3 4 FLEX CUT 2 9 2 3 5 OVERCUT 2 10 2 3 6 OPTICUT 2 11 2 3 7 EMULATE 2 11 2 3 8 BAUD RATE 2 12 2 3 9 PARITY 2 12 2 3...

Page 7: ...OTES 4 1 4 2 1 SYSTEM SETUP 4 1 4 2 2 SERIAL INTERFACE CONNECTOR ON THE CUTTER 4 2 4 2 3 AVAILABLE SERIAL SIGNALS 4 2 4 3 USB INTERFACE NOTES 4 3 4 3 1 USB SPECIFICATIONS 4 3 4 3 2 INSTALLING THE USB...

Page 8: ...LENGTH ADJUSTMENT 1 22 1 11 SETTING KNIFE DEPTH 1 22 1 12 KNIFE DEPTH TEST PATTERN 1 23 2 1 GERBER P2C 600 CONTROL PANEL 2 1 2 2 GERBER P2C 600 MAIN MENU 2 2 2 3 GERBER P2C 600 SYSTEM SETUP 2 8 3 1 CL...

Page 9: ...following are some of the main features of the Gerber P2C 600 cutters The ability to accommodate various media widths An interchangeable pen for producing preview plots of designs on paper An intercha...

Page 10: ...media roll A sensor that detects the end of the media The ability for the user to reposition the origin Concatenation and curve smoothing that result in better cuts A slitter knife for cutting the fin...

Page 11: ...mpatible media A complete description of the Gerber P2C 600 s main components Step by step instructions for knife and pen installation and the loading of media Information about control panel operatio...

Page 12: ...4m 13 feet max within guaranteed specifications for media larger than 750 mm 30 Thickness 0 05 to 0 25 0 8mm with optional sandblast knife 0 002 to 0 01 0 03 inch with optional sandblast knife Max Cut...

Page 13: ...N AND POUNCING TOOL Gerber P2C 600 cutters are shipped with two standard knife blades for vinyl media and a black fiber tip pen Knife Medium Quantity Standard knife Standard reflective fluorescent vin...

Page 14: ...Sans serif single stroke medium ROM based plots Confidence plot DIN plot TABLE 1 5 GERBER P2C 600 FIRMWARE 1 2 6 PERFORMANCE Cutting specifications for 0 05mm 0 002 wax backed vinyl where the total me...

Page 15: ...INT The use of dimensionally stable media is essential for obtaining high cut quality Additionally media expansion or contraction may occur as a result of temperature variations To improve the dimensi...

Page 16: ...vailable for your Gerber P2C 600 cutter CD ROM manuels drivers Power Supply Cables Serial Interface Kit Contents 9 pin to 9 pin cable 9 pin to 8 pin DIN conv Standard knife Standard knife holder Sandb...

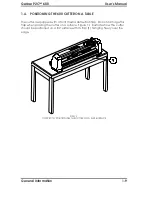
Page 17: ...e cutter is equipped with a front media deflection flap Do not damage this flap when placing the cutter on a surface Figure 1 1 illustrates how the cutter should be positioned on a flat surface with i...

Page 18: ...In order to get better acquainted with your Gerber P2C 600 cutter examine the following illustrations and read the accompanying descriptions of its components 1 5 1 REAR PANEL CONTROLS Figure 1 2 sho...

Page 19: ...ch This rocker switch sets the cutter s power to ON or OFF To switch the power ON press the I side of the rocker switch To switch the power OFF press the O side of the rocker switch 4 Power Entry Modu...

Page 20: ...Section 1 7 2 Media Drive Sleeves The media drive sleeves move the media only when the pinch rollers are in the down position 3 Tool Carriage The tool carriage holds the pen the pouncing tool or the...

Page 21: ...p The cutting strip prevents damage to the knife tip when the cutter is turned on and no media has been loaded Since cutting takes place on the cutting strip it is essential that the cutting strip rem...

Page 22: ...green with yellow striping The ground conductor described above must be grounded at the electrical distribution board or if power is supplied by a separate system at the power supply transformer moto...

Page 23: ...risk of electric shock and will also lead to the malfunctioning of the cutter 1 6 2 POWER UP PROCEDURE To power up the cutter proceed as follows 1 Make sure the cutter is placed on a flat level and st...

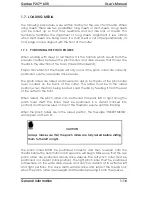
Page 24: ...inch roller lever located on the back of the cutter The rollers must be in the raised position when media is being loaded Load media by feeding it from the rear of the cutter to the front When raised...

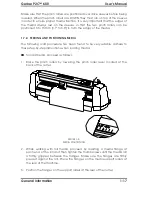
Page 25: ...e following load procedure has been found to be very reliable Adhere to these step by step instructions when loading media To load media proceed as follows 1 Raise the pinch rollers by lowering the pi...

Page 26: ...ocated anywhere between the two outer detent positions above the long drive sleeve This flexibility allows the Gerber P2C 600 cutters to accommodate various media widths The alignment strips on the fr...

Page 27: ...dia follows a straight path from the roll to the cutting area This can be accomplished by sliding the media guides left and right as needed along the media support rollers 5 The pinch rollers should b...

Page 28: ...dia lays straight 8 SAFE OPERATION Do not place any objects in front of or behind the cutter that could interfere with cutter operation Make sure the media is free to move forward and back Keep hands...

Page 29: ...personal injuries if handled without proper care Exercise caution when operating the cutter and when installing removing or handling the knife To set up your cutter for knife operation proceed as foll...

Page 30: ...without penetrating the backing Cutting too deeply may result in damage to the cutting strip FIGURE 1 10 BLADE LENGTH ADJUSTMENT 4 Turn the cutting depth adjustment screw 1 clockwise to increase the...

Page 31: ...but not on the back If the cut pattern is not visible on the front side of the media backing increase the knife pressure by pressing the key Decrease the knife pressure by pressing the key when the cu...

Page 32: ...t vinyl cutting activities the tip of the blade should be barely visible at the bottom of the knife tool If you can clearly see the blade tip you will probably need to readjust the cutting depth To pr...

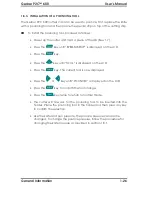
Page 33: ...rawing draft plots of new or existing designs on paper To install the pen proceed as follows Power up the cutter and load a piece of media See 1 7 Press the key until SYSTEM TEST is displayed on the L...

Page 34: ...e LCD Press the key Press the key until TOOL is displayed on the LCD Press the key The current tool is now displayed Press the or key until POUNCER is displayed on the LCD Press the key to confirm the...

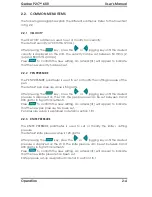
Page 35: ...CUTTERS 2 1 1 THE LIQUID CRYSTAL DISPLAY The liquid crystal display LCD contains one line consisting of 16 characters The LCD provides information about the cutter s status during operations and also...

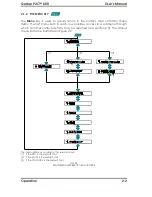
Page 36: ...in each row provides access to a submenu through which all other cutter functions may be reached see section 2 3 The various menu items are illustrated in Figure 2 2 The menu differs according to the...

Page 37: ...e parameter will revert to its previous setting 2 1 5 THE TEST KEY TEST initiates the test procedure wherever such a procedure is available 2 1 6 THE JOGGING KEYS Jogging key functionality varies acco...

Page 38: ...essure value is 80 grams After pressing the key press the or jogging key until the desired pressure is displayed on the LCD The pen pressure can be set between 0 and 400 grams in 5 gram increments Pre...

Page 39: ...he offset value is set too high the rectangles will be distorted The offset test is illustrated below 2 2 5 POUNCING PRESSURE The POUNCING PRESSURE submenu is used to set or modify the pouncing pressu...

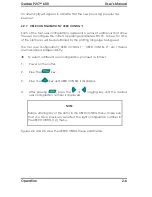
Page 40: ...e being used The four user configuration USER CONFIG 1 USER CONFIG 2 etc menus are maintained independently To select a different user configuration proceed as follows 1 Power on the cutter 2 Press th...

Page 41: ...o change the length of the window or press the key to change the value of the length of the media window The and jogging keys change the value in 100mm increments the and jogging keys change the value...

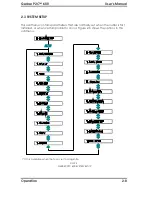
Page 42: ...TUP This submenu contains parameters that are normally set when the cutter is first installed or when certain problems occur Figure 2 3 shows the options in this submenu Only available when the tool i...

Page 43: ...ing the key press the or jogging key until the desired tool is displayed on the LCD Press to confirm the new setting Select PEN to configure the cutter for plotting operations Select DRAG KNIFE to con...

Page 44: ...ermines the length that will be cut with reduced pressure or without pressure Press the or jogging key to change the value Press the key to start the test cut 3 PRES The PRES parameter sets the pressu...

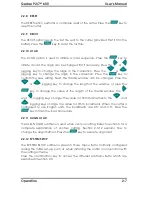
Page 45: ...press the or jogging key until the desired language is displayed on the LCD Press to confirm the new setting The Gerber P2C 600 supports DM PL HP GL and HP GL 2 The active emulation setting is marked...

Page 46: ...TY submenu is used to set or modify the byte format and parity type for RS 232 C serial communications between the cutter and the host computer The parity can be set to any of the following values LCD...

Page 47: ...pen knife or media be loaded To run the RS 232 C test proceed as follows 1 Unplug the RS 232 C data cable from the rear panel of the cutter 2 Use a loopback test cable to connect pin 2 of the cutter s...

Page 48: ...t or modify the dialogue language on the LCD After pressing the key press the or jogging key until the desired language is displayed on the LCD Press to confirm the new setting The information on the...

Page 49: ...ions on the LCD Put a piece of media halfway on the sensor and then press the key The LCD will indicate whether or not the sensor is working 2 3 19 CALIBRATE X Y To calibrate is to bring the length of...

Page 50: ...cute this test The desired pressure appears in the upper line of the display The bottom line of the display indicates the value that has to be sent to the head in order to reach the desired pressure t...

Page 51: ...me clogged with accumulated residue from the media This may affect traction as the media will tend to slip between the pinch rollers and the drive sleeves To clean the drive sleeves proceed as follows...

Page 52: ...sor may become dirty with accumulated residue from the media This may cause the cutter to malfunction To clean the sensor area proceed as follows 1 The sensor is located on the right side of the cutte...

Page 53: ...tween 110V and 230V The fuse is at the back of the cutter next to the power inlet refer to fig 1 2 The fuse rate is 2 0A Slo Blo for all voltage ratings SAFETY WARNING Before changing the fuse be sure...

Page 54: ...Gerber P2C 600 User s Manual Maintenance and Cleaning 5 1...

Page 55: ...if both ports are connected at the same time that port which receives data first will stay active and the other will be deactivated The deactivated port can only be reactivated by restarting the cutt...

Page 56: ...g your own cable only a few of the cutter s pins will actually need to be connected to the host computer To ensure optimal results the cable length should not exceed 4 8 m 16 feet It should be taken i...

Page 57: ...ing system 2 Plug the cable connector securely into the cutter s USB interface connector Plug the other end of the cable into the computer s USB interface connector 3 For Windows XP the computer shoul...

Page 58: ...y install the driver and the Gerber PortMapper utility Restart the computer once installation is complete Next to the cutter s USB connector is a small light emitting diode LED that will either be on...

Page 59: ...ar Enamel Receptive Gerber High Performance Series 220Metallic Film Gerber High Performance Series 225 Premium Film 3M Controltac Series 180 Plus Repositionable Film 3M Controltac Plus Series 250C wit...

Page 60: ...ositive Gerber PlastiGraphix PVC 10HG Gerber Stardust Gold and Stardust Silver ultrametallic films Gerber Vision Perforated Window Film Static Cling Heat Transfer Paper Gerber QUANTUM Series 2000 Gerb...

Page 61: ...PRODUCTS OFFICES Gerber Scientific Products 83 Gerber Road South Windsor CT 06074 USA 860 643 1515 Customer Service Technical Support Telephone 800 828 5406 or 860 644 6971 Fax 860 871 3862 800 227 6...

Reviews: