


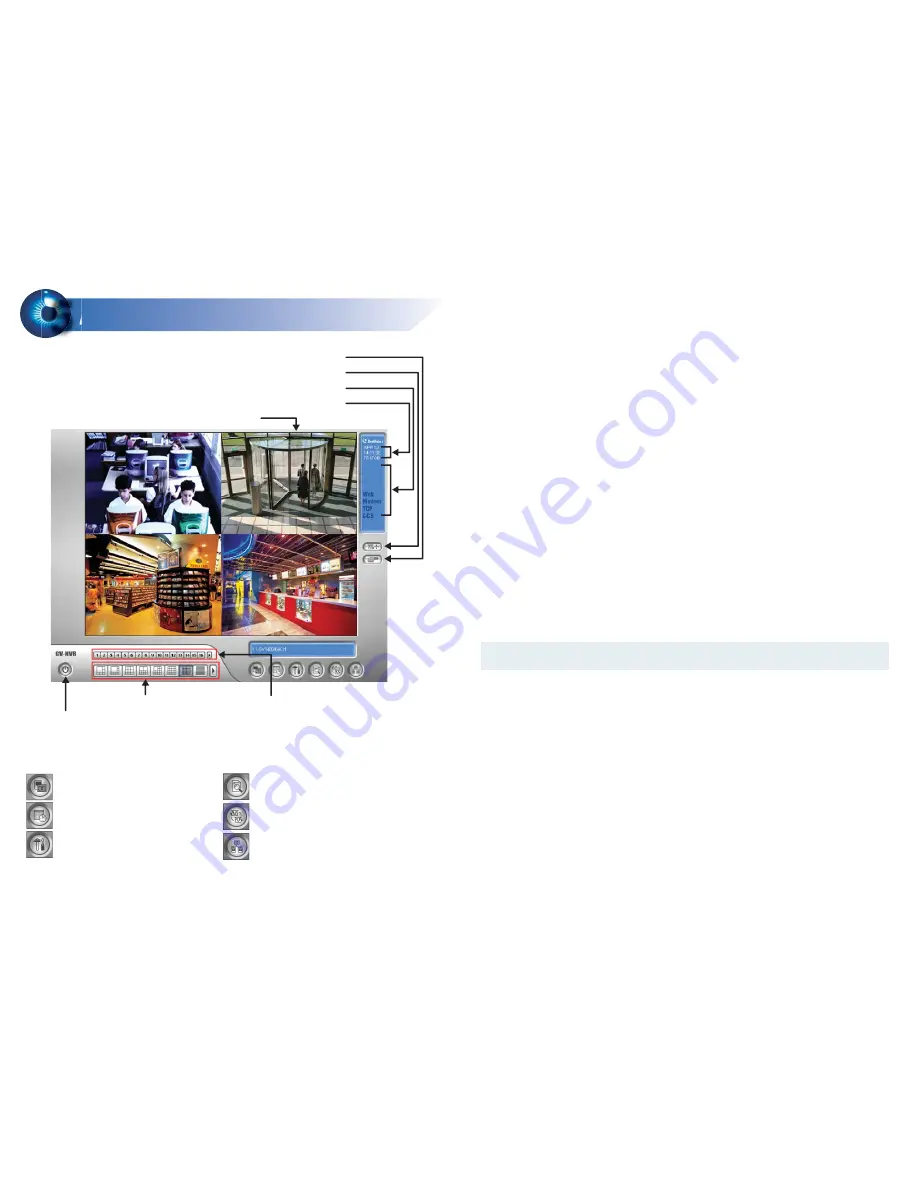
Start/stop recording
Set up recording schedules
Access system settings
Access ViewLog to play back video
Start/stop screen rotation
Access remote applications
Main Screen
5
5
Logout / Exit / Minimize
Select screen divisions
Select a camera for full screen mode
Camera Name
Date / Time / Storage Space
Status indicators for remote applications
Click to call up PTZ Control Panel
Click to call up I/O Control Panel
Adding the External Hard Drive to a Recording Path
Before you start recording to the external hard drive, you need to add the formatted
external hard drive to the recording path.
Note:
The default recording path for external hard drives starts from E:\
1. On the GV-Desktop, click the
Programs
button, and select
Hot Swap HDD
Tool
.
2. Right-click the hard drive in the MediaMan Tools window, select
Add for
recording
, and then select the storage group from the drop-down list. The
Storage 1 is created by default.
3. Click
OK
to automatically configure the hard drive to the recording path.
Formatting the External Hard Drive
The GV-NVR System Lite records audio and video to the internal hard drive. You can
also use an external hard drive to expand recording space. You must format the hard
drive before you can use it.
To format an external hard drive, use Windows’s
Disk Management
. To start
initializing and formatting an external hard drive, click the
Programs
button on the
GV-Desktop, and select
Disk Management
. The feature is protected by an ID and a
password. The default ID and password are “
0000
”. For details to format an external
hard drive, see
3.5 Formatting the Hard Drive
in
GV-NVR System Lite User’s Manual
(GV-Desktop <
Program
button <
Multicam Installation
).


