


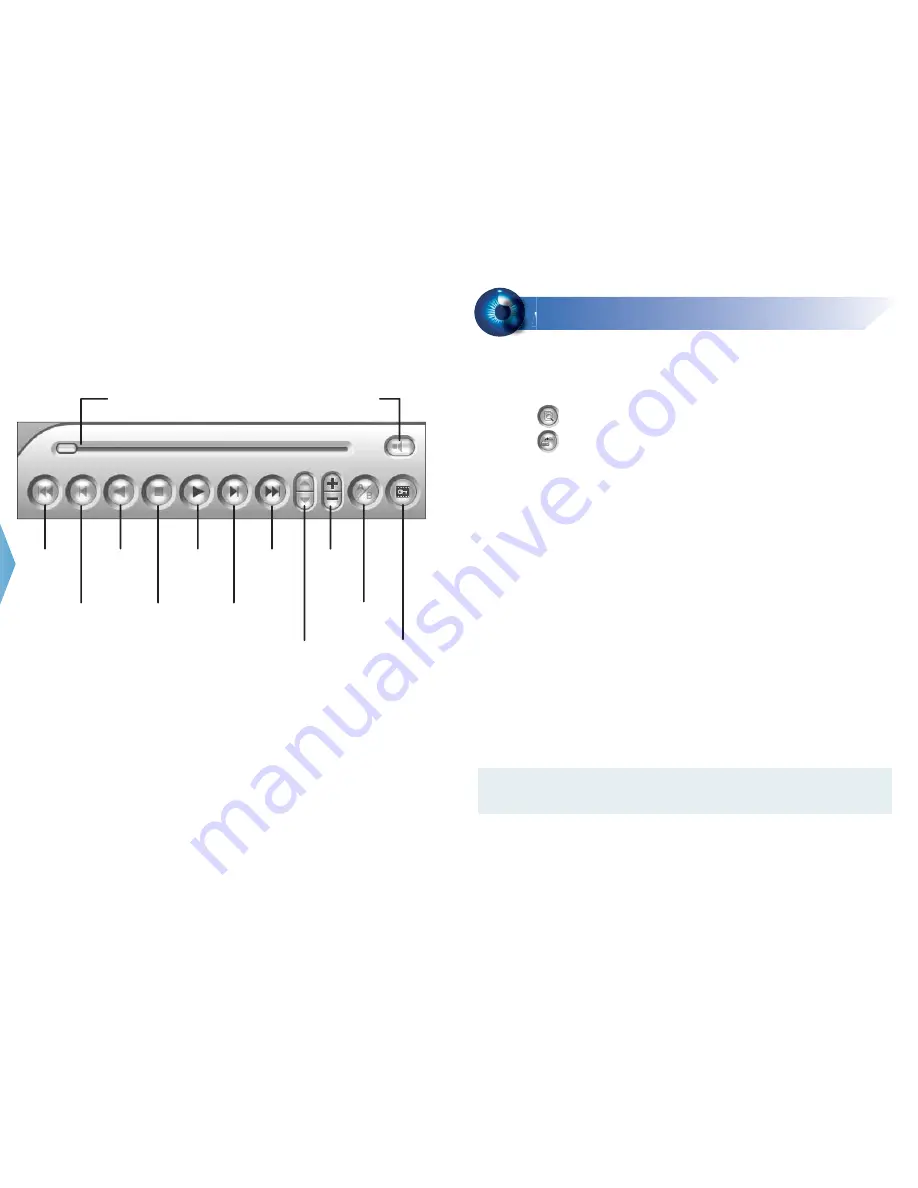
Playback Controls
Using the Zoom
. Zoom in:
Click the
Zoom-in
button, and then click on the area you want to
magnify. Each click will increase the zoom level.
. Zoom out:
Click the Zoom-out button, and then click on the image to
zoom out. Each click will decrease the zoom level.
Rewind
Play
Stop
Rewind to
Beginning
Frame-by-Frame
Reverse
Frame-by-Frame
Forward
Forward to
End
Speed up/
down
A to B
Playback
Zoom in/
out
Frame-by-Frame/
Real Time/
Just Key Frame
Playback Scroll
Audio on/off
Video Files Backup
8
8
You can back up video files of the desired time to CD / DVD.
1. Insert the CD / DVD media into the drive.
2. Click on the main screen, and select
Video/Audio Log
.
3. Click on the functional panel.
4. Select
CD Using OS-Burning
to burn files with the inbuilt software of
Windows
XP.
5. Click
Add time frame
.
6. Enter the Start Time and End Time for backup.
7. Select the desired camera(s) for backup. The number of video and audio files of
each camera is indicated respectively, e.g. “Camera 3 39+0” means the camera
3 has 39 video files and 0 audio file.
8. Select the types of events for backup, e.g. video, audio or both together.
9. Click
OK
to add the time frame. You can repeat steps 5-8 to create up to 10 time
frames.
10. Click
OK
to start burning.
For details, refer to
Backing Up and Deleting Files,
Chapter 5,
DVR User's Manual
(GV-Desktop <
Program
button <
Multicam Installation
).
Note:
You have to connect a USB DVD RW device to the GV-NVR System Lite
for video files backup.


