background image

English

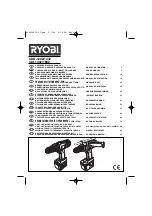
18V Cordless Drill/Driver 


Operator’s Manual                GCD18CP

UNPACKING AND CONTENT
IMPORTANT:


Due to modern mass production techniques, it is unlikely the tool is 

faulty or that a part is missing.  If you find anything wrong, do not operate the tool until 
the parts have been replaced or the fault has been rectified. Failure to do so could result 
in serious personal injury.

CONTENTS IN PACKAGE


Description 


QTY             

Description 


QTY

Drill/Driver 


Charger Stand 


1

Wall Adaptor 


13-Piece Bit set 


1

Operator’s Manual 


1

OPERATION


WARNING:


To reduce the risk of serious personal injuries, read and follow all 

important safety warning and instructions before using this tool.

NOTE

:


Always Check that the power supply corresponds to the voltage on the ratings 

plate.

CHARGING THE TOOL (FIG 2)

•   use only the Battery Charger that is included in this kit to 

recharge your batteries.

•   use only 120 Volt AC Power Source.
•   Charge your batteries fully before using the drill for the first 

time.

•   

Connect the wall adaptor (2) to charger stand (3)

•    Plug the wall adaptor (1) into a 120 Volt AC Power Source. The 

red light on the charger will illuminate, indicating the charger is 
power on. 

•   Insert the battery (1) into the slot on the charger stand (3). Make 

sure that the battery is seated firmly in the charger. The green 
light on the charger will illuminate, indicating that the battery is 
charging.

•   Charge for 3 hours before initial use, and after normal use. If drill has been used continuously, and the battery 

is completely discharged, it may require up to 5 hours to fully recharge the battery.

•   The green and red lights will remain lit, even after charging is complete.
•    Batteries may become warm while charging. This is normal.
•    If battery is hot after continuous use in the drill, allow it to cool down to room temperature before charging. 

This will extend the life of your batteries.

•   Other tips for extending battery life: Do not store batteries completely discharged. Charge them fully before 

storing, and if drill is not used for a long time, take the batteries out and charge them periodically.


WARNING: 

Always disconnect battery pack from tool or place the switch in the 

locked or off position before any assembly, adjustments or changing accessories.

 WARNING: 

Always be sure that the tool is switched off before insertion or 

removal of the battery pack.

INSTALLING OR REMOVING THE BATTERY PACK (FIG 3)

•   To install the battery pack, insert the battery pack into drill housing as shown in fIG 3. Always insert it all the 

way until it locks in place with a little click. Lightly pull on the battery to ensure it is locked into place and will not 
accidentally fall out of the drill, causing an injury.

•   Do not use force when inserting the battery pack. If the battery does not slide in easily, it is not being inserted 

correctly.

FIG 2

3

1

2

Summary of Contents for GCD18CP

Page 1: ...l Driver Perceuse Tournevis sans fil de 18v Taladro Tornillador inal mbrico de 18v GCD18CP Operator s Manual Manuel d utilisation Manual del Operario 888 552 8665 TOLL FREE HELP LINE WEBSITE www genes...

Page 2: ...ecommend Wide Vision Safety Mask for use over eyeglasses or standard safety glasses with side shields Always wear eye protection which is marked to comply with ANSI Z87 1 Look for this symbol to point...

Page 3: ...rease the risk of electric shock When operating a power tool outside use an extension cord suitable for outdoor use These cords are rated for outdoor use and reduce the risk of electric shock Do not u...

Page 4: ...his type tool may cause damage to the tool or result in personal injury to the user Consult the operator s manual for recommended accessories Keep cutting tools sharp and clean Properly maintained cut...

Page 5: ...ly you can suffer serious personal injury Hold the tool by insulated gripping surfaces when performing an operation where the tool may contact hidden wiring Contact with a live wire will make exposed...

Page 6: ...erviceman Do not disassemble charger or battery pack Take it to a qualified serviceman when service or repair is required Incorrect reassembly may result in a risk of electric shock or fire Do not cha...

Page 7: ...rocution may result Do not allow any liquid to get inside charger Electric shock may result Warning This product comes with the battery installed internally You are not allowed to install or remove th...

Page 8: ...charger will illuminate indicating that the battery is charging Charge for 3 hours before initial use and after normal use If drill has been used continuously and the battery is completely discharged...

Page 9: ...just the maximum torque that the drill will produce This feature can be used to prevent the stripping and breaking of screws or to set a series of screws to a depth that fits your project Set the clut...

Page 10: ...if you do work with any of these materials it is extremely important to clean the tool using compressed air LUBRICATION This tool is permanently lubricated at the factory and requires no additional lu...

Page 11: ...masque vision large par dessus les lunettes Portez toujours une protection oculaire qui est marqu e comme en conformit avec ANSI Z87 1 Rep rez ce symbole qui signale d importantes pr cautions de s cu...

Page 12: ...altraiter le cordon d alimentation Ne jamais utiliser le cordon d alimentation pour transporter l outil et ne jamais d brancher ce dernier en tirant sur le cordon Garder le cordon l cart de la chaleur...

Page 13: ...pteur de marche arr t fonctionne mal Faites imm diatement remplacer les interrupteurs d fectueux par un centre de r parations agr D brancher l outil avant d effectuer des r glages de changer d accesso...

Page 14: ...ou trois conducteurs Plus augmente la distance depuis la prise d alimentation plus le calibre de la rallonge devra tre important L utilisation de cordons rallonges avec des fils mal calibr s peut pro...

Page 15: ...ormes ANSI S3 19 Protection respiratoire Porter un masque facial ou un masque anti poussi re si le travail produit de la poussi re Le respect de cette r gle r duira les risques de blessures graves Tou...

Page 16: ...en contact avec la peau lavez rapidement l eau savonneuse Si le liquide vient en contact avec les yeux rincez les l eau pendant au moins 10 minuites et sollicitez des soins m dicaux Ne pas essayer d...

Page 17: ...ppelant le 1 800 822 8837 1 800 8BATTERY VOTRE PERCEUSE TOURNEVIS SANS FIL 1 Mandrin sans cl 2 S lecteur de Couple 3 G chette d interrupteur 4 Commutateur de r version 5 Bits plateau int gr e 6 Bloc d...

Page 18: ...uand la charge est termin e Les batteries peuvent devenir chaudes durant leur charge c est normal Si la batterie est chaude apr s une utilisation continue pour du per age laissez la refroidir la temp...

Page 19: ...afin de mettre en place une s rie de vis une m me profondeur convenant votre projet Positionnez la bague de mandrin sur l avant de la perceuse sur les r glages de 1 le plus faible 21 le plus fort Sur...

Page 20: ...l outil a t utilis sur l un de ces mat riaux il est extr mement important de le nettoyer l air comprim LUBRIFICATION Ce outils est lubrifi s en permanence l usine et ne n cessitent aucune lubrificati...

Page 21: ...con protectores laterales Siempre utilice protecci n de ojos que est marcada indicando el cumplimiento de la norma ANSI Z87 1 Busque este s mbolo que indica precauciones de seguridad importantes ste...

Page 22: ...el riesgo de descargas el ctricas Evite el contacto del cuerpo con las superficies de objetos conectados a tierra como las tuber as radiadores estufas y refrigeradores Existe un mayor riesgo de descar...

Page 23: ...a producirse da o a la m quina y o lesiones personales No utilice la herramienta si el interruptor no realiza la operaci n de encendido y apagado Solicite a un centro de servicio autorizado que reemp...

Page 24: ...medida que aumenta la distancia desde el tomacorriente de suministro de energ a usted debe utilizar un cable de extensi n de mayor calibre Utilizar cables de extensi n con alambre de dimensiones inad...

Page 25: ...ci n de ojos deben cumplir las normas ANSI Z87 1 Los equipos de protecci n auditiva deben cumplir las normas ANSI S3 19 Prot jase los pulmones Use una careta o mascarilla contra el polvo si la operaci...

Page 26: ...bater as pueden emanar l quido Si el l quido llega a tocarle la piel l vese de inmediato con agua y jab n y despu s neutralice los efectos con jugo de lim n o vinagre Si le entra l quido en los ojos...

Page 27: ...DOR INAL MBRICO 1 Mandril sin llave 2 Selector del Esfuerzo de torsi n 3 Gatillo interruptor 4 Interruptor de reversa 5 Bits bandeja incorporado 6 Paquete de bater a DESEMPAQUETADO Y CONTENIDO IMPORTA...

Page 28: ...encendido incluso despu s que el proceso de carga est completo Las bater as podr an calentarse durante el proceso de carga Esto es normal Si la bater a est caliente despu s del uso continuo en el tal...

Page 29: ...a profundidad adecuada para su proyecto Ajuste el anillo del embrague ubicado en la parte delantera del taladro en valores de ajuste desde 1 el menor apriete hasta 16 el mayor apriete El valor de ajus...

Page 30: ...o destruir el pl stico lo cual a su vez puede producir lesiones corporales serias Las herramientas el ctricas que se utilizan en materiales de fibra de vidrio paneles de yeso para paredes compuestos d...

Page 31: ...n de la compra por favor llame gratis a la l nea de ayuda para las posibles soluciones ESTE PRODUCTO NO EST GARANTIZADO SI SE UTILIZA PARA PROP SITOS INDUSTRIALES O COMERCIALES LOS ACCESORIOS INCLUIDO...

Page 32: ...Richpower Industries Inc 736 Hampton Road Williamston SC USA www genesispowertools com 2013 07 V02...

Reviews: