background image

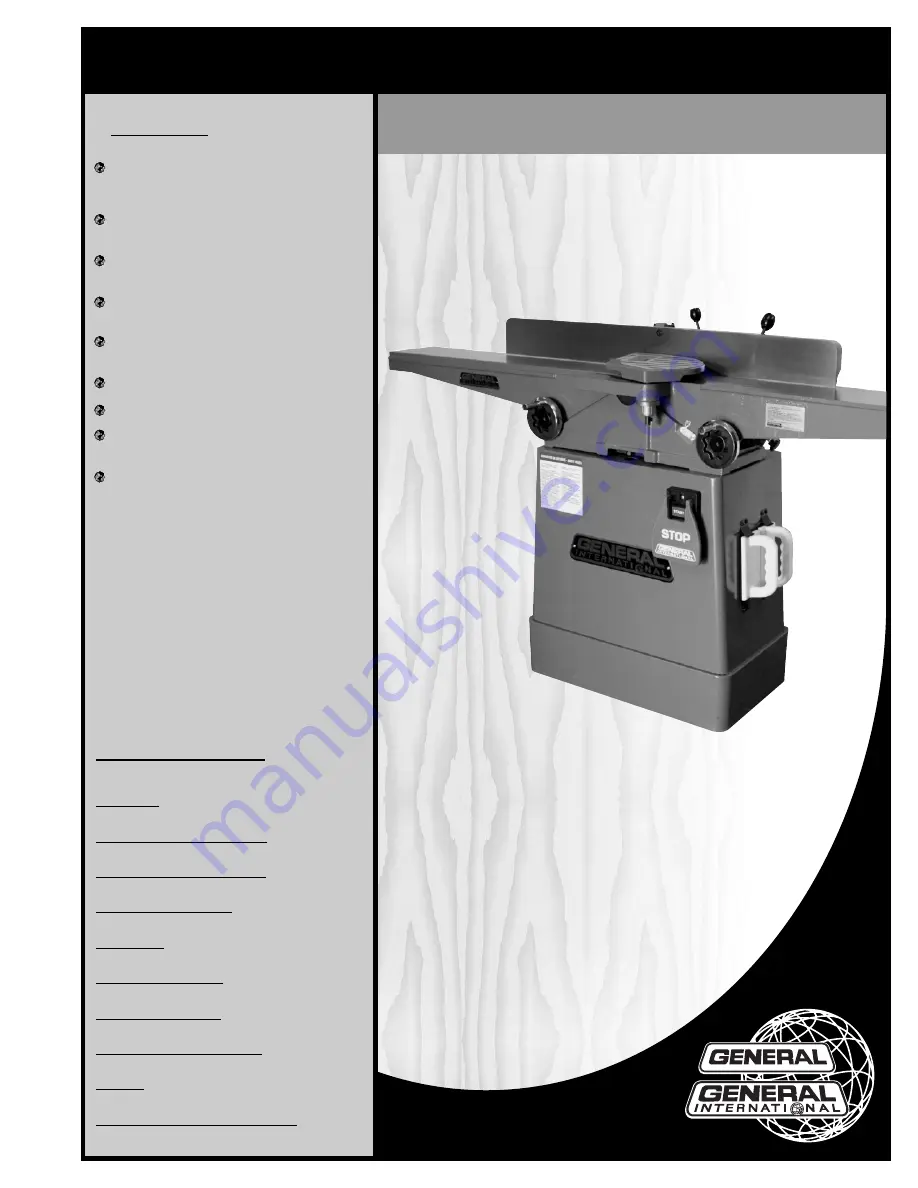
FEATURES

Large surface, ground cast-iron tables for
stability and added support when feeding
longer stock.

Heavy-duty, three-knife cutter head for
clean, fast, superior finish cuts.

Jackscrew system for quick, easy knife
adjustment.

Large, heavy-duty, center-mounted cast-
iron fence with 90° and 45° positive stops.

Independent in-feed and out-feed table
adjustment handwheels.

4” dust collection outlet included.

Built-in rabbeting ledge.

2 hand-paddle style push blocks with
onboard storage mounts included.

Extra long 66 1/4” tables

SPECIFICATIONS

TABLE SIZE
7 1/4" x 66 1/4" (184 x 1683 mm)

MAXIMUM CUTTING WIDTH
6" (152 mm)

MAXIMUM CUTTING DEPTH
1/2" (13 mm)

RABBETING CAPACITY
1/2" (13 mm)

FENCE SIZE
4" x 38" (102 x 965 mm)

CUTTER HEAD SPEED
5000 RPM

NUMBER OF KNIVES
3/HELICAL

BASE DIMENSIONS (L X W)
24" x 13 3/4" (610 x 349 mm)

MOTOR
1 HP, 110/220 V, 13/7 A

SHIPPING WEIGHT / NET WEIGHT
423 LBS (192 kg) / 340 LBS (154 KG)

SETUP & OPERATION MANUAL

VERSION 1 - REVISON 1 (August 16

th

, 2011)

© COPYRIGHT GENERAL INTERNATIONAL 2011

6” DELUXE JOINTER

MODEL

#80-125L/LHC

Summary of Contents for 80-125L

Page 1: ...rabbeting ledge 2 hand paddle style push blocks with onboard storage mounts included Extra long 66 1 4 tables SPECIFICATIONS TABLE SIZE 7 1 4 x 66 1 4 184 x 1683 mm MAXIMUM CUTTING WIDTH 6 152 mm MAX...

Page 2: ...uture reference Disclaimer The information and specifications in this manual pertain to the unit as it was supplied from the factory at the time of printing Because we are commit ted to making constan...

Page 3: ...er our Standard 2 year Limited Warranty or under our Limited Lifetime Warranty all defective parts components or machinery must be returned freight or postage prepaid to General International or to a...

Page 4: ...ctor 14 Adjusting and setting the out feed table height 14 Adjusting and setting the in feed table height depth of cut 15 Setting the in feed table min max height 15 Adjusting the fence checking setti...

Page 5: ...or force stock into the cutter head The jointer will perform better and more safely when work ing at the rate for which it was designed 14 Be sure that the cutter head has gained full operating speed...

Page 6: ...lock to hold and guide the workpiece 4 WORKPIECE SUPPORT To make safe cuts and reduce the risk of injury support the workpiece adequately at all times Never attempt to make a cut with an unstable work...

Page 7: ...L AS DAMAGE TO THE MACHINE IF IN DOUBT CONTACT A QUALIFIED ELECTRICIAN BEFORE CONNECTING TO THE POWER SOURCE THIS TOOL IS FOR INDOOR USE ONLY DO NOT EXPOSE TO RAIN OR USE IN WET OR DAMP LOCATIONS CONV...

Page 8: ...ble to support the weight of the jointer and the operator Using the dimensions shown as a guideline plan for placement within your shop that will allow the operator to work unencumbered and unobstruct...

Page 9: ...FLAT WASHER 3 PHILLIPS SCREW 4 FLAT WASHER 4 SMALL PHILLIPS SCREW 4 SMALL FLAT WASHER 4 SMALL PHILLIPS SCREW 4 SMALL FLAT WASHER 4 LIST OF CONTENTS QTY A JOINTER BED 1 B FENCE 1 C PULLEY GUARD 1 D CU...

Page 10: ...TED TO DO SO ASSEMBLY INSTRUCTIONS CLEAN UP 10 1 With the help of an assistant lift the jointer bed onto the base A 2 Align the 3 bolt holes on the jointer bed with the 3 holes on the base 3 Secure th...

Page 11: ...ley on its shaft to obtain parallel alignment then re tighten the set screws PULLEY PARALLEL ALIGNMENT 11 C B 1 Push on the belt with your finger The belt should not move more than 1 2 2 If needed tig...

Page 12: ...r the knives once the workpiece has cleared the guard To install the guard 1 Remove the set screw A on the guard shaft B 2 Turn and hold the tension adjustment knob and fit the shaft as far as it will...

Page 13: ...e end of the rod 3 Secure the foot on the rod by pushing a c clip into the exposed groove in the rod 4 Repeat step 2 and 3 to install the other foot 5 Set the gauge aside for use whenever knife settin...

Page 14: ...the machine is disconnected from the power source 2 To give yourself unimpeded access to the cutter head and and upper pulley remove the cutter head guard and fence 3 Set a straightedge onto the out f...

Page 15: ...e 20 ADJUSTING AND SETTING THE IN FEED TABLE HEIGHT DEPTH OF CUT WORKPIECE DEPTH OF CUT THE MAXIMUM DEPTH OF CUT FOR ONE PASS IS 1 8 NEVER ATTEMPT TO REMOVE MORE MATERIAL THAN 1 8 IN ANY SINGLE PASS A...

Page 16: ...sary To set the 90 fence stop 1 Using a 45 combination or machinists square set the fence to 45 inward J 2 Loosen the jam nut K 3 Adjust the 45 inward fence stop bolt L as needed 4 Retighten the jam n...

Page 17: ...or to first use ALWAYS DISCONNECT THE MACHINE FROM THE POWER SOURCE BEFORE MAKING ANY ADJUST MENTS FAILURE TO HEED THIS WARNING CAN LEAD TO SERIOUS PERSONAL INJURY 1 Make sure that the the machine is...

Page 18: ...E GENERAL DIRECTION OF THE GRAIN JOINTING AGAINST THE GRAIN OR JOINTING END GRAIN IS DANGEROUS AND MAY CAUSE THE WORKPIECE TO SHATTER D DETERMINE THE CONCAVE FACE AND EDGE OF YOUR BOARD Place your boa...

Page 19: ...cutter head to come to a complete stop The ON OFF switch assembly A is equipped with a lock out safety pin B When the pin is installed through the green ON button C the machine cannot be started When...

Page 20: ...e stock before starting remove any foreign objects or debris 3 Set the depth of cut as required 1 16 1 8 is recommended for rabbeting Less for hard wood or wider stock 4 Turn on the machine using push...

Page 21: ...s as they come off of the machine and looking for signs of knife damage or wear is the best method to help you to determine when knives are due to be changed Signs to look for include EFFECT EXAGGERAT...

Page 22: ...s to set the knife height Use an Allen key to turn the screws C to raise or lower the knife as needed until the ideal posi tion both sets of feet of the gauge sitting flush on the cutter head and the...

Page 23: ...f they have been removed instead of loosened follow the instructions below to make sure that the knife holder chip break ers are all secured at the same height into the cutter head 1 Place the screw i...

Page 24: ...ris and wipe down the machine and the tables occasionally with a damp rag An occasional light coating of paste wax can help protect the tables surface and reduce workpiece friction Ask your local dist...

Page 25: ...st collectors to suit all your shop needs Magnetic micro adjustable planer and join Magnetic micro adjustable planer and join ter knife alignment gauge 30 025 ter knife alignment gauge 30 025 Keeps kn...

Page 26: ...B 34 92 37 39 38 40 92 8 29 5 4 3 2 1 1 33 18 B 55 53 129 56 58 59 60 28 54 7 50 49 50 49 45 46 45 46 41 6 20 22 21 6 61 51 52 125 128 65 2 65 1 65 2 65 1 7 126 134 127 130 131 132 133 93 92 91 109 11...

Page 27: ...ALL CRANK 1 26 80100 26 SHOULDER PIN 2 27 80125 06 BASE 1 28 80125 07 SET SCREW 5 16 18NC x 3 8 2 29 80125 08 IN FEED TABLE 1 30 80125 09 SET SCREW 7 31 80100 31 HEX NUT 1 4 20NC 11B x 5 5H 5 32 80100...

Page 28: ...83 80125 39 SQUARE NUT 1 84 80125 40 SWIVEL BLOCK 1 85 80125 41 HEX NUT 3 8 x 16NC 13 83B x 6 68H 4 86 80125 42 SCREW 4 87 80125 43 LINK PLATE 1 88 80125 44 FENCE SLIDE BLOCK 1 89 80125 45 HEX HEAD BO...

Page 29: ...80125 63 SAFETY PIN 1 119 80125 64 KNIFE SETTING GAUGE BLOCK 2 120 80125 65 E RING ETW 9 4 121 80125 66 KNIFE GAUGE BAR 1 122 80100 122 SHEET METAL SCREW 5 32 x 5 16 8 123 80100 123 LOCK WASHER 4 1 x...

Page 30: ...REW 16 3 100H 03 NUT 16 4 100H 04 KNIFE HOLDER CHIP BREAKER 16 5 30 443 CARBIDE INSERT STANDARD 30X12X1 5MM T 14 6 100H 06 CARBIDE INSERT RABBETING 30X12X1 5MM T 2 7 100H 07 T HANDLE ALLEN KEY 5MM 1 8...

Page 31: ...31 Notes...

Page 32: ...S 80 125L LHC xkcjnvjknck xvnkzx nvcv b cvjkbncvbkoidmbp b vikmodfidfm ofmcmpmp dkmfdnozi onpompmnm c kfnifxcbvinvobnoncvknxcklvnzxlc nvklxz cv ckxvnljkxcb nkvnzxc vbn klzxcnbklcvnklbncl kvnblkzxcn xc...

Reviews: