ENGLISH
20
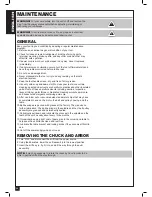
MAINTENANCE
WARNING!
For your own safety, turn the switch off and remove the
plug from the power source outlet before adjusting, maintaining or
lubricating your drill press.
WARNING!
To avoid electrocution or fire, any repairs to electrical
systems should be done by an authorized repair center.
GENERAL
Keep your tool in good condition by adopting a regular maintenance
program.
1. Before use, examine the general condition of your tool.
2. Check for loose screws, misalignment, binding of moving parts,
improper mounting, broken parts, and any other condition that may
affect its’ safe operation.
3. If power cord is worn, cut or damaged in any way, have it replaced
immediately.
4. If abnormal noise or vibration occurs, turn the tool off immediately and
have the problem corrected before further use.
5. Do not use a damaged tool.
6. Never disassemble the tool or try to do any rewiring on the tool’s
electrical system.
7. Keep the tool handles clean, dry and free of oil or grease.
8. Use only mild soap and damp cloth to clean your tool since certain
cleaning agents and solvents are harmful to plastics and other insulated
parts. Some of these harmful solvents include: gasoline, turpentine,
lacquer thinner, paint thinner, chlorinated cleaning solvents, ammonia,
and household detergents containing ammonia.
9. After use, blow out or vacuum sawdust and metal chips that may have
accumulated in and on the motor, the belt and pulley housing, and the
table.
10. Ball bearings are packed with grease at the factory. They require no
further lubrication. The ball bearings in the spindle and the V-belt pulley
assembly are greased and permanently sealed.
11. Periodically pull down and lubricate the grooves in the spindle and the
teeth of the quill, usually about every three months.
12. Occasionally apply a light coat of paste wax to the column and table to
help keep these surfaces clean and rust-free.
13.
Lubricate the table bracket and locking knobs if they become difficult to
use.
14. Cut off the power supply when not in use.
REMOVING THE CHUCK AND ARBOR
1. Turn “OFF” and disconnect the drill from the power source.
2. Using feed handles, lower the quill assembly to the lowest position.
3.
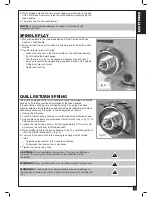
Insert the drift key (o, fig 3) into, and all the way through the quill
assembly.
NOTE:
It may be necessary to rotate the chuck by hand in order to be
able to get the drift all the way through.
!
!
Summary of Contents for DP2006
Page 24: ...ENGLISH 24 SCHEMATIC DRAWING ...
Page 50: ...FRANÇAIS 50 SCHÉMA ...
Page 51: ...FRANÇAIS 51 141222 ...
Page 52: ...FRANÇAIS 52 ...


