background image

ENGLISH

22

TROUBLESHOOTING

PROBLEM

POSSIBLE CAUSE

SOLUTION

Operation is noisy under load

Improper belt tension

Adjust tension

Dry spindle

Remove and oil spindle / quill assembly

Loose pulley

Check and tighten pulley attachments or 

set screws

Excessive runout

Bent drill bit

Replace drill bit

Drill bit is improperly mounted in chuck

Check that chuck holds bit cleanly

Chuck is loose

Clean chuck / spindle joint

Retighten chuck- press down with chuck 

against wooden block on table

Damaged bearings or spindle

Replace spindle shaft or bearing

Chuck is loose

Replace chuck

Motor will not start

Power supply is faulty

Check power cord

Problem with motor connection 

Check connections to motor

Faulty switch

Replace

Motor windings burned

Replace motor

Drill bit binds in material

Too much feed pressure

Less force on feed handles

Belts are slipping

Check belt tension

Loose drill bit

Tighten chuck correctly

Drilling speed is wrong

Refer to speed table

Drill angle or bit type is wrong for material Check material information and handling 

instruction

Workpiece moves during drilling

Properly support or clamp workpiece

Drill bit burns or smokes in material

Wrong speed for material and hole size

Refer to speed table

Chips are not being evacuated from hole Clean the drill bit
Dull bit or incorrect clearance

Replace or sharpen bit

Needs coolant

Use coolant

Feed is too slow

Increase speed at feed handles

Quill returns too slowly or with too much 

force

Quill return spring is improperly adjusted

Adjust tension

Dust on or in quill assembly 

Clean and lubricate

Table raises with difficulty

Lack of lubrication

Apply a light oil

Table lock is tightened

Loosen table lock handle

Excessive tearout on underside

Too much feed pressure

Less force on feed handles

No backing material

Use another piece of scrap material as 

backing

Drill bit veers off hole

Hard grain in wood

Lubricate drill bit

Bent drill bit

Replace

Too much force

Use a lower feed speed

NOTE: 

SERVICE AND REPAIRS should be made by qualified repair 

technicians at an authorized repair center. Improperly repaired tools could 

cause serious shock or injury.

NOTE: 

REPLACEMENT PARTS. When servicing, use only the 

manufacturer’s recommended replacement dentical replacement parts 

and accessories.

Summary of Contents for DP2006

Page 1: ...witch with removable security key Transparent flip up chuck safety guard Large soft grip ergonomic feed handles Depth stop with scale Heavy cast iron and steel construction SPECIFICATIONS Motor 120 V 60 Hz Power 550 W 1 HP Swing 15 in 390 mm Work table dim 12 x 12 30 5 x 30 5 cm Base dim 17 15 16 x 10 5 8 456 mm x 270 mm Drilling capacity 3 4 in 20 mm Taper MT2 Overall height 63 1610 mm Speed rang...

Page 2: ... are committed to making constant improvements General International reserves the right to make changes to components parts or features of this unit as deemed necessary without prior notice and without obligation to install any such changes on previously delivered units Reasonable care is taken at the factory to ensure that the specifications and information in this manual corresponds with that of...

Page 3: ...ce THE WARNINGS CAUTIONS AND INSTRUCTIONS discussed in this instruction manual cannot cover all possible conditions or situations that could occur It must be understood by the operator that common sense and caution are factors which cannot be built into this product but must be supplied by the operator IMPORTANT SAFETY INSTRUCTIONS The purpose of safety symbols is to attract your attention to poss...

Page 4: ...Do not wear loose clothing gloves bracelets necklaces or jewellery while operating the tool Wear face eye ear respiratory and body protection devices as indicated for the operation or environment 6 ALWAYS WEAR SAFETY GLASSES Also use face or dust mask if cutting operation is dusty and ear plugs during extended periods of operation Everyday eyeglasses have only impact resistant lenses they are NOT ...

Page 5: ... safer at a rate for which it was designed Don t force a small tool or attachment to do the work of a larger industrial tool Don t use a tool for a purpose for which it was not intended 5 MAINTAIN TOOLS WITH CARE Keep tools sharp and clean for better and safer performance Follow instructions for lubricating and safe performance Follow instructions for lubricating and changing accessories Keep hand...

Page 6: ...st important safety feature in any shop is the knowledge and good judgement of the user Use common sense and always keep safety considerations as they apply to your individual shop situation first and foremost in mind If you have any doubts about the safety of an operation you are about to perform STOP Do not perform the operation until you have validated from qualified individuals if the operatio...

Page 7: ...ARTS Before using this tool any part that is damaged should be carefully checked to determine that it will operate properly and perform its intended function Check for misalignment of moving parts binding of moving parts breakage of parts mountings and other conditions that may affect its operation Inspect screws and tighten any that are loose Any part that is damaged should be properly repaired o...

Page 8: ...he chuck is rotating 31 USE ONLY ACCESSORIES DESIGNED FOR THIS DRILL PRESS to avoid serious injury from thrown broken parts or work pieces 32 WHEN CUTTING LARGE DIAMETER HOLES CLAMP THE WORKPIECE FIRMLY TO THE TABLE Otherwise the cutter may grab and spin at high speed Use only one piece cup type hole cutters DO NOT use fly cutters or multi part hole cutters as they may come apart or become unbalan...

Page 9: ...in serious injury to the user as well as damage to the machine If in doubt contact a qualified electrician before connecting to the power source 2 MAKE SURE YOUR FINGERS do not contact the terminals of the power cord plug when plugging in or unplugging the tool 3 GROUNDED TOOLS MUST BE PLUGGED INTO AN OUTLET THAT ITSELF IS PROPERLY INSTALLED AND GROUNDED Grounding provides a low resistance path to...

Page 10: ...a 12 ga Not Recommended Use only UL or CSA approved extension cords WARNING Do not allow familiarity with your tool to make your careless Remember that a careless fraction of a second is sufficient to inflict severe injury IMPORTANT The warnings cautions and instructions detailed in this manual cannot cover all possible conditions and situations that occur It must be understood by the operator tha...

Page 11: ... below NOTE Make certain all parts are accounted for before discarding any packing material Some items below may be packed already assembled to each other a Table assembly b Column assembly c Manual d Loose parts box e Base f Head assembly g Loose parts bag h 2 x AA batteries i 4 x hex bolts j Allen hex keys 3 mm 4 mm 5 mm k Chuck safety guard l 2 x V belt m Table hand crank n Table support lock h...

Page 12: ...ty guard P Depth stop Q Work light switch R Head lock set screw S Drill switch T Drill switch lockout key U Belt tension lock knob V Belt pulley cover W Laser switch X Belt pulley cover knob Y Belt tensioning handle Z Feed handle AA Quill feed spring assembly BB Depth gauge CC Floor mount holes ASSEMBLY PROCEDURE WARNING For your own safety never connect the plug to the power source outlet or inse...

Page 13: ...e roughly the center of the rack 6 Slide this table support and rack assembly down together onto the column Insert the bottom edge of the rack so that it rests inside the lip of the column support 7 Hold it in this position while you place the rack collar bevel side down over the top edge of the rack 8 Tighten the set screw with a hex Allen wrench holding the rack in position NOTE Make sure there ...

Page 14: ...ide the pulley cover or the drill speed chart in the Adjustments section and fit the belts l fig 3 in positions corresponding to spindle drill speed required 8 Turn the belt tensioning handle counter clockwise so that tension is applied to the belts Tension is correct when the belts deflect by about 1 2 13 mm at their centers of run when using reasonable thumb pressure CAUTION Do not over tension ...

Page 15: ...ermine the speed at which you set the drill press As a rule of thumb small drill bits require more speed than large drill bits and soft materials require more speed than hard ones APPROXIMATE RECOMMENDED DRILLING SPEEDS Speed range Wood Non ferrous metals Aluminum Zinc Brass Iron Steel Drill bit diameter 2000 to 3100 rpm 3 8 9 5 mm 7 32 5 6 mm 3 32 2 4 mm 1400 to 2000 rpm 5 8 16 mm 11 32 8 75 mm 5...

Page 16: ...le support lock handle K fig 4 and turning the crank handle I fig 5 until the table is at the height desired 2 Be sure to re tighten the table support lock handle before drilling TABLE ROTATION Rotate the table around the column 1 By loosening the table support lock handle and moving the table around the column to the placement desired 2 The table height adjustment rack should also slide around th...

Page 17: ... s downward travel at a consistent specific depth particularly for repeat drilling set up the depth stop With the drill press turned off 1 Set the bottom edge of the lower nut 1 even with the desired depth setting marked on the scale 2 Check the depth Lower the drill using the feed handles alongside the workpiece until it hits the stop Compare it to the desired hole depth 3 If OK tighten nut 2 aga...

Page 18: ...oles of the chuck when tightening it 3 Before the final tightening with the chuck key be sure the drill bit is centered in the chuck jaws 4 Tighten the chuck sufficiently to prevent the bit slipping in the jaws during drilling As a test turn the drill press on and immediately off to check if the drill bit wobbles LASER 1 Place a work piece on the table 2 Turn the laser switch on press I DANGER Do ...

Page 19: ...arly in wood drilling ease up on the pressure when nearing the point where the drill bit is about to emerge on the other side of the workpiece 6 After drilling a hole do not release the feed handle but restrain it lightly allowing the spring to raise spindle sleeve gently to its original position 7 Turn off the drill press 8 Switch off the laser 9 Switch off the work light WARNING After switching ...

Page 20: ... harmful to plastics and other insulated parts Some of these harmful solvents include gasoline turpentine lacquer thinner paint thinner chlorinated cleaning solvents ammonia and household detergents containing ammonia 9 After use blow out or vacuum sawdust and metal chips that may have accumulated in and on the motor the belt and pulley housing and the table 10 Ball bearings are packed with grease...

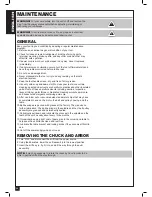
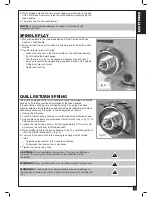
Page 21: ...a spring and a notched housing The spring has been properly adjusted at the factory and should not need readjustment unless absolutely necessary If required it can be adjusted as follows 1 Unplug the drill press 2 Locate the return spring housing on the left side of the drill press head 3 Use needle nose pliers or a screwdriver thrust into the loop s fig 13 to hold the spring in place 4 Loosen the...

Page 22: ...d handling instruction Workpiece moves during drilling Properly support or clamp workpiece Drill bit burns or smokes in material Wrong speed for material and hole size Refer to speed table Chips are not being evacuated from hole Clean the drill bit Dull bit or incorrect clearance Replace or sharpen bit Needs coolant Use coolant Feed is too slow Increase speed at feed handles Quill returns too slow...

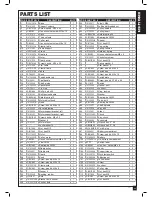
Page 23: ...4 55 13105009 Bushing rubber 4 56 LYPCB01 Bulb 1 57 16102013 2A Bracket bulb socket 1 58 16102013 1B Socket bulb 1 POS PART NO DESCRIPTION QTY 59 16105011 V belt M26 1 60 16102025 Left hand threaded nut 1 61 16105009D Pulley spindle 1 62 16102022 Pulley insert 1 63 GB894 1 86 Retaining ring 35 1 64 GB276 89 Bearing ball 6204 2 65 16102023B Spacer 1 66 GB170 86 Nut hex M12 2 67 16104008 Cap spring ...

Page 24: ...ENGLISH 24 SCHEMATIC DRAWING ...

Page 25: ...être relevé Interrupteur facilement accessible avec clé de sécurité Grande poignées d alimentation ergonomique Guide d arrêt avec gradation Construction robuste de fonte et d acier SPÉCIFICATIONS Moteur 120 V 60 Hz Puissance 550 W 1 cv Diamètre de perçage 15 po 390 mm Table de travail 12 po x 12 po 30 5 x 30 5 cm Base 17 15 16 po x 10 5 8 po 456 mm x 270 mm Capacité de perçage 3 4 po 20 mm Fuselag...

Page 26: ...le consentement écrit de General International annuleront la garantie CLAUSE DE NON RESPONSABILITÉ L information et les caractéristiques présentées dans ce manuel se rapportent à la machine telle qu elle est sortie de l usine au moment de mettre sous presse En raison de son souci d amélioration constante General International se réserve le droit de modifier des composantes des pièces ou des caract...

Page 27: ...ts de sécurité les précautions l assemblage le fonctionnement les procédures d entretien la liste des pièces et les schémas des pièces Gardez votre facture avec ces instructions Écrivez votre numéro de facture à l intérieur de la page couverture Gardez les instructions ainsi que la facture dans un endroit sûr et sec pour référence future LES AVERTISSEMENTS LES PRÉCAUTIONS ET LES instructions discu...

Page 28: ...EURER ALERTE Regardez ce que vous faites Utilisez votre bon sens Ne pas utiliser l outil lorsque vous êtes fatigué Ne pas l utiliser sous médication ou si vous avez consommer de l alcool ou d autres drogues 4 ÉVITEZ LES DISTRACTIONS DURANT LES SESSIONS DE TRAVAIL 5 PORTEZ DES VÈTEMENTS APPROPRIÉS Ne portez pas de vêtements amples gants bracelets colliers bijoux lors de l utilisation de l outil Por...

Page 29: ...t est accidentellement en contact avec vous 16 GARDER LES MAINS LOIN DES FORETS et toutes les pièces mobiles Ne pas enlever la sciure ou la poussière avec mains Utilisez une brosse 17 UTILISATION SI POSSIBLE D UN COLLECTEUR DE POUSSIÈRE avec un couvercle pour réduire les risques pour la santé 18 SECURISER VOTRE PIÈCE Utilisez des pinces ou un étau pour maintenir la pièce Il est plus sûr que d util...

Page 30: ...ette machine La connaissance est sécurité 12 UTILISEZ LES ACCESSOIRES RECOMMANDÉS L utilisation d accessoires non recommandés par Général International peut entraîner un risque de blessure SERVICE 1 INSPECTION ET ENTRETIENT RÉGULIER DE L OUTIL Le faire réparer par un technicien agréé 2 ENTRETENIR LES OUTILS AVEC SOIN Garder les outils propres pour un meilleur rendement Suivre les instructions pour...

Page 31: ...ez pas de brancher le cordon d alimentation et de mettre l interrupteur à ON jusqu à ce que la pièce endommagée ou manquante sont obtenus et sont correctement installés 5 FIXER LA MACHINE SUR UNE SURFACE D APPUI Les vibrations peuvent faire glisser se déplacer ou basculer la perceuse Pour éviter toutes blessures causé par un mouvement inattendu assurez vous que la perceuse est sur une surface de n...

Page 32: ...ter la perceuse 18 NE QUITTEZ PAS LA ZONE DE TRAVAIL AVANT QUE TOUTES PIÈCES MOBILES SOIENT ARRÊTÉES Coupez l alimentation du commutateur maitre Rendez l atelier à l épreuve des enfants 19 POUR LIBÉRER LES PIÈCES COINCÉES éteindre l interrupteur Débranchez l outil Attendez que toutes les pièces en mouvement soient arrêtées avant de retirer le matériau coincé 20 NE JAMAIS TRAVAILLER MAIN LIBRE Teni...

Page 33: ...se à colonne Accessoires non conforme peuvent se détacher et causer des blessures 34 NE PAS INSTALLER OU UTILISER DES MÈCHES dépassant 7 po 18 cm de longueur ou dépassant de 6 po 15 cm en dessous des mâchoires du mandrin Ils peuvent plier brusquement ou se briser 35 NE PAS UTILISER des mèches à fil métallique couteaux à façonner des forets de toupie Scie cylindriques à plusieurs morceaux des plane...

Page 34: ...ÉSISTANCE QUI CONDUIT L ÉLECTRICITÉ AU SOL PRÉVOYANT LES CHOC SI L APPAREIL A UN DÉFECTUOSITÉ ÉLECTRIQUE 4 N ABUSEZ PAS LE CORDON D ALIMENTATION Ne pas transportez ou tirer le cordon d alimentation pour le débrancher Protégez le cordon des sources potentielles de dommages la chaleur de l huile et des solvants des endroits coupants ou des pièces mobiles Remplacez immédiatement un cordon endommagé 5...

Page 35: ...MPORTANT Les mises en garde les avertissements et les instructions détaillées dans ce manuel ne peut pas couvrir toutes les situations qui se produisent il doit être compris par l opérateur que le bon sens et la prudence sont facteurs qui ne peuvent pas être intégrés dans ce produit mais doivent être fournis par l opérateur SÉCURITÉ LASER Cet outil est équipé laser de précision avec guide de centr...

Page 36: ...Assurez vous que toutes les pièces sont déballées avant de jeter le matériel d emballage Certains articles ci dessous peuvent être emballés déjà assemblés les uns aux autres a Ens de table b Ens de colonne c Manuel d Boite de quincaillerie e Base f Ens de tête g Sac de quincaillerie h Batteries AA 2 i 4 x boulons hex j Ens de clés Allen 3 mm 4 mm 5 mm k Garde du mandrin l Courroie en V 2 m Manivel...

Page 37: ...s de support de la table F Barrure d angle de la table G Barrure de la table H Table I Manivelle de la table J Support de la table K Verrou du support L Collier de l étrier M Moteur N Mandrin O Garde du mandrin P Guide de profondeur Q Interrupteur de la lampe R Barrure vis à tête creuse S Interrupteur T Clé de sécurité U Bouton de tension des courroies V Couvercle de poulies W Interrupteur du lase...

Page 38: ...u support de la table J fig 6 et à travers le trou de la poignée de manivelle comme indiqué à droite L arbre de vis sans fin doit dépasser du boîtier d environ 1 po 25 mm 4 Insérez le support D figure 5 dans la rainure verticale du support de table Assurez vous que la vis sans fin entraînée par l arbre à vis sans fin est justement installé sur la partie à l intérieur du support de table est en pri...

Page 39: ... enlevées temporairement Si le travail comporte une pièce en forme exceptionnelle qui interfère avec la rotation de la poignée POULIE ET COURROIE 1 Ouvrez le couvercle de la poulie ATTENTION Assurez vous que la perceuse est éteinte et débranchée lorsque le couvercle de courroie et de poulie est ouvert et vous avez vos mains dans cette zone 2 Desserrez le bouton de tension la courroie du côté gauch...

Page 40: ...iron 2 po 50 mm au dessous du mandrin Verrouiller la table en place Tournez les poignées l alimentation en sens antihoraire ce qui oblige le mandrin vers le bas contre le bois Cela sécurisera le mandrin sur l axe 5 Pour retirer le mandrin voir la section Entretien BATTERIES POUR LE LASER 1 Repérez l interrupteur du laser W fig 5 et 7 sur le côté gauche de la tête 2 Appuyez sur l onglet situé en de...

Page 41: ... 5 dans le sens horaire Cela tirera la moteur vers l avant près de la tête de la perceuse amener la poulie du moteur plus près de la poulie de l axe permettant les courroies d entraînement déplacées 5 Choisissez la meilleure vitesse pour l opération de forage planifié et installer la courroies dans la position correcte sur les poulies pour produire cette vitesse ATTENTION Assurez vous que la perce...

Page 42: ...née barrure de la table INCLINAISON DE LA TABLE Le tableau dispose d une gamme d inclinaison disponible entre 0 et 45 à gauche et à droite 1 Localisez le verrou de biseau sous la table 2 Pour incliner la table desserrer la vis M16 x 35 de blocage F fig 4 et 5 sous la table avec une clé 3 Inclinez la table à l angle désiré vous pouvez utiliser l échelle de gradation sur le support comme d un guide ...

Page 43: ... et fournira des trous répétitifs à la même profondeur 5 Écrou 3 peut également être mis en œuvre pour limiter la rétraction à la hausse de la mèche 6 Après avoir utilisé la perceuse à la profondeur de jeu fourni par la butée de profondeur se rappeler de renvoyer l arrêt de la partie supérieure INSTRUCTIONS D OPÉRATION ATTENTION Avant d utiliser cette machine l opérateur doit soigneusement lire su...

Page 44: ...ble 2 Mettez l interrupteur du laser à on appuyez sur I DANGER Ne pas regarder directement le faisceau laser Dangereux pour les yeux si vous regardez délibérément dans le faisceau 3 Abaisser la mèche PAS EN FONCTION pour toucher la pièce Les deux lignes du laser doivent se croisées où la mèche rencontre la pièce 4 Si le laser doit être réajusté À l aide d une clé hexagonale tournez les vis hexagon...

Page 45: ... Éteignez la perceuse à colonne 8 Coupez le laser 9 Éteignez la lumière de travail ATTENTION Après l arrêt ne jamais laisser la machine sans surveillance jusqu à ce qu il est venu à un arrêt complet ATTENTION En cas de problème ou de bruit anormal survenant pendant le fonctionnement arrêter le moteur débranchez l appareil de la source et trouver la cause Ne pas reprendre tant que le problème n est...

Page 46: ...de cire en pâte à la colonne et table pour aider à garder ses surfaces propres et sans rouille 13 Lubrifiez le support de table et boutons de verrouillage si elles deviennent difficiles à utiliser 14 Coupez l alimentation électrique en cas de non utilisation ENLEVER LE MANDRIN 1 Mettez à arrêt et débranchez le cordon de la source d alimentation 2 À l aide des poignées d alimentation abaisser l ens...

Page 47: ...ire 7 Serrez les deux écrous du boitier MISE EN GARDE Do not overtighten the two nuts If the nuts are tightened too much the movement of the spindle and feed handles will be restricted ATTENTION Ne jamais utiliser de solvants inflammables ou combustibles auprès des outils ATTENTION Pour réduire le risque de blessures choc électrique ou dommage à l outil ne jamais immerger votre outil dans un liqui...

Page 48: ...z moins de force Pas de matériau de retenu Utilisez une pièce de bois de rebus sous la pièce à travailler Mèche dévie de son trou Bois très dur Lubrifiez la mèche Mèche légèrement voutée Remplacez Trop de force Utilisez une vitesse moins haute REMARQUE le service et les réparations doivent être faites par un technicien qualifié dans un centre de réparation agréé Un outil mal réparé pourrait provoq...

Page 49: ...sort 1 68 16104009 Ressort de tension 1 69 16104007A Siège de ressort 1 70 GB80 85 Vis de pression à six pans creux M8 x 8 1 POS no de PIÈCE DESCRIPTION QTÉ 71 16102021 Vis de pression à six pans creux 1 72 GB6170 86 Écrou hex M10 1 73 Rondelle à ressort 5 2 74 Rondelle dentée 5 2 75 GB818 85 Vis à tête cylindrique bombée M5 x 6 2 76 16102008C Boîtier d interrupteur 1 77 GB818 85 Vis à tête cylind...

Page 50: ...FRANÇAIS 50 SCHÉMA ...

Page 51: ...FRANÇAIS 51 141222 ...

Page 52: ...FRANÇAIS 52 ...

Reviews: