background image

GK340     11

Using the Style Auto functions

The Styles provide a wide variety of automatic functions that

make the 

GK340

 very easy to play.  The functions are found

in the ACCOMPANIMENT CONTROL section.

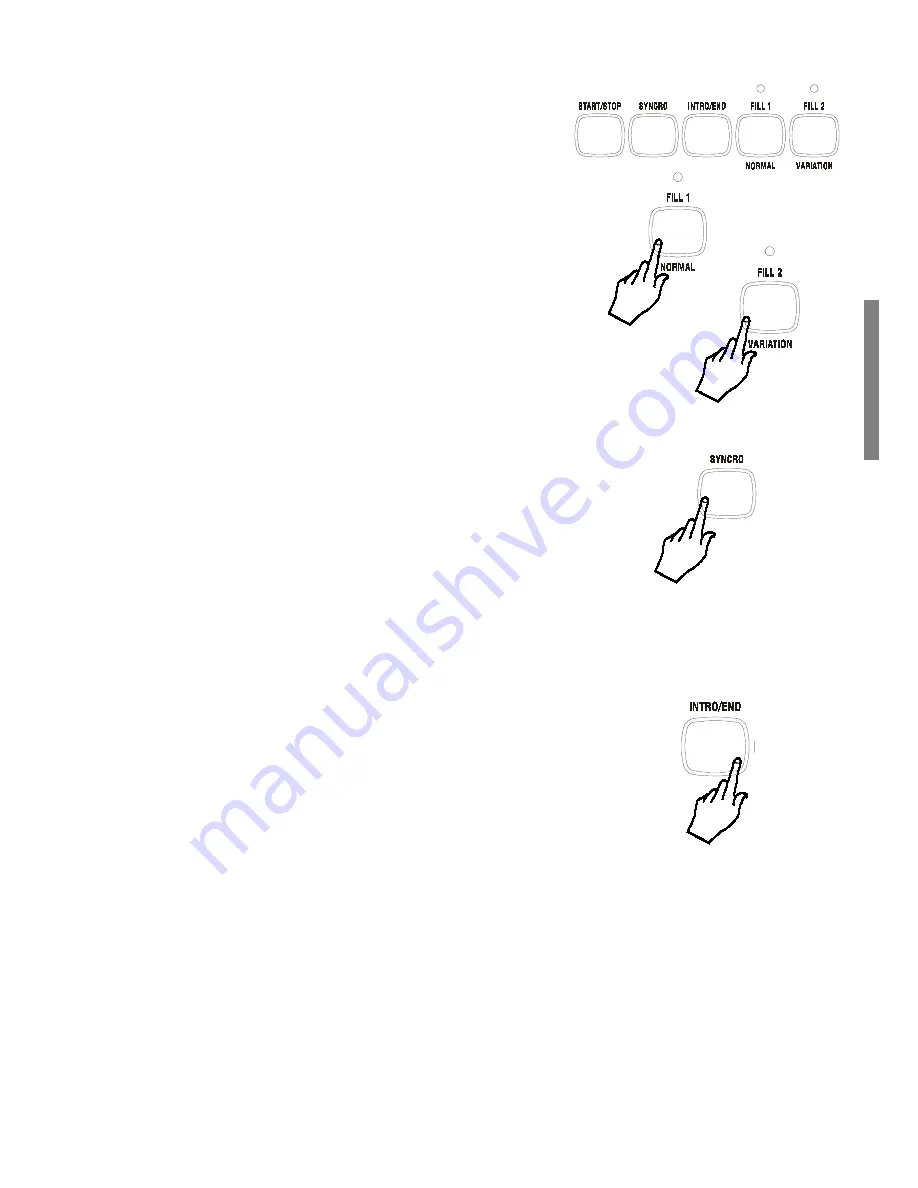
Select the Fill In and change Style Variation

Each Style has two accompaniment patterns, 

NORMAL

 and

VARIATION

, which you can select at any time before or

after starting to play the Styles by pressing the corresponding

button.    The status of the LED on the FILL 1 or FILL 2

buttons tells you which Style pattern is active for play, Normal

or Variation.
When you press the 

[FILL 1/NORMAL]

 or the 

[FILL 2/

VAR]

 button during playback, the current pattern will be

interrupted by an appropriate Fill In, or “break”, then pro-

ceed with the same pattern or variation, depending on which

button you press.
The LED of the  button pressed will turn on while the LED of

the other button will turn off.

Start the Style accompaniments with Key Start

The KEY START function allows you to synchronize the start

of your Style with a note or chord pressed on the keyboard

without using the Start/Stop button.
When you press the 

[KEY START]

 button, the display shows

4 flashing black dots (beat pattern indicators) after the word

TEMPO to indicate the synchro start stand-by.   Now, if you

play a note or chord on the lower part of the keyboard, the

Style pattern starts automatically.

Start the Style with an Intro pattern

Before starting the Style, press the

 [INTRO] 

button to put

the instrument into intro-stand-by mode.  The LED of the

current Style pattern (Fill1/Normal or Fill2/Var) starts to flash

to indicate that the INTRO has been preset.  Now press the

[START/STOP]

 button and play a note or chord on the lower

part of the keyboard.   The Style starts with an introductory

pattern then proceeds with the selected auto-accompaniment

(Normal or Variation).

Stop the Style with an Ending phrase

You can stop your Style automatically with a professionally-

programmed ending pattern without using the Start/Stop

button. While the Style is playing, simply press the 

[ENDING]

button.  The Style auto-accompaniment will stop automatically

with an Ending phrase.

Summary of Contents for GK 340

Page 1: ...ENGLISH Owner s manual GK 340...

Page 2: ...your authorized technical assistance centre to have the lithium battery replaced with the same or equivalent type reccommended by the manufacturer NB Danger of explosion or damage of the battery if i...

Page 3: ...the Octave Transpose setting 8 Styles Auto Accompaniment 8 What are the Styles 8 Selecting Style Mode 8 Use the and buttons to select a Style 9 Use the numeric keypad to select a Style 9 Selecting th...

Page 4: ...II GK340 Contents The GK340 Utility functions 16 Transpose 16 Tune 16 Pan 16 MIDI 17 Midi channel selection 17 Control Change filter 17 The Beat function 17 PERCUS function 17...

Page 5: ...cover 2 Insert six D size SUM 1 or R 20 batteries into the battery com partment beingcarefultofollowthepolaritymarkingsonthecabinet 3 Replace the compartment cover making sure that it locks firmly in...

Page 6: ...nect the rear panel AUX OUT jack to amplified speakers amplifiers or domestic hi fi units for external amplification Use audio cables with standard 1 4 jacks and plug into the LINE IN or AUX IN of the...

Page 7: ...strument is in NORMAL mode Every time you turn on your instrument it sets to NORMAL mode To return the instrument to NORMAL mode press the MODE button to the left of the display Selecting playing Voic...

Page 8: ...number assigned to the layered section If you play on the keyboard you will hear two sounds for every note played In our example you will hear the Piano voice 01 together with Strings 49 In DUAL mode...

Page 9: ...d Voices in Normal Dual and Split modes using a number of panel operations If every time you want to create a preferred sound combination you have to take several steps to arrive at your goal you woul...

Page 10: ...volume press the bottom DECREASE VOLUME control If the Upper section is playing with the DUAL effect the UPPER MIXER controls adjust both voices at the same time Muting the sections If you want to exc...

Page 11: ...right hand side of the control panel you can turn the effect on or off at will When the small black display arrow is shown pointing to the REVERB and or CHORUS indicator the current voices are playin...

Page 12: ...y 5 sections or tracks that generate the automatic arrangements Drums Bass and 3 Accomp and an additional two tracks Upper and Lower for the keyboard sounds The automatic arrangements are triggered by...

Page 13: ...nge key for example from C to F the Style pattern will transpose automatically The names of the recognized chords are displayed in the left hand corner of the display For example if you play the chord...

Page 14: ...ote C2 up to and including note F 3 FINGERED mode requires that you press at least 3 notes for a chord to be recognized ONE FINGER mode requires that you press only one note for a Major chord to be re...

Page 15: ...ou to synchronize the start of your Style with a note or chord pressed on the keyboard without using the Start Stop button When you press the KEY START button the display shows 4 flashing black dots b...

Page 16: ...e a section mute or turn off simply press both INCREASE VOLUME and DECREASE VOLU ME buttons at the same time to mute the section required For example to play your Upper and Lower voices with the BASS...

Page 17: ...corresponds to note F 3 1 Press and hold the MODE button The display will show the current Split Point setting expressed as a note of the keyboard together with the number of the Voice assigned to the...

Page 18: ...cluding Style Variation and other se lections which you can then recall at the touch of a single button To memorize a Performance the first thing to do is to modify one of the factory set situations F...

Page 19: ...terns when you play a chord on the keyboard below the split point If you play a note or chord on the upper part of the keyboard only the drum track will be triggered 5 While playing use the Fills chan...

Page 20: ...ormal pitch press both and TRANSPOSE buttons at the same time Tune The TUNE function allows you to fine tune the instrument in steps on one cent at a time cent one hundredth of a tone If you press eit...

Page 21: ...ither the or button repeatedly to scroll to the required Beat number For example if you want to practice a piece with a time signature of 5 4 assign the number 5 to the BEAT function The BEAT value ha...

Page 22: ...tyles X 2 variations 4 tracks Styles Control normal fingered one finger split start stop syncro intro end fill 1 normal fill 2 variation Sequencer 1 song style record play stop 96 internal demo songs...

Page 23: ...TRUMPET 58 TROMBONE 59 TUBA 60 MUTE TRP 61 FR HORN 62 BRASSECT 63 SYNBRASS 1 64 SYNBRASS 2 REED group 65 SPRNOSAX 66 ALTOSAX 67 TENORSAX 68 BARI SAX 69 OBOE 70 ENG HORN 71 BASSOON 72 CLARINET PIPE gr...

Page 24: ...O U S E DANCE2 37 TECHNO M 38 70 D ISCO 39 DIGITAL 40 CL DISCO 41 BAKER POP 42 RAP 43 EURO POP 44 PARTY POP JAZ Z 45 SWING 46 MID SWING 47 SL SWING 48 BIG BAND 1 49 BIG BAND 2 50 DIXIE 51 BROAD WAY 52...

Reviews: