background image

5

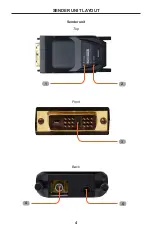
SENDER UNIT DESCRIPTIONS

1  Status

This LED indicator will slowly blink bright green, indicating that there is a valid 

connection between the Sender unit and Receiver unit.

2  Power

This LED indicator will glow bright green, when power is applied to the Sender 

unit.

3  DVI Input

Connect this part of the Sender unit to the DVI source.

4  SC Fiber Connector

Connect an SC-terminated fiber cable from this SC connector to the


SC-connector on the Receiver unit.

5  5V DC Power Supply Connector  

If the source does not supply enough voltage to power the Sender unit, connect 

one of the included 5V DC power supplies.  In most situations, the power supply 

will not be required.

Summary of Contents for DVI FM1500

Page 1: ...DVI FM1500 Optical Extender with Recordable EDID GEF DVI FM1500 User Manual www gefenpro com...

Page 2: ......

Page 3: ...o Customer Service 20600 Nordhoff St Chatsworth CA 91311 www gefenpro com support gefenpro com Notice Gefen LLC reserves the right to make changes in the hardware packaging and any accompanying docum...

Page 4: ...3 Features 4 Sender unit Layout 5 Sender unit Descriptions 6 Receiver unit Layout 7 Receiver unit Descriptions 8 Connecting the DVI FM1500 Optical Extender with Recordable EDID 8 Wiring Diagram 9 EDID...

Page 5: ...s that you find the solution that fits your needs The GefenPRO DVI FM1500 Optical Extender with Recordable EDID The GefenPRO DVI FM1500 Optical DVI Extender with Recordable EDID extends a DVI source u...

Page 6: ...ID can use both single mode and multi mode SC terminated optical fiber cables This product does not support interlaced video resolutions such as 1080i The DVI FM1500 Sender unit has a default built in...

Page 7: ...terference Virtual EDID programming feature provides quick installation and compatibility between source and display Uses single mode or multi mode fiber optic cable Fully supports DVI 1 0 Specificati...

Page 8: ...4 SENDER UNIT LAYOUT Sender unit Front Top Back 5 4 3 2 1...

Page 9: ...wer is applied to the Sender unit 3 DVI Input Connect this part of the Sender unit to the DVI source 4 SC Fiber Connector Connect an SC terminated fiber cable from this SC connector to the SC connecto...

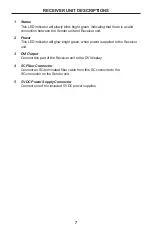
Page 10: ...6 RECEIVER UNIT LAYOUT Receiver unit Front Top Back 5 4 3 2 1...

Page 11: ...unit 2 Power This LED indicator will glow bright green when power is applied to the Receiver unit 3 DVI Output Connect this part of the Receiver unit to the DVI display 4 SC Fiber Connector Connect an...

Page 12: ...M1500 DVI Display Sender Receiver FIBER OPTIC CABLE DVI Source STOP Before continuing connect one of included 5V DC power supplies to the Receiver unit If EDID programming is required then skip to the...

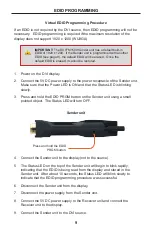
Page 13: ...he Status LED on the top of the Sender unit will begin to blink rapidly indicating that the EDID is being read from the display and stored in the Sender unit After about 10 seconds the Status LED will...

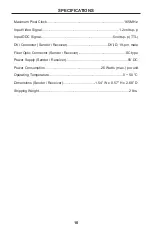
Page 14: ...nal 5 volts p p TTL DVI Connector Sender Receiver DVI D 19 pin male Fiber Optic Connector Sender Receiver SC type Power Supply Sender Receiver 5V DC Power Consumption 2 5 Watts max per unit Operating...

Page 15: ...Proof of sale may be required in order to claim warranty 2 Customers outside the US are responsible for shipping charges to and from Gefen 3 Copper cables are limited to a 30 day warranty and cables...

Page 16: ...Rev A8 20600 Nordhoff St Chatsworth CA 91311 1 800 545 6900 818 772 9100 fax 818 772 9120 www gefenpro com support gefenpro com Pb This product uses UL listed power supplies...

Reviews: