12
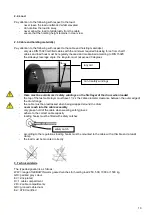
3.2. Mounting instructions
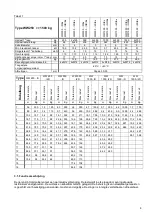
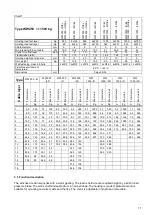
The winch must be mounted with the bolts as set out in chart 1.
To avoid tension build up in the winch housing, pay attention to the following:
there must be a smooth surface at the mounting bolt position
the wall or other construction must have sufficient carrying power
the level of the mounted winch must be checked with a spirit level in order to ensure good cable
movement.
All the nuts of the mounting bolts must be evenly fastened and secured.
3.3. Cable mounting
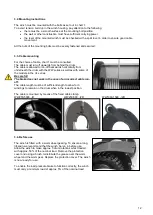
For the choice of cable, chart 1 must be consulted.
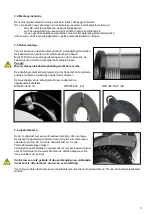
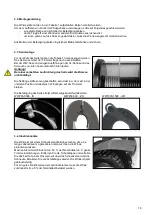
The cable must run-off upwards from behind the drum.
The cable is allowed to run-off backwards horizontally from
underneath the drum with the WW series as well as with some of
the models in the VL series.
Be careful!
The brake does not work in the case of an incorrect cable run-
off.
The cable length must be of sufficient length to allow for 3
windings to remain on the drum when in the lowest position.
The cable is mounted by means of the fixed cable clamp.
WW250-5000 ../D WW250-500 ../2D WW1000-1500 ../2D
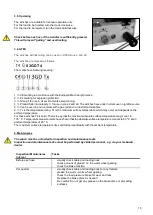
3.4. Before use
The winch is fitted with a worm wheel gearing. To ensure a long
lifespan we recommend that the winch be run in before use.
Allow the winch to make approx. 5 drum rotations whilst loaded
with approx. 50% of the nominal load. Remove the protection
cover and using a brush, redistribute the grease over the worm
wheel and the worm gear. Replace the protection cover. The winch
is now ready for use.
To enable the load pressure brake to function correctly, the winch
must carry a minimum load of approx. 5% of the nominal load.
Summary of Contents for WW1000 /2D Series
Page 2: ...1...
Page 31: ...30 WW250 D 2D...
Page 32: ...31 WW500 D 2D...
Page 33: ...32 WW1000 D 2D...
Page 34: ...33 WW1500 D 2D...


