2
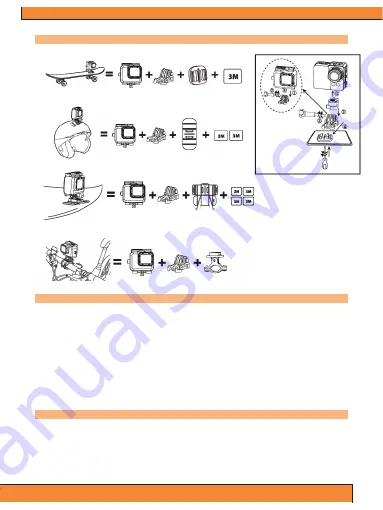
Mounting Applications
1. Camera on any flat surface / tripod
2. Camera on top of helmet
3. Camera on any curved surface
4. Camera on handlebar
Initial Setup
Install a micro SD memory card (max support for up to 32GB, optimal performance is achieved with a class-10 memory card)
into the camera. Use your fingernail or the tip of a pen to insert and eject the micro SD card. The micro SD card will click
into place once it is inserted past flush level.
* When using a micro SD memory card, there should be no data from other devices present on the card. If you are using a
micro SD memory card for the first time in the camera, you should firstly try to format the card, by firstly connecting it to your
computer. Then insert the battery and you’re ready to go!
Charging the Battery (2 Options)
The Lithium-Po battery comes partially charged and the kit includes AC Charger and charging cable.
1. Use the included battery charging dock and USB cable, to connect to a USB port like the one found on your
computer.
2. Use the included USB charging cable to directly connect the Gear Pro to your computer. Then select ‘AC Charge’,
followed by the power button on the Gear Pro, to begin charging.
Battery
3.7V Lithium-Po Rechargeable Battery
Battery Power: 1050mAh (3.885Wh)
Battery Life:
Wifi OFF and LCD OFF -
80 minutes
Wifi ON and LCD ON - 65 minutes
Wifi ON and LCD OFF - 70 minutes
Wifi OFF and LCD ON - 75 minutes
Summary of Contents for QUEST
Page 1: ......


