


4
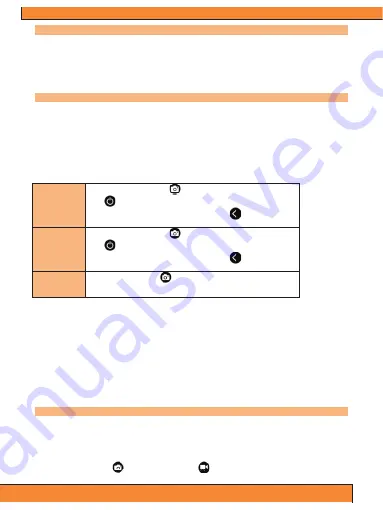
Default Settings
The camera powers up with the following default settings:
Video Resolution: 1080p @ 60fps
Photo Resolution: 16.0 Megapixels (MP)
Photo Burst: SINGLE
WiFi: ON
Display: ON
Video System: NTSC
Date & Time Stamp: OFF
Access Settings Menu
To access the settings menu and make adjustments to picture and video calibration, hold in the left arrow button located on
top of the Gear Pro. This takes you to the settings main menu screen. Now, press the left and right arrows to navigate
between camera, video or settings adjustments. Press the camera and video options to navigate up and down these
settings.
Once you scroll your way to the setting you wish to adjust, press the power button on the right side of the Gear Pro to begin
settings adjustment. Then, adjust setting values by pressing the camera and video buttons. Press the power button again to
lock in your selected setting. When you are finished, and you have successfully made the desired adjustments, press and
hold the left arrow to return to the camera ready display screen to start using the Gear Pro.
View/Play Media Files
To Play Videos
Press and hold the photo button
to play. Select video icon,
Press
for OK.
Press photo and video button to select more media files.
= Delete
To Play Images
Press and hold the photo button
to play. Select image icon,
Press
for OK.
Press photo and video button to select more media files.
= Delete
Logout Preview
Press and hold photo button
to back to standby mode.
Press and hold the same button again to logout.
Transcript:
To view a previously recorded video or image taken on the LCD Digital Display, hold in the camera button on top of the Gear
Pro. You are now in the camera and video media preview selection screen. Then press the video button on top of the Gear
Pro to choose which type of file you would like to preview. Once highlighted, press the power button on the right side of the
Gear Pro to go to your gallery. Choose the camera icon (to preview images taken) or choose the video camera icon (to
preview videos taken).
Once you have chosen between the image or video files to view, you can press the camera and video buttons on top of the
Gear Pro to browse through your captured media. To preview a selected media file, press the power button and the image
or video will appear in full screen. To scroll between images in the full screen preview mode, press the camera and video
buttons to navigate between your files.
To play a selected video file on the Gear Pro, press the power button when your desired video file is highlighted.
To exit the ‘Image/Video Preview’ screen and return to the camera ready display, hold in the camera button.
HDMI Connection - HDTV Playback
You can playback your photos and videos on the camera, with a HDTV. Playback is possible through the preview mode
when camera is powered on and plugged into a HDTV. This HDMI port can transmit the images of this device to compatible
and connected external HDTV display.
1. Plug the camera into a HDTV with the HDMI cable.
2. Power ON.
3. Previews of all videos and photos on HDTV display.
4. Press upward arrow button
and downward arrow button
to select between media files.
Summary of Contents for QUEST
Page 1: ......