– 8 –
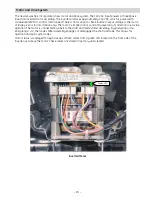
Washer Electrical Preparation
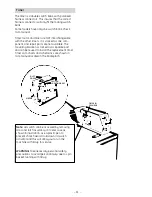
If required, an external
ground wire (not provided)
which meets local codes may
be added. Attach to washer
cabinet with sheet metal
screw (not provided) to rear
of washer as illustrated. The
screw required is a #8 sheet
metal screw, 18 threads per
inch, 1/2 inch long. It can
be obtained locally at any
hardware store.
Attach Ground
(Obtain Locally)
2227J
SPECAL INSTRUCTIONS
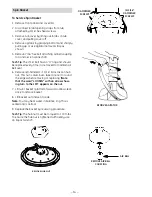
Cover Security Lock Installation
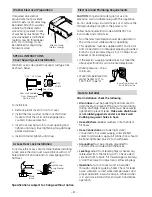
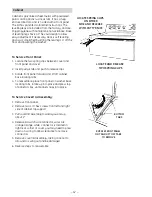
Washer cover is designed to accept stud type lock
as shown below.
To install lock:
1. Remove plastic insert in front of cover.
2. Install the lock washer on the lock shaft and
locate so that the lock can be engaged in a
counterclockwise direction.
3. Insert lock mechanism into cover opening and
tighten until snug. (Overtightening may damage
painted surfaces.)
4. Install cam and tighten until snug.
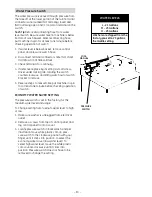
Access Door Lock Installation
To remove the access door retainer before installing
a lock, place the door over a wood block with a 1/2"
hole drilled in it and tap end of screw lightly with a
hammer.
Electrical and Plumbing Requirements
CAUTION:
For personal safety do not use an
extension cord or adapter plug with this appliance.
Do not, under any circumstances, cut or remove the
third grounding prong from the power cord.
Follow national electrical code ANSI/NFPA 70 or
local codes and ordinances.
• No other electrical device should be operated on
the same circuit while washer is operating.
• This appliance must be supplied with 115V, 60 Hz
and connected to an individual properly grounded
branch circuit protected by a 15 or 20 amp circuit
breaker or time-delay fuse.
• If the electric supply provided does not meet the
above specifications, call a licensed electrician.
• Water pressure – 20 psi
minimum.
• Water temperature from
water heater 120° to
150°F (50° to 66°C).
Note to Installer
After Installation check the following:
•
Drain Hose
must be pulled tight and secured to
drain facility to prevent lifting out of drain facility
during discharge. Nozzle clamp must be securely
tightened to prevent leaks.
Make sure drain hose
is not rubbing against concrete or block wall.
Rubbing may wear holes in hose
.
•
Hose Washers–
Rubber washers in both ends of
fill hoses.
•
Hose Connections–
Hot side (right valve)
connected to hot water supply, cold side (left
valve) to cold water supply. All connections should
be hand-tightened plus 1/2 turn with pliers.
•
Grounding–
Must be properly grounded to
conform to local codes and ordinances.
•
Leveling–
Adjust front leveling legs as necessary
(preleveled from the factory at 1"). Check side to
side and front to back. Tilt forward approximately
4" and then lower to adjust rear self-leveling legs.
•
Operation–
Turn on faucets and run washer
through complete cycle by hand. Check for leaks,
noise, vibration, correct water temperatures and
proper operation in wash and spin. While washer
is in spin, raise lid and check lid switch and brake
operation
Specifications subject to change without notice.
5/16" - 18 Thread
3/4"
Rear View
1-1/16"
5/8"
9/32"
Width
Cam Lock Available
From Greenwald
Part #8-1222
2227R
Wood
Block
Nut
Nut
Cam
Lock Washer
Spring Washer
2227S
2227U
Insure Proper Ground
Exists Before Use


