GE
D
IRECTION
FQ091019, R
EVISION
2
V
IVID Q
N S
ERVICE
M
ANUAL
Chapter 3 - System Setup
3-153
1) Click on the required examination
Exam Date
(labelled 1 in the example above) to select and
display images of that exam.
The
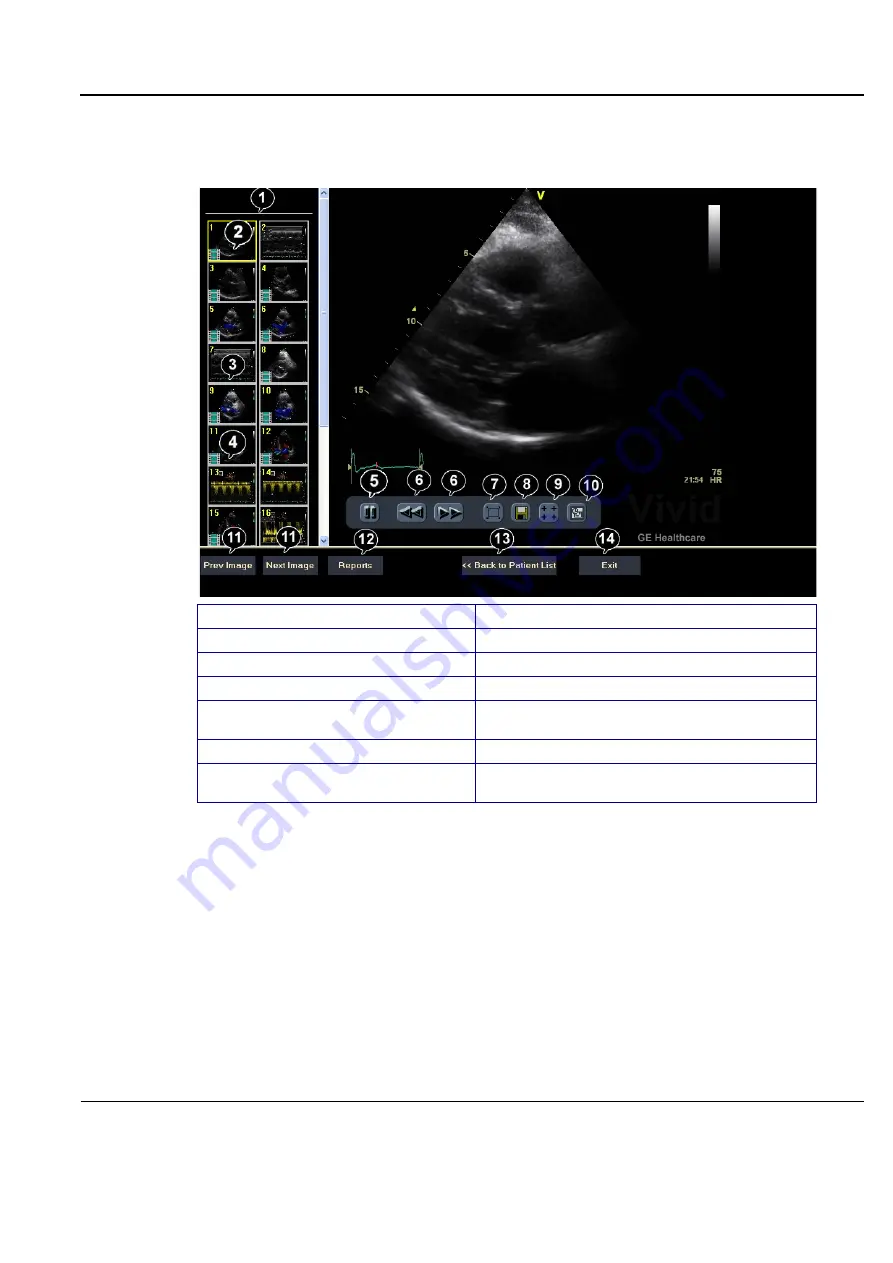
MPEGVue screen
is displayed as shown in the example in
.
2) Proceed to use the navigation tools described below to select an image and perform the various
review functions, as required.
3-10-9-3-3
Selecting an Image
When a thumbnail image is selected for review, the thumbnail image in the clipboard area becomes
bounded (highlighted) with a yellow frame. This currently-selected image is also displayed in full size in
the MPEGVue Screen view pane.
There are several ways to select a thumbnail image from the clipboard:
•
Use the mouse pointer. With the pointer on the required image, click the
left
mouse button to
select the image.
•
Use the
up
or
down
keyboard arrow to view the
next
or
previous
loop in the exam.
•
Click on the
Next Image
or
Previous Image
buttons (#11 in
), as required.
1.
Clipboard: select the image to display
8.
Save image as MPEG or Bitmap file
2.
Selected image
9.
Measurement tool
3.
Single frame image
10.
E-mail support
4.
Cineloop
11.
Display previous/next image
5.
Freeze/run cineloop
12.
Display reports
(button appears only when report is available)
6.
Scrolling tool when in Freeze
13.
Display the MPEGVue Patient List
7.
Full Screen
(press any key to return to normal view)
14.
Quit MPEGVue Screen
Figure 3-162 MPEGVue Screen


