background image

– 22 –

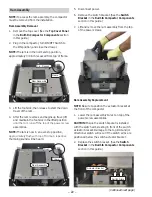
5. Disconnect 

power.

6.  Remove the switch bracket. (See the Switch 

Bracket in the Built-In Compactor Components 
section in this guide.)

7.  Lift and remove the ram assembly from the top 

of the power screws.

Ram Assembly Replacement

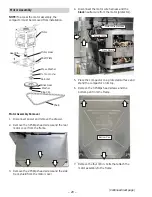
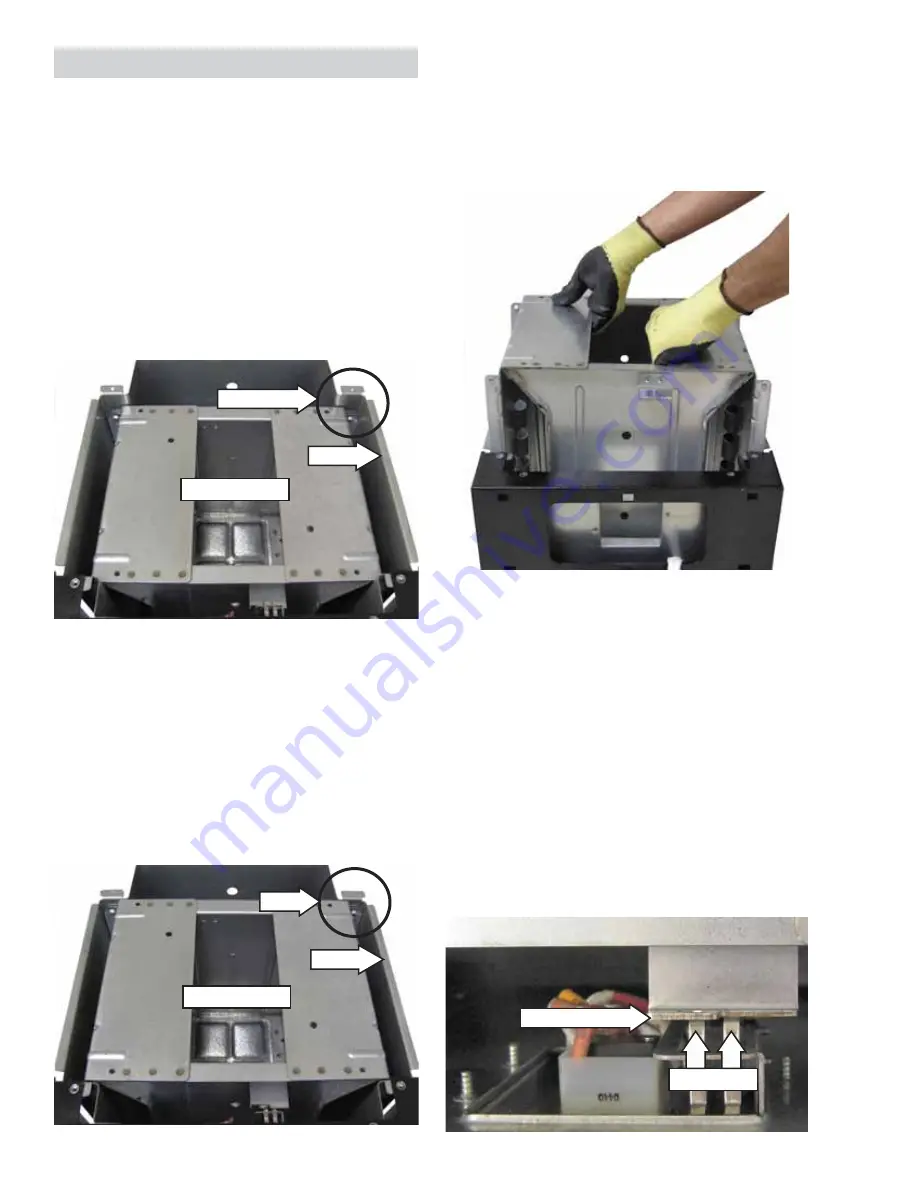
NOTE: Be sure to position the actuator bracket at 
the front of the compactor.

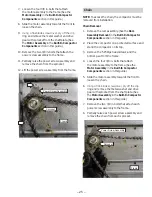
1.  Lower the ram assembly to rest on top of the 

power screw assemblies.

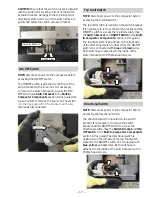
CAUTION: Ensure the switch bracket is installed 
with the switch arms resting in front of the switch 
actuator bracket. Damage to the top limit and/or 
directional switch will occur if the switch arms are 
positioned below the switch actuator bracket.

2.  Replace the switch bracket. (See the Switch 

Bracket in the Built-In Compactor Components 
section in this guide.)

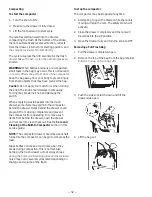
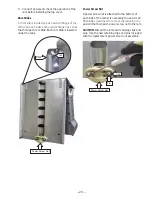
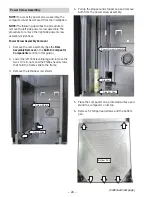
NOTE: To access the ram assembly, the compactor 
must be removed from the installation.

Ram Assembly Removal

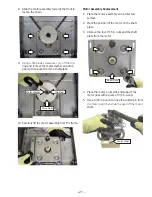
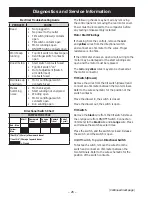
1.  Remove the top cover. (See the Top Cover Panel  

in the Built-In Compactor Components section 
in this guide.)

2.  Plug in the compactor, turn ON/OFF Switch to 

the ON position, and close the drawer.

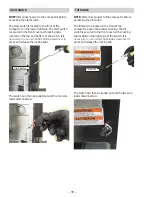
NOTE: The ram is in the normal stop position, 
approximately 3/4 inch recessed from top of frame.

3.  Lift the foot kick, then release to start the down 

travel of the ram.

4.  After the ram reverses and begins up travel, lift 

and maintain the foot kick in the lifted position 

XQWLOWKHUDPUXQVRȺWKHWRSRIWKHSRZHUVFUHZ

assemblies.

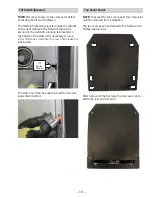
NOTE: The ram is now in an over-stop position, 

DSSUR[LPDWHO\ÀXVKZLWKWRSRIIUDPH$UHSHWLWLYH

thumping sound will be heard.

¾-in. Recess

Ram Assembly

Frame

Flush

Frame

Ram Assembly

Actuator Bracket

Switch Arms

(Continued next page)

  Ram Assembly

Summary of Contents for UCG1600L

Page 1: ...UCG1600L UCG1650L UCG1680L 15 Inch Built In Compactors Technical Service Guide June 2017 31 9268 ...

Page 2: ...ith its use WARNING To avoid personal injury disconnect power before servicing this product If electrical power is required for diagnosis or test purposes disconnect the power immediately after performing the necessary checks RECONNECT ALL GROUNDING DEVICES If grounding wires screws straps clips nuts or washers used to complete a path to ground are removed for service they must be returned to thei...

Page 3: ...ts 9 Control Features 10 Using the Built In Compactor 11 Care and Cleaning of the Built In Compactor 13 Changing the Foot Pedal 13 Component Locator Views 14 15 in Built In Compactor 14 Built In Compactor Components 16 Control Panel 16 Switch Bracket 16 ON OFF Switch 17 Top Limit Switch 17 Directional Switch 17 Start Switch 18 Tilt Switch 18 Tilt Switch Drawer 19 Top Cover Panel 19 Motor Assembly ...

Page 4: ... 4 Diagnostics and Service Information 26 Schematic 28 Warranty 29 Index 30 ...

Page 5: ...shoes for all repairs Steel Toed Work Boot Electrically Rated Glove and Dyneema Cut Resistant Glove Keeper Dyneema Cut Resistant Glove Plano Type Safety Glasses Prescription Safety Glasses Safety Glasses must be ANSI Z87 1 2003 compliant Brazing Glasses Cut Resistant Sleeve s Step 1 Plan and Prepare Step 4 Apply LOTO device and lock Step 2 Shut down the appliance Step 5 Control discharge stored en...

Page 6: ... OCT V NOV Z DEC 2024 Z 2023 V 2022 T 2021 S 2020 R 2019 M 2018 L 2017 H 2016 G 2015 F 2014 D 2013 A Model Designator Designates features the higher the number the more features U C G 1 6 0 0 L S S Brand U Universal Product Type CG Built In Compactor Exterior Color BB Black SS Stainless Steel WW White II Requires Custom Cabinetry Panel Model Year Designator The Model Serial plate is located on the...

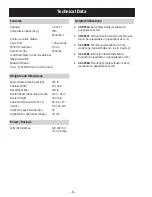
Page 7: ...ÀXVK WR WKH VXUURXQGLQJ FDELQHWU IRRW SHGDO SURYLGHV KDQGV IUHH RSHUDWLRQ Pushing the foot pedal down opens the drawer and lifting the pedal up starts the 30 second maximum cycle time compacting operation Heavy duty trash bags Part WC60X5017 are supplied with the compactor 1 3 HP Motor Slide Out Compactor Drawer Foot Pedal Opening and Start Large 1 4 Cubic Foot Capacity 5 Amps 120 VAC 150 lbs Appr...

Page 8: ...and Dimensions Power Ratings Capacity 1 4 Cu Ft Compression Ratio Avg 75 Reduction Control Location Hidden Cycle Time 25 seconds Motor Horsepower 1 3 hp Ram Force lb 2300 lbs Lock Start Switch w Removable Key Side Release Bin Slide Out Drawer Color WW BB SS and custom panel Approximate Shipping Weight 144 lb Cabinet Width 15 1 8 in Net Weight lbs 128 lb Overall Depth depending model 23 in 24 in Ov...

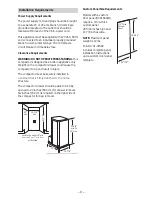
Page 9: ...le The outlet box should be located within reach of the 36 in power cord This appliance must be supplied with 120 VAC 60 Hz and connected to an individual properly grounded branch circuit protected by a 15 or 20 ampere circuit breaker or time delay fuse Installation Requirements Models with a custom door panel UCG1680LII require a 3 4 in thick custom panel 29 5 16 inches high and 14 7 8 inches wid...

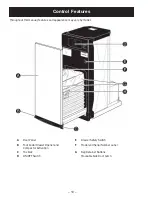
Page 10: ... appearance may vary by model Control Features A Door Panel E Drawer Safety Switch B Foot Pedal Drawer Opener and Compactor Activation F Model and Serial Number Label C Toe Kick G Bag Retainer Buttons D ON OFF Switch Moveable Side Door Latch ...

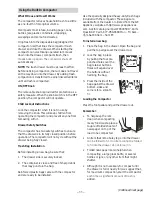
Page 11: ...that 1 The drawer side is securely locked 2 The container is clean and free of sharp debris that may puncture the bag Reinforced plastic bags came with the compactor and are ready to be installed Use the specially designed heavy duty trash bags included with the compactor These bags are available from the dealer or ordered from the GE Appliance website at http www geappliances com Ask for catalog ...

Page 12: ...V SURJUHVVLYHO shorter WARNING When bottles and cans are compacted small tears in the bag may occur This is normal and LQ QR ZD DȺHFWV WKH SHUIRUPDQFH RI WKH FRPSDFWRU Keep the bag away from your body to prevent injury from sharp objects that may have pierced the bag Caution Do not apply too much force when turning the knob The knob should always rotate easily Forcing may break the knob and damage...

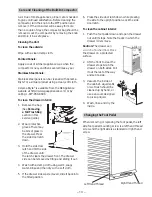
Page 13: ...nd tilt the side of the drawer until the latch clears the drawer front The drawer side can be removed by tilting and sliding it out 4 Wash with a damp cloth using warm soapy water Rinse and then dry with a soft cloth 5 If the drawer side was removed slide it back into the tilted position 6 Press the side door latch down while pressing the side to the upright position Lock the side door latch To cl...

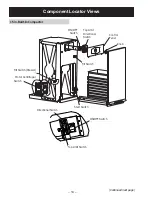
Page 14: ...s Continued next page 15 in Built In Compactor ON OFF Switch Top Limit Directional Switch Control Panel Knob Tilt Switch Tilt Switch Drawer Motor Centrifugal Switch Directional Switch Start Switch ON OFF Switch Top Limit Switch ...

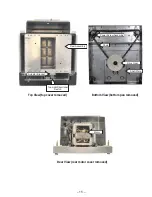
Page 15: ...ear View rear motor cover removed Motor Bottom View bottom pan removed Shaft Plate Power Screw Assembly Drive Gear Chain Top View top cover removed Actuator Bracket Top Limit Directional Switch Ram Assembly ...

Page 16: ...mpactor Components Switch Bracket Removal 1 Disconnect power 2 Remove the control panel See Control Panel Removal in the Built In Compactor Components section in this guide 3 Remove the 3 Phillips head screws that attach the switch bracket to the frame 4 Raise the switch wiring harness parallel to the bottom of the switch bracket 5 Pull the bottom of the switch bracket out to clear the bottom of t...

Page 17: ... In Compactor Components section in this guide The directional switch is positioned on the left side of the top limit switch closest to the ON OFF switch It is connected with blue yellow and red wires Both switches are attached to the inside of the switch bracket with 2 Phillips head screws CAUTION Ensure that the switch bracket is installed with the switch arms resting in front of the switch actu...

Page 18: ...cking tabs The switch can then be pulled out and the two wire leads disconnected NOTE Disconnect power to the compactor before accessing the tilt switch The tilt switch is located in the front of the compactor above the drawer opening The tilt switch is secured in the front cover with a locking tab located on the right side of the switch It is QHFHVVDU WR XVH D VPDOO ÀDW EODGH VFUHZGULYHU WR press...

Page 19: ...witch It is necessary to use a VPDOO ÀDW EODGH VFUHZGULYHU WR SUHVV DQG UHOHDVH WKH locking tab The switch can then be pulled out and the two wire leads disconnected Tilt Switch Drawer NOTE To access the top cover panel the compactor must be removed from installation The top cover panel is attached to the frame with 6 Phillips head screws After removal of the 6 screws the top cover can be slid to ...

Page 20: ...he frame NOTE To access the motor assembly the compactor must be removed from installation Motor Assembly Removal 1 Disconnect power and remove the drawer 2 Remove the 3 Phillips head screws and the rear motor cover from the frame 3 Remove the 2 Phillips head screws and the side track shield from the motor cover Motor Wire Harness Neutral Wire Track Shield Bottom Pan Continued next page Motor Moto...

Page 21: ...otor gear with a piece of 3 4 in wood 5 Use a 3 16 in punch to drive the slotted pin from WKH PRWRU JHDU WKHQ VOLGH WKH JHDU RȺ WKH PRWRU shaft 8 Slide the motor assembly towards the front to loosen the chain 9 8VLQJ D ÀDW EODGH VFUHZGULYHU SU RȺ WKH FOLS ring and remove the metal washer and drive gear with sprocket from the shaft plate 10 Carefully lift the motor assembly from the frame Metal Was...

Page 22: ...tor Components section in this guide NOTE To access the ram assembly the compactor must be removed from the installation Ram Assembly Removal 1 Remove the top cover See the Top Cover Panel in the Built In Compactor Components section in this guide 2 Plug in the compactor turn ON OFF Switch to the ON position and close the drawer NOTE The ram is in the normal stop position approximately 3 4 inch re...

Page 23: ...s inserted under the tabs Power Screw Nut Pin Clip Tab Slide Power Screw Nut Power Screw Nut A power screw nut is attached to the bottom of each side of the ram It is necessary to use a small ÀDW EODGH VFUHZGULYHU WR UHPRYH WKH UHWDLQLQJ FOLS and pin that hold each power screw nut to the ram CAUTION Discard the removed retaining clips and pins Use the new retaining clips and pins included with the...

Page 24: ...e to remove the left side power screw assembly The procedure to remove the right side power screw assembly is identical Power Screw Assembly Removal 1 Remove the ram assembly See the Ram Assembly Removal in the Built In Compactor Components section in this guide 2 Lower the left front leveling leg and remove the two 11 32 in nuts and the Phillips head screws that hold the frame slide to the frame ...

Page 25: ...ed from installation Chain Removal 1 Remove the ram assembly See the Ram Assembly Removal in the Built In Compactor Components section in this guide 2 Place the compactor on a protected surface and stand the compactor on its top 3 Remove the 5 Phillips head screws and the bottom pan from the frame 4 Loosen the four 3 8 in bolts that attach the motor assembly to the frame See the Motor Assembly in ...

Page 26: ...ss and release the switch several times Press the switch and the switch is closed Release the switch and the switch is open 2Q 2ȹ 6ZLWFK 7RS LPLW Directional Switch To test each switch remove the wires from the switch and connect an ohmmeter between the two terminals Refer to the wire schematic for the position of the switch contacts PROBLEM CAUSE Dead Not plugged in No power to the outlet Tilt sw...

Page 27: ...e the motor shaft in the counter clockwise direction using a 1 4 in hex socket screw key hex wrench to make the ram go up Chain Adjustment There should be 3 8 in 9 5 mm to 1 2 in 12 7 mm GHÀHFWLRQ EHWZHHQ DQ VSURFNHWV Lubrication Power Screws If needed apply WC32X5004 grease to the Ram Screws Drawer Slide Rollers Apply WC01X10006 oil Not Compacting Complaints Low Voltage Check supply voltage with ...

Page 28: ...closes the tilt switch drawer and tilt switch The directional switch is closed for down travel blue to yellow and the top limit switch is open The consumer starts the cycle by closing the foot pedal start switch The motor starts in down travel The motor centrifugal switch opens LPPHGLDWHO ZKHQ WKH PRWRU UXQV IWHU WKH UVW 3 4 inch of down travel the top limit switch closes and the directional switc...

Page 29: ...for other than its intended purpose or used commercially Damage caused after delivery Replacement of fuses or resetting of circuit breakers Product not accessible to provide required service This warranty is extended to the original purchaser and any succeeding owner for products purchased for ordinary home use in the 48 mainland states Hawaii Washington D C or Canada If the product is located in ...

Page 30: ...brication 27 M Motor 7 8 14 15 20 21 25 26 27 Motor Centrifugal Switch 27 motor protector 27 Motor Run Winding 27 Motor Start Windings 26 N Nomenclature 6 O ON OFF Switch 10 14 17 P Power Screw Assembly 15 24 25 Power Screw Nut 23 R Ram Assembly 15 22 24 25 Ram Slides 23 S Safety 2 5 10 11 Schematic 28 Serial Number 6 10 starting 11 12 Start Switch 8 14 18 T Table of Contents 3 Tilt Switch 14 18 1...

Reviews: