background image

HALOGENRADIANT SURFACE CLEANING .

(on some models)

 Ceramic Cooktop Cleaning

Cleaning   glass ceramic cooktops is different from
cleaning   standard porcelain finish. To maintain and
protect the surface   your new glass ceramic cooktop
follow these basic steps.

Before 

 use the cooktop for the first time, clean it

with Cook Top Cleaning 

 This helps protect

the top and 

 clean-up easier.

DAILY CLEANING: Use only Cook Top Cleaning
Creme 

 Glass Ceramic.

For normal, light soil:

1. Rub a 

 drops (less is better) of Cook Top

Cleaning Creme onto soiled area using a damp
paper towel. Buff with   dry paper towel until all

soil and creme are removed. Frequent cleaning
leaves   protective coating which is essential in

 scratches and abrasions.

2. Clean surface with Cook Top Cleaning Creme

after each use.

For heavy, burned on soil:

1. Apply   

 drops of Cook Top Cleaning Creme

to the (cool) soiled area.

2

Using   damp 


 rub creme into the

burned on area. As with any burned on spill, this

 require some effort.

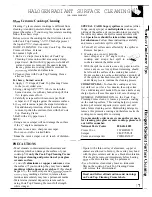
3. Carefully scrape soil with razor scraper. Hold

scraper at   30” angle against the ceramic surface.

4. 


 soil remains, repeat the steps listed above.

For additional protection, after all soil has been
removed, polish the entire surface with the Cook

Top Cleaning Creme.

5. Buff with a dry paper towel.
NOTE:

 Using a razor scraper will not damage the surface

if the 

 angle is maintained.

. Be sure to use a new, sharp razor scraper.

Do not use   dull   nicked blade.

 Store  the razor scraper out of reach of children.

SPECIAL CARE: Sugary spillovers (such as jellies,
fudge, candy syrups) or melted plastics can cause
pitting of the surface of your cooktop (not covered by
the warranty) unless the spill is removed while still
hot. Special care should be taken when removing
hot substances. 
Follow these instructions carefully
and remove soil while spill is still hot.

1. Turn off all surface units affected by the spillover.

Remove hot pans.

2. Wearing an oven mitt, hold the

 .

razor scraper at a 30° angle to the 

     .,’

cooktop and scrape hot spill to a 

 - 

“ 

cool area outside the surface unit.

3. With the spill in a cool area, use a dry paper towel to

remove any excess. Any spillover remaining should
be left until the surface of the cooktop has cooled.
Do not continue to use the soiled surface unit until all
of the spillover has been removed. Follow the steps
under Heavy 

 to continue the cleaning process.

COOKTOP SEAL: To clean the cooktop seal, let a

wet cloth rest on it for a few minutes, then wipe clean.
Use a mild detergent if needed. Do not use a knife or any
sharp object on the seal because it will cut or damage it.

GENERAL INFORMATION: As the Cook Top
Cleaning Creme cleans, it leaves a protective coating
on the cooktop surface. This coating helps to prevent
build-up of mineral deposits (water spots) and will
make future cleaning easier. Dishwashing detergents
remove this protective coating and therefore make the
cooktop more susceptible to staining.

To conveniently order more creme and/or scrapers
for cleaning your glass ceramic cooktop, please call
our toll free number:
National Parts Center

800-626-2002

Creme 10 oz.

# WB02X8273

Scraper

Creme and scraper kit

# WB64X5027

PRECAUTIONS

Most cleaners contain ammonia, chemicals and

 If pots with a thin overlay of aluminum, copper or

abrasives which can damage the surface of your

enamel are allowed to boil dry, the overlay may bond

cooktop. 

 only the Cook Top Cleaning Creme

with the glass ceramic and leave a black discoloration.

for proper cleaning and protection of your glass

This should be removed immediately before heating

ceramic surface.

 or 

the discoloration may be permanent.

● 

 you   

 aluminum or copper cookware across

● 

Use of window cleaner may leave an iridescent

the surface   your cooktop, they may leave metal

film on the cooktop. Cook Top Cleaning Creme

markings which appear as scratches. If this should

will remove this discoloration.

happen. 

 the razor scraper and 


 to


 markings. Failure to remove these

Read and follow all instructions and warnings

residues immediately may leave permanent marks.

on Cook Top Cleaning Creme labels.

Water stains (mineral deposits) are removable

using Cook Top Cleaning Creme or full strength
white vinegar.

Summary of Contents for JBP80

Page 1: ...10 12 Cooktop Comparison 10 Cookware Tips 14 16 Halogen Radiant Surface Cleaning l 7 Halogen RadiantSurface Units l 3 17 w Iiiiila iiill 0 ProbIem SoIver 52 54 Thermostat Adjustment Dolt Yourself __...

Page 2: ...es it easy to check baking progress without opening the door Safety Features The four hot surface indicator 1 ights let you know which surface unit is turned on or still too hot to touch The control l...

Page 3: ...ge Immediately contact the dealer or builder that sold yoLl the range Save time and money Before you request service Check the Problem Solver in the back of this guide It lists causes of minor operati...

Page 4: ...act with hot surface units or heating elements and may cause severe bums AWARNING All ranges can tip and injury could result To prevent accidental tipping of the range attach it to the wall and bl s P...

Page 5: ...te possibility that trichina may be present in the meat it will be killed and the meat will be safe to eat Oven nd away from the range when opening the oven door Hot air or steam which escapes can cau...

Page 6: ...container should be turned toward the center of the range without extending over the nearby surface units Always turn the surface units off before removing cookware To avoid the possibility of a burn...

Page 7: ...d the center of the range without extending over the nearby surface units Always turn the surface units off before removing the cookware Keep an eye on foods being fried at high or medium high heat se...

Page 8: ...FEATURES OF YOUR RANGE Not all features are on all models Appearance may vary JBP95 y Electric coil models have lift up cooktops for easier cleaning 8 o e o e 0 Broiler panand grid...

Page 9: ...n Door with Broil Stop Position Easily removed for cleaning 2 31 47 4 5 38 40 41 45 9 Surface Unit Controls 13 14 44 10 Surface Light I 13 44 27 Oven Door Gasket 5 41 45 11 Surface Unit On Indicator L...

Page 10: ...e pan For best cooking results use good quality pans Electric coils are more forgiving of warped pans than halogenh adiant or solid disks Heats up quickly but does not change heat settings as quickly...

Page 11: ...ooled completely The Hot Surface Lights will stay lit until the cooktop is safe to touch It is not unusual for the lights to stay lit for 30 minutes maintain your selected control setting With poor co...

Page 12: ...o avoid burns from steam or heat be careful when canning to boil water NOTE if your house has low voltage canning r nay n mm take longer than expected even though directions have been carefully fo low...

Page 13: ...ium Low i tenderize and develop flavors Use this setting to melt High butter and chocolate or to keep foods warm MED Appearance may vary slightly Light Over the Surface Units The switch must be pushed...

Page 14: ...the surface is cool enough to touch Each element has its own HOT SURFACE indicator light It comes on instantly when the unit is turned on t stays on even after the unit is turned off It glows brightl...

Page 15: ...ibution Aluminum heavy weight recommended Good conductivity Aluminum residues sometimes appear as scratches on the cooktop but can be removed if cleaned immediately Because of its low melting point th...

Page 16: ...flat cookware will have an even distribution of bubbles over the bottom surface area of the pan Bubbles localized in only a portion of the bottom indicate uneven contact of the pan to the surface unit...

Page 17: ...p and scrape hot spill to a C cool area outside the surface unit 9 3 With the spill in a cool area use a dry paper towel to remove any excess Any spillover remaining should be left until the surface o...

Page 18: ...TIMER pad Then press the INCREASE or DECREASE pad to change the time To cancel the timer press and hold the TIMER pad until the word TIMER disappears from the display 11 CONV RO 4ST Press this pad to...

Page 19: ...above to set the timer End of Cycle Tones Power Outage The end of cycle tone is a series of 3 beeps followed After a power outage when power is restored the by 1 beep every 6 seconds If you would lik...

Page 20: ...to return to the time of day display M7 Child Lockout Feature Your range has a special feature that allows you to lock the control panel preventing children from turning on the range accidentally or...

Page 21: ...r is opened Use the switch to turn the light on and off when the door is closed OVEN LIGHT Offset Shelf To remove the shelf pull it forward to the stop locks and lift the front of the shelf The offset...

Page 22: ...aching into the hot oven To remove a shelf from the oven pull it toward you tilt the front end upward and pull it out To replace place the shelf on the shelf support with the stop locks curved extensi...

Page 23: ...tender product while at the same time creating a rich golden brown exterior In regular baking the bottom heating element heats the air in the o ren which then cooks the food Convection Roast Convecti...

Page 24: ...elf in the second B shelf position and the straight shelves in first A and fourth D shelf position For 2 shelf baking place the straight shelves in the A and C positions NOTE When convection baking wi...

Page 25: ...ok Time you can set is 10 minutes The words TIMED CONV BAKE and COOK TIME will be displayed along with the oven temperature that you set and the cook time that you entered When the oven starts to heat...

Page 26: ...tomatically sets the Stop Time by adding the Cook Time to the time of day In this example the time of day is 2 00 and the Cook Time is 3 hours Adding 3 hours to the time of day equals 5 00 A 6 At 4 00...

Page 27: ...ection Cookbook suggested time i J Convection Roasting Rack Roasting rack Roasts or poultry should be cooked on the lowest shelf position A on a shelf When you are convection roasting you will use the...

Page 28: ...set will be in the display After a few seconds the words LO PROBE will replace the roasting temperature in the display After the internal temperature of the meat reaches 100 F the changing internal te...

Page 29: ...popular but you should know that cooking it to only 140 F means some food poisoning organisms may survive Source Safe Food Book Your Kitchen Guide USDA Rev June 1985 REGULAR BAKING Do not lock the ov...

Page 30: ...correct temperature without a preheat indicator light or tone preheat selecting a higher temperature does not shorten 10 minutes After the oven is preheated place the preheat time food in the oven as...

Page 31: ...recipe r baking since the shiny foil pan reflects heat away recommends will usually be crisper thinner and drier from the pie crust the cookie sheet helps retain it than it should be f baked in a pan...

Page 32: ...automatically the changing temperature starting at 100 F will be displayed When the oven reaches the temperature 1 Press the BAKE pad you set a tone will sound The oven will continue u BAKE to cook fo...

Page 33: ...AIVOFF pad to clear the display if necessary Remove the food from the oven Remember even though the oven shuts off automatically foods continue cooking after the controls are off NOTE Foods that spoil...

Page 34: ...ld be removed when the desired internal temperature has been reached 1 Place the shelf in A or B position No preheating When the oven starts to heat the word ON and is necessary the changing oven temp...

Page 35: ...se tongs to pull on the cable when removing the probe they might damage it TO AVOID BREAKING THE PROBE MAKE SURE FOOD IS COMPLETELY DEFROSTED BEFORE INSERTING Cable Probe Plug Handles appearance may v...

Page 36: ...t store the probe in the oven NOTE If the probe is removed from the food before the final temperature is reached a tone will sound and the display will flash until the probe is removed from the oven Y...

Page 37: ...und for roasts under 5 pounds more time for larger roasts Oven Type Temperature Meat Tender cuts rib high quality 325 sir oin tip rump or c p round Lamb leg or bone in houlclcr Veal shoulder lcg or lo...

Page 38: ...f desired the fat may be trimmed leaving a layer about l 8 inch thick n 5 Press the BROIL pad I n BROIL LO 2 Place the meat on the broiler grid in the broiler pan Always use the grid so the fat drips...

Page 39: ...meat from sticking No The broiler grid is designed to reflect broiler heat thus keeping the surface cool enough to prevent meat from sticking to the surface However spraying the broiler grid lightly...

Page 40: ...browning Pan frying is recommended Slash fat 1 inch thick 1 to 1 lbs c c c c c c 1 X inch thick 2 to 2X lbs Chicken 1 whole 2 to 2X lbs split lengthwise 35 10 15 Reduce time about 5 to 10 minutes per...

Page 41: ...outside the gasket with a dampened cloth The oven front frame and the oven door outside the gasket do not get cleaned by the self clean cycle On these areas use detergent and hot water or a soap fill...

Page 42: ...f slide the latch handle to the left If you c nnot slide the latch easily to unlock the d or allow additional tilme for cooling NOTE The word door will be displayed NOTE You can find out when the clea...

Page 43: ...you will not be able to set a delay clean to end at a specific time Q Can I use commercial oven cleaners on any part of my self cleaning oven A No cleaners or coatings should be used around any part...

Page 44: ...ning To remove a knob pull it straight off the stem Wash the knobs in soap and water but do not soak Cooktop Surface Light When changing a cooktop light do not touch the To replace metal at the ends o...

Page 45: ...llow for proper air circulation Inside Gasket Gasket Outside Gasket I J I 1 Outside of the door Use soap and water to thoroughly clean the top sides and front of the oven door Rinse well You may also...

Page 46: ...it Both the broiler pan and grid can also be cleaned in the dishwasher Do not store a soiled broiler pan and grid anywhere in the range Oven Shelves and Convection Roasting Rack Clean the oven shelve...

Page 47: ...onvection cooking cooks most foods 257c faster This faster cooking causes the oven vent to put out more steam or water vapor than usual The steam will condense on surfaces such as the cooktop control...

Page 48: ...acle To remove a surface unit To remove the drip pans for cleaning the surface units must be removed first Surface Unit Drip Pan Lift the surface unit about 1 inch above the drip pan and pull it out D...

Page 49: ...ns it is recommended that a licensed electrician install an approved outlet Because range terminals are not accessible tier range is in position flexible service conduit or cord must be used STEP 1 PR...

Page 50: ...e local codes do not permit grounding through the neutral STEP 3 1 Locate connector block at the bottom rear of range and remove rear wiring cover 2 Directly below the connector block is a hole with a...

Page 51: ...inning installation WARNING 1 Range must be secured by ANTI TIP bracket supplied 2 See instructions to install supplied with bracket 3 Unless properly installed range could be tipped by stepping or si...

Page 52: ...the locked position after cleaning The light bulb is loose or defective Tighten or replace The switch operating the oven light is broken Call for service The fluorescent liglht is loose or defective A...

Page 53: ...ture Surface units are not plugged in solidly Drip pans are not set securely in the cooktop Surface unit controls are not properly set You must use pans which are absolutely flat If light can be seen...

Page 54: ...cleaning procedures be sure cookware bottoms and cookware are clean before use and use cookware with smooth bottoms Tiny scratches are not removable but will become less visible in time as a result o...

Page 55: ...lnobilit T obmin t ese items f ree of hargc call 8f 621i 2 Special Needs Parts andAccessories 800 626 2002 Individuals qualified m seMce their own appliances user maintenance instructions contained i...

Page 56: ...terial If you then have any questions about operating the product please contact your dealer or our Consumer Affairs office at the address below or call toll free GE Answer Center 800 626 2000 consume...

Reviews: