background image

8

Este producto puede únicamente ser reparado por el 

fabricante o sus agentes de reparación autorizados. 

Cualquier cambio o modificación no aprobados 

expresamente por Thomson Inc. podría ser motivo de 

anulación de la autoridad del usuario para operar este 

producto. Para recibir instrucciones sobre cómo obtener 

servicios de mantenimiento, por favor consulte la garantía 

incluida en esta Guía, o llame a Información para el Usuario, 

1-800-448-0329

.

O envíe sus preguntas a:

Thomson Inc. 

Gerente, Servicio al Consumidor 

P.O. Box 196 

Indianápolis, IN 606

Adjunte su recibo al folleto, para futura referencia, o anote 

la fecha en la que se compró o recibió este producto como 

regalo. Esta información será valiosa si se llegase a requerir 

durante el período de garantía.
Fecha de compra___________________________________
Nombre de la tienda_________________________________ 

Summary of Contents for 27906GE1

Page 1: ...Model 27906 2 4 GHz Cordless Telephone System User s Guide...

Page 2: ...ning the number of devices you may connect to your telephone line and still have all of these devices ring when your telephone number is called In most but not all areas the sum of the RENs of all dev...

Page 3: ...phone line ensure the installation of this product does not disable your alarm equipment If you have questions about what will disable alarm equipment consult your telephone company or a qualified ins...

Page 4: ...ules and Regulations If these changes are expected to affect the use or performance of your telephone equipment the telephone company must give you adequate notice in writing to allow you to maintain...

Page 5: ...harmful interference to radio or television reception which can be determined by turning the equipment off and on the user is encouraged to try to correct the interference by one or more of the follo...

Page 6: ...erence Problems This booklet is available from the U S Government Printing Office Washington D C 20402 Please specify stock number 004 000 00345 4 when ordering copies Notice The changes or modificati...

Page 7: ...um distance of 20 centimeters between the radiator and your body This transmitter must not be co located or operated in conjunction with any other antenna or transmitter For body worn operation this p...

Page 8: ...ist 11 Telephone Jack Requirements 12 Installation 12 Digital Security System 12 Important Installation Guidelines 14 Handset Layout 15 Installing the Phone 16 Installing the Handset Battery 16 Base S...

Page 9: ...27 Storing CID Records In CID Memory 28 Reviewing CID Records 28 Dialing a CID Number 29 Storing CID Records in Internal Memory 30 To Replace a Stored CID Record 31 Deleting a CID Record 31 Deleting A...

Page 10: ...RISKOFELECTRICSHOCK DONOTOPEN WARNING TO PREVENT FIRE OR ELECTRICAL SHOCK HAZARD DO NOT EXPOSETHIS PRODUCT TO RAIN OR MOISTURE THE LIGHTNING FLASH AND ARROW HEAD WITHIN THE TRIANGLE IS A WARNING SIGN...

Page 11: ...this product and save them for future reference IMPORTANT Because cordless phones operate on electricity you should have at least one phone in your home that isn t cordless in case the power in your h...

Page 12: ...gital security system to protect against false ringing unauthorized access and charges to your phone line INSTALLATION NOTE Some cordless telephones operate at frequencies that may cause or receive in...

Page 13: ...telephone If you are concerned with interference please refer to the owner s manual for these devices on how to properly set channels to avoid interference Typical devices that may use the 2 4 GHz fre...

Page 14: ...perature Avoid other cordless telephones or personal computers Never install telephone wiring during a lightning storm Never install telephone jacks in wet locations unless the jack is specifically de...

Page 15: ...or 6 caller ID volume 5 or 6 button redial button flash program button TONE exit button delete channel button mem memory button ringer button pause button display format button talk call back button V...

Page 16: ...2459 that is compatible with this unit 1 Locate battery and battery door which are packaged together inside a plastic bag and are separate from the handset 2 Locate the battery compartment on the bac...

Page 17: ...e wall jack RJ11C and place your cordless telephone on a level surface such as a desktop or tabletop or you may mount it on the wall 2 Plug one end of the telephone line cord into the TEL LINE jack on...

Page 18: ...6 Allow the phone to charge for 16 hours prior to first use If you don t properly charge the phone battery performance is compromised CAUTION Use only the 5 2617 gray power adaptor that came with this...

Page 19: ...s in the display 2 Use the CID vol 5 or 6 button or the handset number pad to select 1 English 2 French or 3 Spanish The default setting is 1ENG 3 Press the flash program button to confirm and to adva...

Page 20: ...n the display 2 Use the CID vol 5 or 6 button or the handset number pad 1 3 to enter your selection from Ringer Tone 1 2 or 3 The default setting is RINGER TONE 1 3 Press the flash program button to c...

Page 21: ...ar a confirmation tone Cordless Phone Basics Making a Call 1 Press the talk call back button and dial the desired number OR To perform preview dial dial the number first then press the talk call back...

Page 22: ...to the combined Call Waiting Caller ID service from your local telephone company you will receive Caller ID information if available on Call Waiting calls During a phone call you will hear a beep to...

Page 23: ...ly change the channel in order to reduce static caused by appliances such as baby monitors garage door openers microwave ovens or other cordless phones Press and release the delete channel button to m...

Page 24: ...rmation you need 4 Hang up the handset and the phone automatically returns to pulse rotary dialing mode Exit Press the TONE exit button to cancel any command you initiated Ringer On Off 1 Press ringer...

Page 25: ...ead the Paging feature will not work Volume Boost During a conversation you may increase the volume by pressing the Vol Boost button AUDIO BOOST will show in display The volume will return to its orig...

Page 26: ...ler ID Service To know who is calling while you are on the phone you must subscribe to Call Waiting Caller ID Service This unit receives and displays information transmitted by your local phone compan...

Page 27: ...Waiting Caller ID information When you hear the call waiting beep in the handset receiver press the flash program button to put the current call on hold and answer the incoming call Press flash progr...

Page 28: ...information at any time Calls received since your last review show as NEW in the display Calls that have not been previously reviewed but were received from the same number more than once show as REP...

Page 29: ...d and b whether or not you previously pre programmed your local area code into the set up menu you may need to adjust the format of the incoming caller s stored phone number before making the call pre...

Page 30: ...ory as you cannot reformat CID records stored in memory 1 Make sure the phone is OFF not in TALK mode 2 Use the CID vol 5 or 6 button to scroll to the desired CID record 3 Press the mem button 4 Use t...

Page 31: ...RE To Replace a Stored CID Record 1 Repeat steps 1 through 3 in Storing CID Records in Internal Memory After you enter the memory location REPLACE MEMO shows in the display 2 Press the mem button agai...

Page 32: ...mode Deleting All CID Records 1 Make sure the phone is OFF not in TALK mode 2 Use the CID vol 5 or 6 button to display any Caller ID record 3 Press and hold the delete channel button until DELETE ALL...

Page 33: ...sure the phone is OFF not in TALK mode 2 Press the mem button 3 Press the desired memory location 0 through 9 or use CID vol 5 or 6 to scroll to the desired memory location NOTE If the memory location...

Page 34: ...Press the 1 key to insert a space between the L and the S Press the 7 key 4 times for the letter S press the 6 key once for the letter M press the 4 key 3 times for the letter I press the 8 key for th...

Page 35: ...tton 3 Press the mem button to store the number You will hear a confirmation tone To replace an old number with a new redial number 1 Repeat steps 1 through 6 in Storing a Name and Number in Memory 2...

Page 36: ...and each pause counts as one digit in the dialing sequence Changing a Stored Number 1 Repeat steps 1 through 7 in Storing a Name and Number in Memory 2 Press the mem button and REPLACE MEMO shows in...

Page 37: ...umber 1 Make sure the phone is ON by pressing the talk call back button 2 Press the mem button 3 Press the memory location 0 9 The number dials automatically OR 1 Make sure the phone is OFF not in TAL...

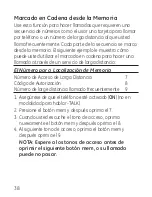
Page 38: ...make a call through a long distance service The Number For Memory Location Long distance access number 7 Authorization code 8 Frequently called long distance number 9 1 Make sure the phone is ON in T...

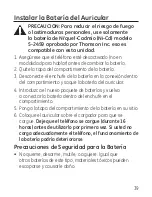
Page 39: ...he battery pack from the handset 4 Insert the new battery pack and connect the cord to the jack inside the battery compartment 5 Put the battery compartment door back on 6 Place handset in the base to...

Page 40: ...am to collect and recycle the rechargeable battery or batteries For more information go to the RBRC web site at www rbrc org or call 1 800 8 BATTERY or contact a local recycling center Display Message...

Page 41: ...s a memory location is vacant END OF LIST Indicates that there is no additional information in Caller ID memory ENTER NAME Prompt telling you to enter the name for one of the 10 memory locations ENTER...

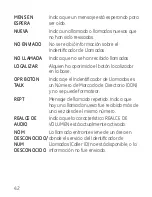
Page 42: ...n the base PRESS TALK KEY Indicates the CID number is a Direct Dial Number DDN and cannot be formatted REPT Repeat call message Indicates that a new call from the same number was received more than on...

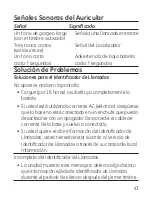
Page 43: ...tery must be fully charged Try replacing the battery Make sure that the unit is connected to a non switched electrical outlet Disconnect the unit from the wall and plug it in again You must be subscri...

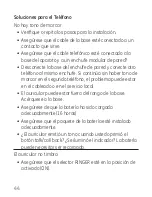
Page 44: ...rk the problem might be with your wiring or local service The handset may be out of range of the base Move closer to the base Make sure the battery is properly charged for 16 hours Ensure the battery...

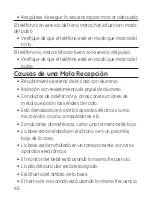
Page 45: ...dset might be out of range Relocate the base Make sure base is not plugged into an electrical outlet with another household appliance Charge the battery Unit beeps Place handset in base for 20 seconds...

Page 46: ...nsulation Heating ducts and other metal construction that can shield radio signals You re too close to appliances such as microwaves stoves computers etc Atmospheric conditions such as strong storms B...

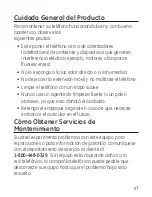
Page 47: ...Never use a strong cleaning agent or abrasive powder because this will damage the finish Retain the original packaging in case you need to ship the phone at a later date Periodically clean the charge...

Page 48: ...ded in this guide or call customer service at 1 800 448 0329 Or refer inquiries to Thomson Inc Manager Consumer Relations P O Box 1976 Indianapolis IN 46206 Attach your sales receipt to the guide for...

Page 49: ...or Reception 46 Chain Dialing from Memory 38 Changing a Stored Number 36 Changing the Battery 39 Channel Button 23 Cordless Phone Basics 21 Cordless Phone Solutions 44 D Deleting a CID Record 31 Delet...

Page 50: ...t Installation Guidelines 14 Inserting a Pause in the Dialing Sequence of a Stored Number 36 Installation 12 Installing the Handset Battery 16 Installing the Phone 16 Interference Information 4 Introd...

Page 51: ...Storing a Name and Number in Memory 33 Storing CID Records In CID Memory 28 Storing CID Records in Internal Memory 30 Storing the Last Number Dialed 35 T Telephone Jack Requirements 12 Temporary Tone...

Page 52: ...warranty for the remainder of the original product s warranty period How you get service Properly pack your unit Include any cables etc which were originally provided with the product We recommend usi...

Page 53: ...o you freight prepaid What your warranty does not cover Customer instruction Your Owner s Manual provides information regarding operating instructions and user controls Any additional information shou...

Page 54: ...given by Thomson Inc its agents or employees shall create a guaranty or in any way increase the scope of this warranty Repair or replacement as provided under this warranty is the exclusive remedy of...

Page 55: ...imitations on how long an implied warranty lasts so the above limitations or exclusions may not apply to you This warranty gives you specific legal rights and you also may have other rights that vary...

Page 56: ...MasterCard or Discover Card ready and call toll free 1 800 338 0376 A shipping and handling fee will be charged upon ordering We are required by law to collect appropriate sales tax for each individua...

Page 57: ...Modelo 27906 2 4 GHz Sistema de Auricular Inal mbrico Gu a del Usuario...

Page 58: ...una etiqueta que indica entre otra informaci n el n mero de US y el N mero de Equivalencia de Timbres REN para este equipo Usted debe cuando sea requerido proveer esta informaci n a su compa a telef n...

Page 59: ...fono de previo pago prove do por la compa a telef nica Las l neas compartidas son sujetas a las tarifas del estado y por eso es posible que Ud no pueda usar su propio equipo telef nico si Ud estuvier...

Page 60: ...al de servico 2 concederle a Ud la oportunidad de corregir la situaci n 3 informarle a Ud de sus derechos de presentar una questa a la Comisi n de acuerdo con los procedimientos dictados en la Subpart...

Page 61: ...protecci n razonable contra una interferencia da osa que pueda existir en una instalaci n dom stica Este equipo genera usa y puede radiar la energ a de frecuencia de una radio y si no fuera instalado...

Page 62: ...das no eliminan la interferencia favor de consultar a su distribuidor o a un t cnico de radio televisi n experto por otras sugerencias Tambi n la Comisi n Federal de Comunicaciones FCC ha preparado un...

Page 63: ...ste equipo deber ser instalado y operado a una distancia m nima de 20 cent metros entre el radiador y su cuerpo Este transmisor no debe de ser colocado u operado en conjunto con alguna otra antena o t...

Page 64: ...a Enchufe Telef nico 12 Instalaci n 12 Sistema Digital de Seguridad 12 Pautas Importantes de la Instalaci n 14 Formato del Auricular 15 Instalar el Tel fono 16 Instalar la Bater a del Auricular 16 Est...

Page 65: ...vos del Identificador de Llamadas en la Memoria de CID 28 Revisar los Archivos de Identificador CID 28 Marcar un N mero del Identificador de Llamadas 29 Almacenar Archivos del Identificador de Llamada...

Page 66: ...ERTENCIA EN LA PARTE POSTERIOR BASE DEL PRODUCTO RIESGODESACUDIDA EL CTRICANOABRA ADVERTENCIA PARA PREVENIR EL RIESGO DE UNFUEGO O DE UNA SACUDIDA ELECTRICA NO EXPONGA ESTEAPARATOA LA LLUVIA OA LA HUM...

Page 67: ...ara referencia futura IMPORTANTE Como los tel fonos inal mbricos operan con electricidad usted debe tener por lo menos un tel fono en su casa que no sea inal mbrico en caso de una interrupci n de corr...

Page 68: ...o el uso no autorizado y cargos a su l nea telef nica NOTA SOBRE LA INSTALACI N Algunos tel fonos inal mbricos operan a frecuencias que pueden causar o recibir interferencia con aparatos de televisi n...

Page 69: ...roblemas con esta interferencia refi rase al manual de instrucciones de dichos accesorios para ver c mo puede programar los canales para evitar esta interferencia Los accesorios t picos que pueden uti...

Page 70: ...car cerca de otros tel fonos o computadoras personales Nunca instale cableado telef nico durante una tormenta de rel mpagos Nunca instale enchufes telef nicos en localizaciones mojadas a menos que el...

Page 71: ...l bot n volver a marcar TONE exit bot n tono salir delete channel bot n canales borrar pantalla CID vol 5 6 bot n del identificador volumen format bot n formato PAUSE b ton pausa flash program b ton c...

Page 72: ...a puerta de la bater a y la bater a que vienen empacadas juntos dentro de una bolsa de pl stico y est n separados del auricular 2 Localice el compartimento de la bater a en la parte posterior del auri...

Page 73: ...el fono inal mbrico sobre una superficie plana y nivelada como una mesa o un escritorio o usted puede montarlo sobre la paredl 2 Conecte un extremo de la l nea telef nica dentro del enchufe marcado TE...

Page 74: ...r primera vez Si usted no carga adecuadamente el tel fono el funcionamiento de la bater a podr a deteriorarse CUIDADO Utilice nicamente el adaptador de corriente 5 2617 gris que es compatible con esta...

Page 75: ...vol 5 o 6 o el teclado num rico del auricular para seleccionar 1 Ingl s 2 Franc s 3 Espa ol La selecci n de f brica es 1ENG 3 Presione el bot n flash program para confirmar y avanzar a la siguiente o...

Page 76: ...MBR se muestre en la pantalla 2 Use el bot n CID vol 5 o 6 o el teclado num rico del auricular para ingresar su selecci n La selecci n de f brica es TONO TIMBR 1 3 Presione el bot n flash program para...

Page 77: ...formaci n B sica del tel fono Inal mbrico Para Hacer una Llamada 1 Presione el bot n talk call back y marque el n mero deseado o Para efectuar una marcaci n de previsualizaci n marque el n mero luego...

Page 78: ...amada Flash Si usted se suscribe al servicio combinado de Llamada en Espera e Identificador de Llamada con la compa a de telefon a local usted recibir informaci n de Identificador de Llamada si est di...

Page 79: ...ximo y VOL 1 es el m nimo Bot n de Canal Mientras habla en el tel fono usted tal vez necesite cambiar manualmente de canal para reducir la est tica causada por electrodom sticos tales como monitores...

Page 80: ...iga las instrucciones automatizadas para obtener la informaci n que necesita 4 Cuelgue el auricular y el tel fono autom ticamente regresa al modo de marcaci n por pulsos rotatorio Pasa Salir Presione...

Page 81: ...o funcionar Realce de volumen Durante la conversaci n usted puede aumentar el volumen presionando el bot n Vol Boost AUDIO BOOST se mostrar en la pantalla El volumen regresar a su nivel original cuand...

Page 82: ...ientras usted est en el tel fono usted debe suscribirse al Servicio de Identificador de Llamada en Espera Caller ID con Call Waiting Este aparato recibe y muestra informaci n transmitida por su compa...

Page 83: ...istoria de todos los auriculares en el sistema Cuando usted escuche el tono de llamada en espera en la bocina del auricular prima el bot n flash program para poner la llamada actual en espera y poder...

Page 84: ...ecibidas desde la ltima revisi n se mostrar n NUEVA en la pantalla Llamadas que no han sido revisadas previamente pero fueron recibidas desde el mismo n mero m s de una vez se muestran como REPT en la...

Page 85: ...llam y b si usted hab a o no programado su clave de rea anteriormente en el men de programaci n usted puede necesitar ajustar el formato del n mero telef nico de la persona que llam antes de contesta...

Page 86: ...ted no puede reformatear registros CID almacenados en memoria 1 Aseg rese que el tel fono est desactivado OFF no en el modo hablar 2 Utilice los botones CID vol 5 o 6 para llegar al archivo deseado 3...

Page 87: ...Archivos del Identificador de Llamadas en la Memoria Interna Despu s de inscribir la localizaci n de memoria el aparato le pregunta si quiere reemplazar el mensaje REMPLAZAR MEMO en la pantalla 2 Opri...

Page 88: ...tivado OFF no en el modo hablar 2 Utilice los botones CID vol 5 o 6 ara mostrar el archivo deseado para mostrar cualquier archivo del Identificador de Llamadas 3 Presione y sostenga el bot n delete ch...

Page 89: ...OFF no en el modo hablar 2 Presione el bot n mem 3 Oprima el n mero deseado de la localizaci n de memoria 0 al 9 o utilice los botones CID vol 5 o 6 para llegar a la localizaci on deseada NOTA Si la...

Page 90: ...io entre las letras L y S Oprima la tecla del 7 cuatro veces para la letra S Oprima la tecla del 6 una vez para la M oprima el 4 tres veces para la I oprima el 8 para la T y el 4 dos veces para la H N...

Page 91: ...mem para almacenar el n mero Usted escuchar un tono de confirmaci n Para remplazar un n mero viejo que va a volverse a marcar con uno nuevo 1 Repita los pasos del 1 al 6 de la secci n Almacenar un Nom...

Page 92: ...una P Cada pausa cuenta como 1 d gito en la secuencia de marcado Cambiar un N mero Almacenado 1 Repita los pasos 1 al 7 de la secci n Almacenar un Nombre y N mero en la Memoria 2 Presione el bot n mem...

Page 93: ...o Almacenado 1 Aseg rese de que el tel fono est activado ON oprimiendo el bot n talk call back 2 Presione el bot n mem 3 Presione el n mero 0 9 para la localizaci n de memoria deseada El n mero se mar...

Page 94: ...rav s de un servicio de larga distancia El N mero para Localizaci n de Memoria N mero de Acceso de Larga Distancia 7 C digo de Autorizaci n 8 N mero de large distancia llamado frecuentemente 9 1 Aseg...

Page 95: ...ro del compartimiento y saque la bater a del auricular 4 Introduzca el nuevo paquete de bater as y vuelva a conectar la bater a dentro del enchufe en el compartimiento 5 Ponga la tapa del compartimien...

Page 96: ...ctar y reciclar bater a s recargable s Para m s informaci n vaya al sitio web de RBRC en www rbrc org o llame al 1 800 8 BATTERY o contacte a su centro de reciclado local Indicadores de Mensajes del I...

Page 97: ...ria est vac a FIN DE LISTA Indica que no hay m s informaci n en el registro de memoria del Identificador de Llamadas NSCRIBA Indicaci n indic ndole que inscriba un NOMBRE nombre en una de las 10 local...

Page 98: ...la base OPR BOTON Indica qe el Indentificador de Llamadas es TALK un N mero de Marcado de Directorio DDN y no se puede formatear REPT Mensaje de llamada repetido Indica que hay una llamada nueva fue...

Page 99: ...la bater a Si usted est utilizando corriente AC el ctrica aseg rese que la base no est conectada en un enchufe que pueda desactivarse con un apagador Desconecte el cable de corriente de la base y vuel...

Page 100: ...e Si contin a sin haber tono de marcar en el segundo tel fono el problema puede estar en el cableado o en el servicio local El auricular puede estar fuera del rango de la base Ac rquese a la base Aseg...

Page 101: ...ra de rango Ac rquese a la base Coloque la base en otra localizaci n Cargue la bater a Aseg rese de que la base no est conectada en un enchufe con otro aparato el ctrico El aparato emite tonos Coloque...

Page 102: ...ci n con revestimiento de papel de aluminio Conductos de calefacci n y otras construcciones de metal que paran las se ales de radio Est demasiado cerca de los aparatos el ctricos como microondas cocin...

Page 103: ...el tel fono Limpie el tel fono con un trapo suave Nunca use un agente de limpieza fuerte ni un polvo abrasivo ya que esto da ar el acabado Retenga el empaque original en caso de que necesite embarcar...

Page 104: ...imiento por favor consulte la garant a incluida en esta Gu a o llame a Informaci n para el Usuario 1 800 448 0329 O env e sus preguntas a Thomson Inc Gerente Servicio al Consumidor P O Box 1976 Indian...

Page 105: ...os del Identificador de Llamadas 32 Borrar un Archivo del Identificador de Llamadas 31 Bot n de Canal 23 B squeda del Auricular 25 C Cambiar un N mero Almacenado 36 C digo de Area Local 19 C mo Obtene...

Page 106: ...la Aprobaci n de Equipo 2 Instalaci n 12 Instalar el Tel fono 16 Instalar la Bater a del Auricular 16 39 Introducci n 11 Introducir una Pausa en la Secuencia de Marcado de un N mero Almacenado 36 L Li...

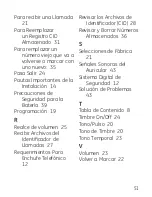
Page 107: ...ogramaci n 19 R Realce de volumen 25 Recibir Archivos del Identificador de Llamadas 27 Requerimientos Para Enchufe Telef nico 12 Revisar los Archivos de Identificador CID 28 Revisar y Borrar N meros A...

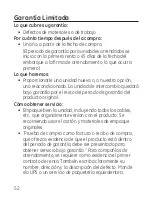
Page 108: ...arant a por el resto del periodo de garant a del producto original C mo obtener servicio Empaque bien la unidad incluyendo todos los cables etc que originalmente ven an con el producto Se recomienda u...

Page 109: ...bre la garant a Instrucciones al cliente Su manual de propietario le proporciona la informaci n con respecto a las instrucciones de operaci n y los controles del usuario Cualquier informaci n adiciona...

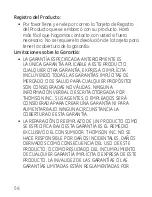
Page 110: ...RCADO O DE SALUD PARA CUALQUIER PROP SITO SON CONSIDERADAS NO V LIDAS NINGUNA INFORMACI N VERBAL O ESCRITA OTORGADA POR THOMSON INC SUS AGENTES O EMPLEADOS SER CONSIDERADA PARA CREAR UNA GARANT A NI P...

Page 111: ...lusi n ni limitaci n de da o incidental o derivado de alguna consecuencia o la limitaci n con respecto al per odo de tiempo que debe aplicarse para garant as impl citas por lo tanto las limitaciones y...

Page 112: ...e de corriente AC 5 2617 Bater a de Repuesto del Auricular 5 2459 Informaci n de Accesorios Para ordenar tenga lista su tarjeta Visa Mastercard o Discover y llame al 1 800 338 0376 Se aplicar un cargo...

Reviews: