43
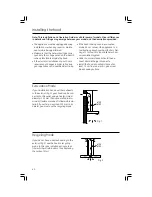
fig. 1
Assembling the Ventilation Shaft
Exhausting Outdoors
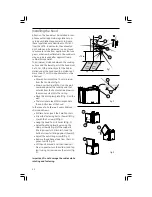
• Using the two screws (fig. 1), attach the
metal chimney bracket against the wall,
flush with the ceiling for support.
• Mount the retention valve at the motor
outlet (fig. 2). This retention valve blocks
the entry of air from the exterior.
• If installing a 125 mm flue, use the
adapter provided (fig. 3). If the diameter
of the exterior flue is less than 125 mm,
you must connect your hood in recycling
mode.
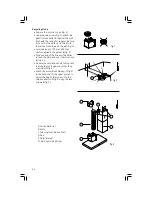
• Slide the end of the flue over the motor
outlet (fig. 4).
• Prepare the telescopic ventilation shaft,
taking care not to block the vents (B/fig.
4). Fit the chimney to the hood and lift the
upper portion to adjust the height and
then screw it (G/fig.4) on the metal chim-
ney bracket (A/fig. 4).
A. Chimney Bracket
B. Telescopic Ventilation Shaft
C. Flue
D. Adapter
E. Retention Valve
F. Motor Outlet
G. Chimney Holding Screw
Tip: For an optimal operation of the appli-
ance, we recommend that you connect the
hood to a 150 mm diameter flue (not pro-
vided). Use a minimum number of elbows
and maintain the length of the flue to a mini-
mum. If hood will exhaust outdoors, provide
a sufficient flow of fresh air into the room to
avoid air pressure differences.
fig. 2
fig. 3
A
fig. 4
C
D
E
F
B
G

