


CHAPTER 6: User Interface
239 MOTOR PROTECTION RELAY – INSTRUCTION MANUAL
6–95
Click the
OK
button when complete.
The new site will appear in the upper-left list in the EnerVista 239
Setup window.
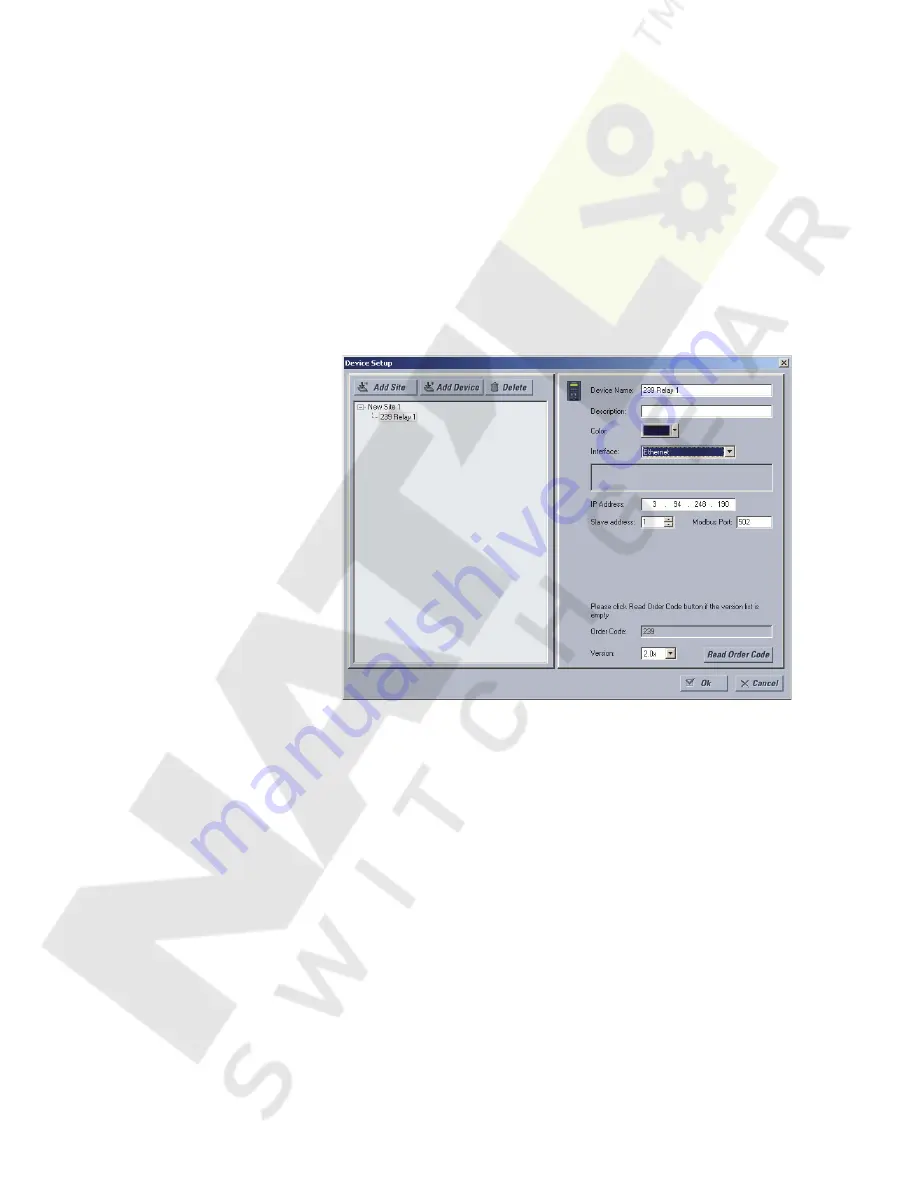
Click the
Add Device
button to define the new device.
Enter the desired name in the
Device Name
field and a description
(optional) of the site.
Select the appropriate communications interface (Ethernet or Serial)
and fill in the required information for the 239.
See
Connecting EnerVista 239 Setup to the Relay
on page 6–72 for
details.
FIGURE 6–4: Device Setup Screen (Example)
Click the
Read Order Code
button to connect to the 239 device and
upload the order code.
If a communications error occurs, ensure that communications
values entered in the previous step correspond to the relay setting
values.
Click
OK
when complete.
From the EnerVista main window, select the
IED Dashboard
item to
open the Plug and Play IED dashboard.
An icon for the 239 will be shown.
Summary of Contents for Multilin 239
Page 6: ...TOC 4 369 MOTOR MANAGEMENT RELAY INSTRUCTION MANUAL TABLE OF CONTENTS ...
Page 20: ...1 14 239 MOTOR PROTECTION RELAY INSTRUCTION MANUAL CHAPTER 1 OVERVIEW ...
Page 48: ...3 10 239 MOTOR PROTECTION RELAY INSTRUCTION MANUAL CHAPTER 3 OPERATION ...
Page 96: ...4 58 239 MOTOR PROTECTION RELAY INSTRUCTION MANUAL CHAPTER 4 PROGRAMMING ...
Page 108: ...5 70 239 MOTOR PROTECTION RELAY INSTRUCTION MANUAL CHAPTER 5 MONITORING ...
Page 150: ...7 112 239 MOTOR PROTECTION RELAY INSTRUCTION MANUAL CHAPTER 7 TESTING ...
Page 152: ...A 2 239 MOTOR PROTECTION RELAY INSTRUCTION MANUAL CHAPTER A ...