3-4
Troubleshooting
4
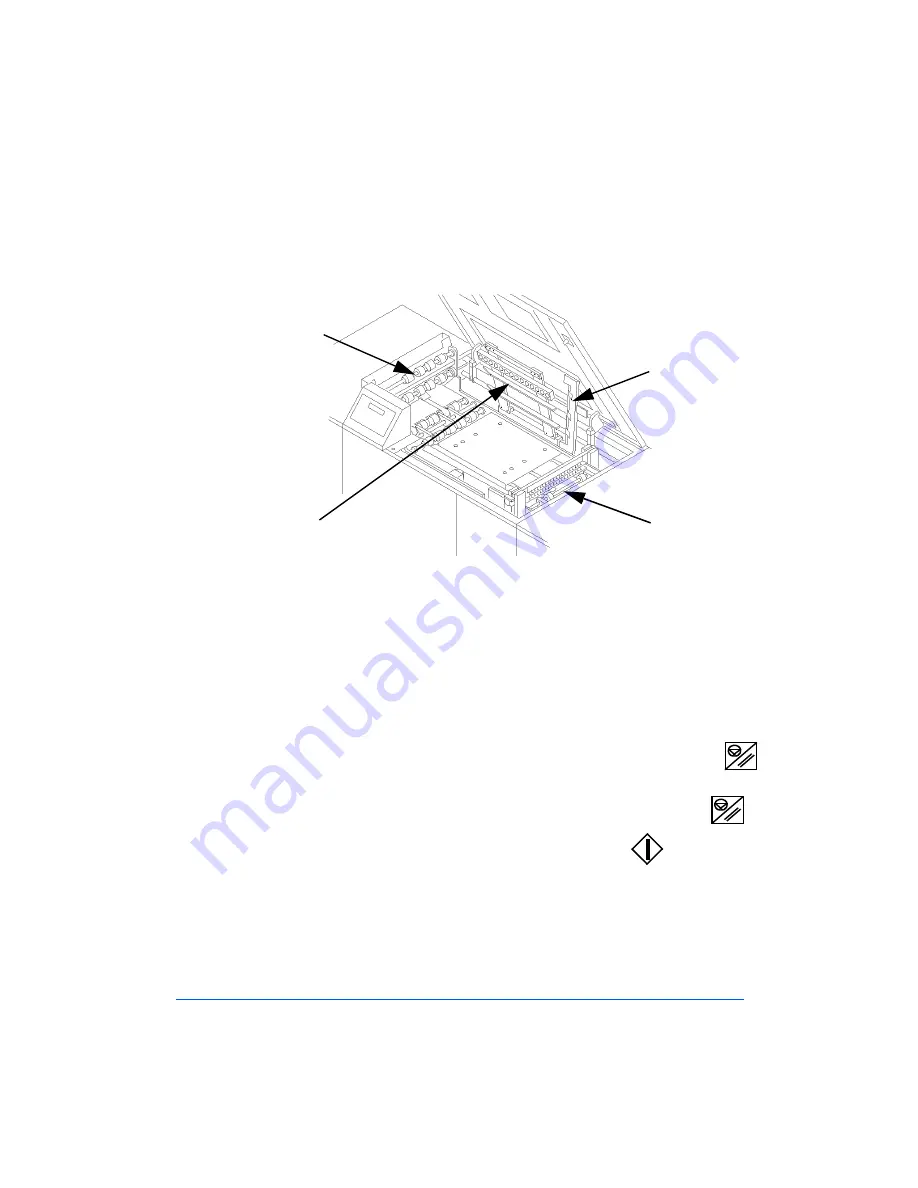
Open (lift) the Input Guide Roller assembly, the Document Transport
Ball Track assembly and the Sheet Eject Strap assembly, as shown in
Figure 3-2 and clear any paper that may be jammed in that area.
Figure 3-2: The Internal Paper Path Components
5
Remove the Output Guide Roller assembly, as shown in Figure 3-2 and
clear any paper that may be jammed in that area.
6
Reinstall the Output Guide Roller assembly and ensure that all
assemblies are locked down. Then, close the Top Covers.
7
Open the Bypass Stacker Top Cover and clear any paper that might be
jammed in that area.
8
If the FusionPunch II is set up in
Cycle Up
mode, press the
Stop/Reset
button and the job will restart automatically.
9
If the FusionPunch II is set up in
Online
mode, press the
Stop/Reset
button to clear the error message and then press
Start .
Input Guide
Roller
Document
Transport Ball
Track
Sheet Eject
Strap
Output Guide
Roller
Summary of Contents for FusionPunch II
Page 4: ...Table of Contents FusionPunch II User Guide ...
Page 5: ...GBC FusionPunch II User Guide ...
Page 6: ......
Page 14: ...1 2 Getting Started ...
Page 44: ...2 2 General Procedures ...
Page 70: ...2 28 General Procedures ...
Page 72: ...3 2 Troubleshooting ...
Page 84: ...3 14 Troubleshooting ...
Page 85: ...4 Chapter 4 Maintenance Cleaning the FusionPunch II ...
Page 86: ...4 2 Maintenance ...
Page 94: ...4 10 Maintenance ...
Page 95: ...A Appendix A Personality Profiles Standard Punch Profiles Other Known Configurations ...
Page 96: ...A 2 Appendix A ...
Page 124: ...A 30 Appendix A ...
Page 125: ...G Glossary Glossary of Common FusionPunch II Terms ...
Page 126: ...G 2 Glossary ...


